Connecting to HPCC Systems using Bitvise on Windows
If you are connecting to the Linux clusters from the wired TTU network or the TTUnet wireless network, then you are considered to be "on campus". Connections made from TTUHSC, the TTUguess wireless network or any other off campus site is treated as an "off campus" connection.
Table of Contents
Downloading the SSH Client
- Bitvise SSH Client - Available for all versions of Windows
- Bitvise is a heavier SSH client with built in graphical SFTP and a cleaner interface.
- Bitvise can be downloaded (for free) from the Bitvise Website.
Connecting from "On Campus" using Bitvise on Windows
To make connecting to our resources easier, we do provide pre-built profiles for connecting to Quanah and Hrothgar using Bitvise. Start by downloading one, or all, of the following profiles:
- Bitvise Profile for connecting to Quanah from "On Campus"
- Bitvise Profile for connecting to Hrothgar from "On Campus"
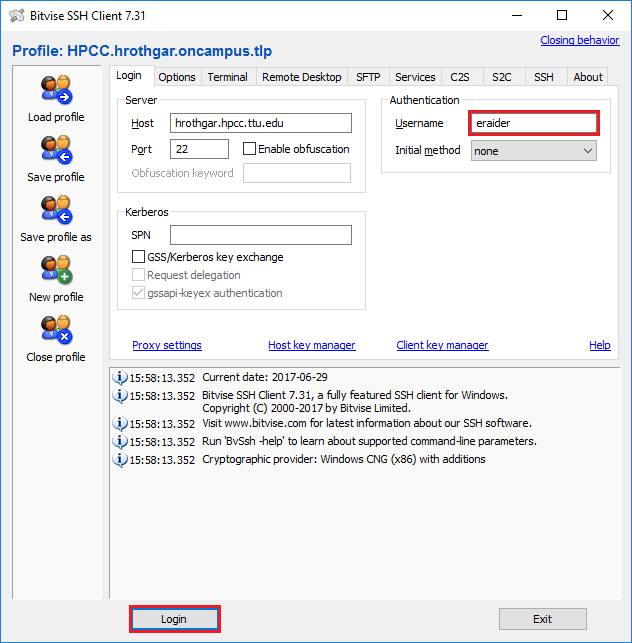
Once downloaded, you can open the Bitvise application and select "Load profile" from the top left. From here, navigate to the location of the profiles you just downloaded, select the profile you wish to use, and press "Open". From here you can now enter your eraider user name and then select "Login" (see below).

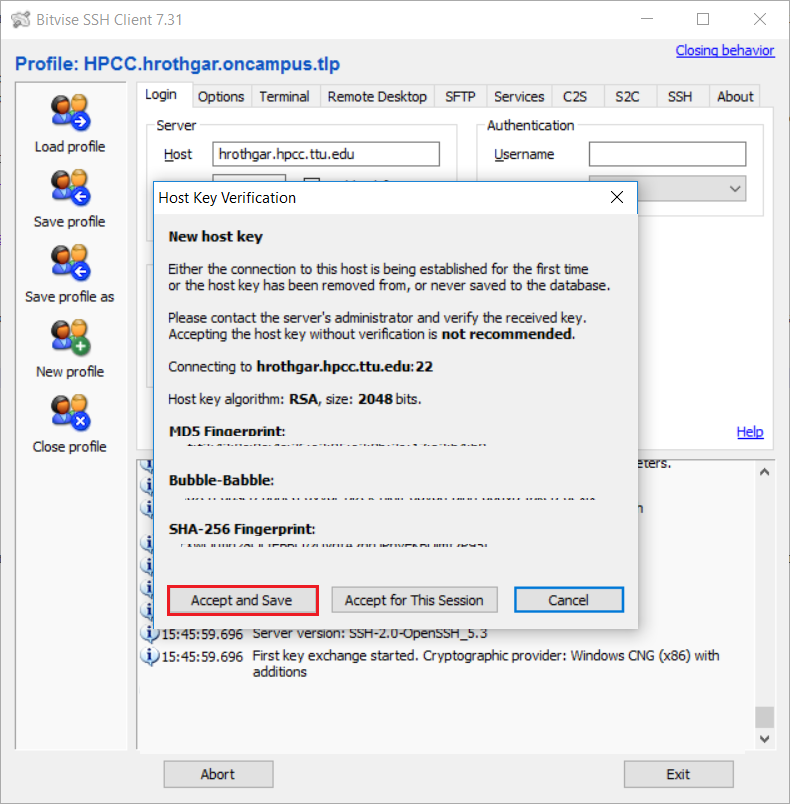
On your first connection to an HPCC server, you will be required to accept the Quanah or Hrothgar host key. We suggest that you select the "Accept and Save" option when prompted to avoid accepting the key on every connection (see below).

You will be prompted for your eraider password and once you have entered and selected "OK" you will be logged into Quanah or Hrothgar where you can begin submitting jobs.
Note: You may wish to save your profile with your eraider username to avoid having to type it in later.
Connecting from "Off Campus" using Bitvise on Windows
To make connecting to our resources easier, we do provide pre-built profiles for connecting to Quanah and Hrothgar using Bitvise. Start by downloading the SSH gateway profile:
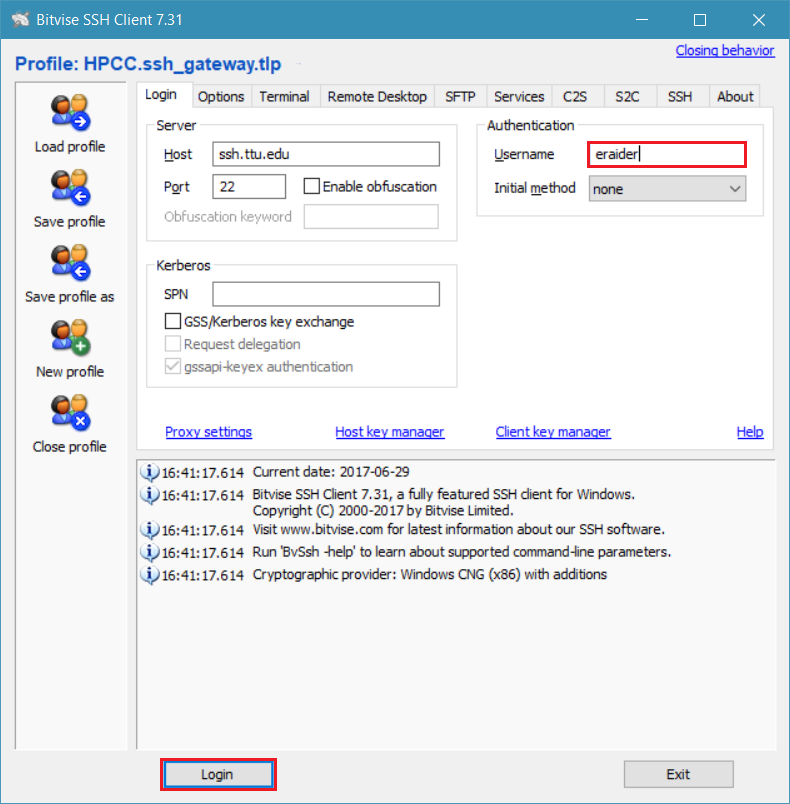
Once downloaded, you can open the Bitvise application and select "Load profile" from the top left. From here, navigate to the location of the profiles you just downloaded, select the profile you wish to use, and press "Open". From here you can now enter your eraider user name and then select "Login" (see below).

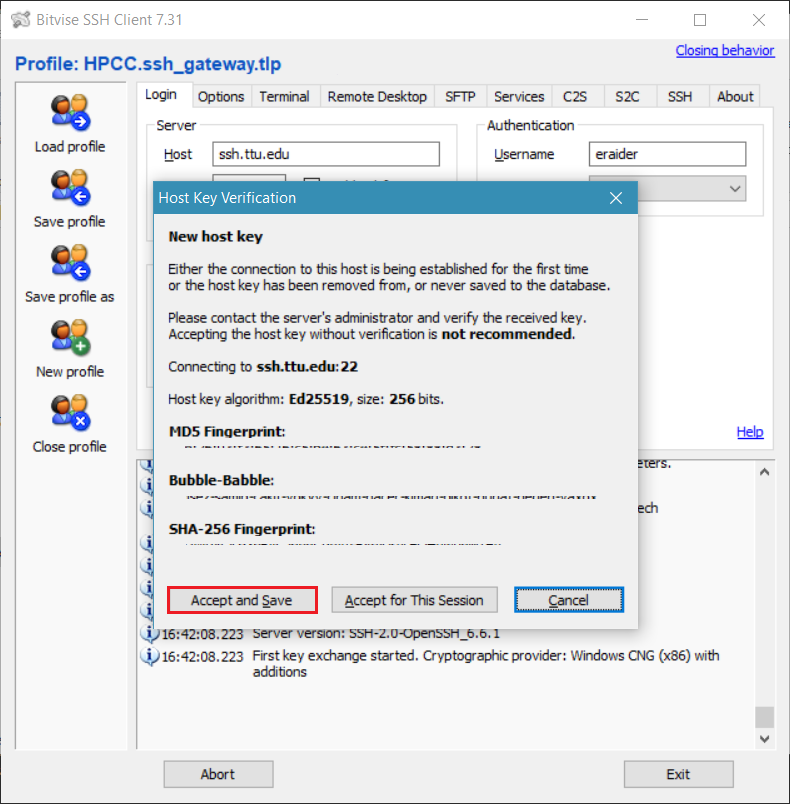
On your first connection to the SSH gateway, you will be required to accept the SSH
gateway host key. We suggest that you select the "Accept and Save" option when prompted
to avoid accepting the key on every connection (see below).

You will be prompted for your eraider password and once you have entered and selected "OK" you will be logged into Quanah or Hrothgar where you can begin submitting jobs.
Note: You may wish to save your profile with your eraider username to avoid having to type it in later.
Bitvise will now prompt you for your eraider password, type it in then select "OK". Once you have successfully entered your eraider password, the system will respond back with:
You are now connected to the TTUnet SSH Gateway. Please specify the following information to continue connecting via SSH to a device on the network. This connection will automatically timeout in 24 hours
Hostname or IP Address of SSH instance:
#Enter either quanah.hpcc.ttu.edu or hrothgar.hpcc.ttu.edu
User account to connect with:
#Enter your eraider username
You will be prompted for your eraider password and once you have entered it you will be logged into Quanah or Hrothgar where you can begin submitting jobs.
High Performance Computing Center
-
Phone
806.742.4350 -
Email
hpccsupport@ttu.edu
