
Modern Campus CMS
Modern Campus CMS provides a simplified interface to manage web pages. With the ability to login directly from your public facing website, it is easy to navigate to the page that needs to be edited.
Once logged in, you can click the area you want to edit, then use the What You See Is What You Get (WYSIWYG) editor to make changes.
Features
- Intuitive Interface: Easy to use, visual editor.
- Drag and Drop File Upload: Move, copy, and upload using drag and drop.
- Image Editor: Modify or publish images uploaded to the CMS.
- Versioning: Previous versions are stored and can be restored as needed.
Frequently Asked Questions
How do I login to edit a page?
Click the Last Updated date in the footer of a page to get started.
You will only be able to edit pages within websites you have been granted permissions to edit.

What is the difference between a new page and a new section?
- New pages are pages created within an existing section.
- New sections add a new section folder to an existing website. Creating a new section adds an index page and supporting folders.
What are snippets?
Snippets are preconfigured code that can be inserted into a page to ensure element design and function is consistent. Once inserted, snippets can be edited in the WYSIWYG editor.
An example of a snippet is a styled HTML table. A snippet can contain specific formatting and styling.
If you frequently reuse content across multiple pages and would like assistance in creating a snippet to streamline the process, email mc.web@ttu.edu.
Insert a Snippet:
- From the WYSIWYG toolbar, click the Insert Predefined Snippet Content icon.

- Select the desired Category.
- Select a snippet to be inserted.
- Click Insert.
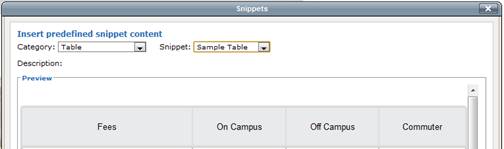
The inserted snippet can be edit as needed.
What are assets?
An asset is a reusable piece of content (text, code, or image gallery) that can be used across multiple pages. Assets offer an edit once, publish on multiple pages at once experience.
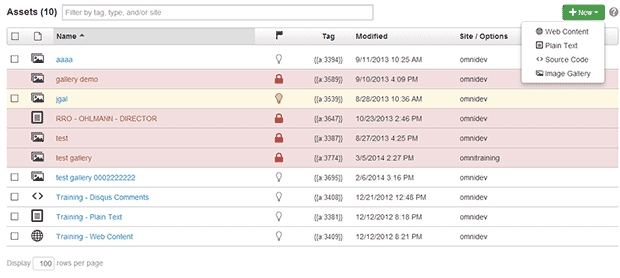
When an Asset is created or updated, it must be published. Publishing an Asset publishes all pages using the Asset.
How do I publish pages?
Save changes, then click Publish Now. Add a short note about the changes made in the version description so it's obvious what was changed in that version should it need to be reverted. (Note: If you have an approver, you will see a Send for Approval button.)

- Every page has access to check Accessibility (ADA Compliance), W3C validation, links, and spelling. From the publish window, click Run All Checks.
- Click Publish to publish the page to the live website (production).
How do I submit content for approval?
- Save changes, then click Submit.
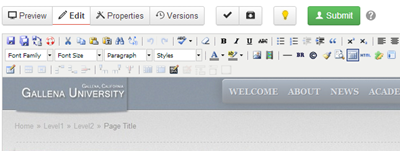
- The default approver assigned will be pre-selected.
- Enter a description in the Subject field and more specific information in the Message field so the approver knows what was changed.
- Send Copy to Email will send a copy of the request by email. Approval requests are
automatcially added to an approver's CMS Inbox.
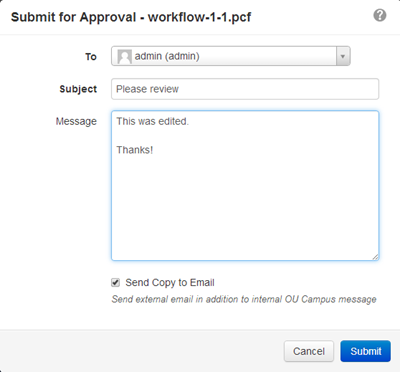
- Clicking Submit locks the page until it is approved or rejected by the approver.
How do I approve content?
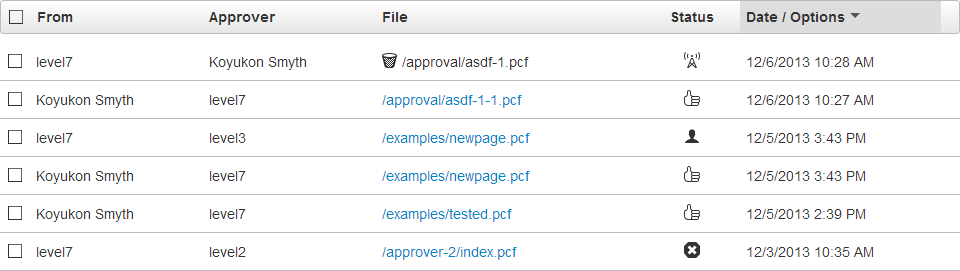
Once content has been sent to an approver using Submit or Submit for Approval, the page is checked out to the approver. The approver can access content that has been sent for approval from Workflow using the Dashboard > Workflow or by clicking the link in the approval request email. Review content sent for approval:
Navigate to the content: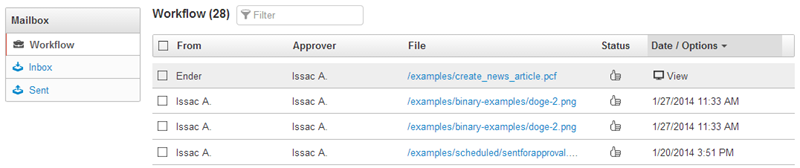
- Click the linked content to Preview.
- Approvers can edit, publish directly, reassign, decline, or decline and revert to an earlier version.
What is Workflow?
Workflow is a Dashboard component of the Mondern Campus CMS Mailbox that tracks content sent for review through the approval process. When users are required to submit content for approval, the Publish button is replaced by the Submit button for them. Both a link to the content and links to the message are shown in the Workflow list view. General messages sent to the user's account are separated from Workflow files and are available in the Inbox.
Workflow is available from the dashboard in the Workflow dashboard widget or from a drop-down menu under Dasboard in the system's primary menu.
The Workflow screen includes the following features and functionality:
- Shows the number of items in the Workflow
- Includes the ability to filter based on the user who sent the content or the approver
- Can use multi-select in order to delete multiple workflow messages with the same action
- Can use the selection checkboxes to select a message to view or delete
- The list can be sorted by From, Approver, File, Status, or Date
- Click the linked file name to view the Preview of the content
- Shows the status
- Shows the date and time that the content was sent for approval
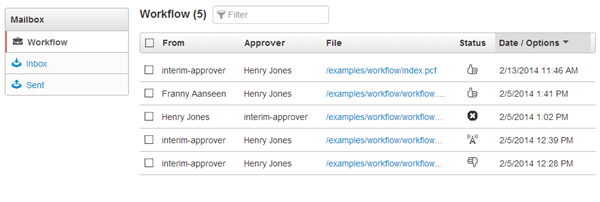
Approvers can click the linked file name to preview the content. Content sent to an approver is automatically checked out to that user and they can perform various page or file actions on the content, including decline and revert.
File
As with pages, approvers can click the linked file name to preview the file. Content sent to an approver is automatically checked out to that user and the user can perform various page or file actions on the content, including decline and revert.
Status
A status icon is shown in the Status column for each content item. Content listed in Workflow can be previewed by any user, but only the user to whom the content was sent has the file checked out and can perform other actions upon it. Clicking a status icon shows the Workflow Message.
| Status Icon | Description |
|---|---|
 |
Pending Approval (by another user) |
 |
Pending Approval (by the current user) |
 |
Approved and Published |
 |
Declined |
 |
Cancelled from Workflow |
View
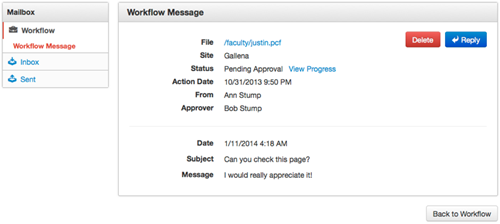
When content is sent for approval, the sender can include a message. This is associated with the item in Workflow as a Workflow Message. This can be viewed by performing one of the following actions:
- Hovering over the file row and clicking on the View option
- Clicking the Status icon
- Selecting the checkbox next to the item and clicking View
From within the message, the following features and functionality are available:
- Clicking the linked file to preview the content sent for approval
- Viewing the workflow details, including the site from which the content originated, the status, the date of the latest action indicated by status (e.g., if the content has only been sent for approval but not approved, this shows the sent date, once published this shows the publish date), and who sent the content and the approver. This also shows the messages details: I.e., the date and time the message was sent, the subject, and the message (if any).
- Deleting the message
- Replying to the message
- Navigate back to Workflow
Reply
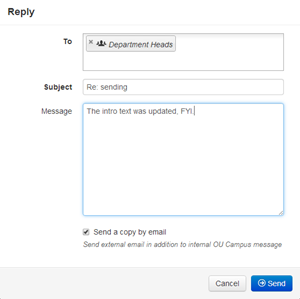
A message in Workflow can be replied to by clicking the Reply button in the message. The Reply dialog is shown. Additional users or groups can be added to the message, the subject can be changed, and a message can be added. Optionally, a copy of the message can be sent by email in addition to the internal OU Campus message.
Delete
The workflow item can be deleted with one of the following actions:
- Hovering over the file row and clicking Delete
- Clicking the Status icon and from the Workflow Message view, clicking Delete
Resources
Marketing & Communications Web
mc.web@ttu.edu
(806) 742-1352
IT Learning Technologies
-
Address
Box 42042, Texas Tech University, Lubbock, TX 79409 -
Phone
806.742.1650 -
Email
ithelpcentral@ttu.edu