
RaiderCanvas Support
Lucid Collaboration Board
Lucid is designed to allow users a space for virtual collaboration. One way to do this is to create collaboration boards for groups or group projects. Rather than coordinating in a forum or Teams alone, the students can instead interact on a virtual whiteboard with a variety of tools to facilitate this collaboration.
This can be done either asynchronously, or synchronously during a virtual meeting.
Create a Page for the Collaboration Board
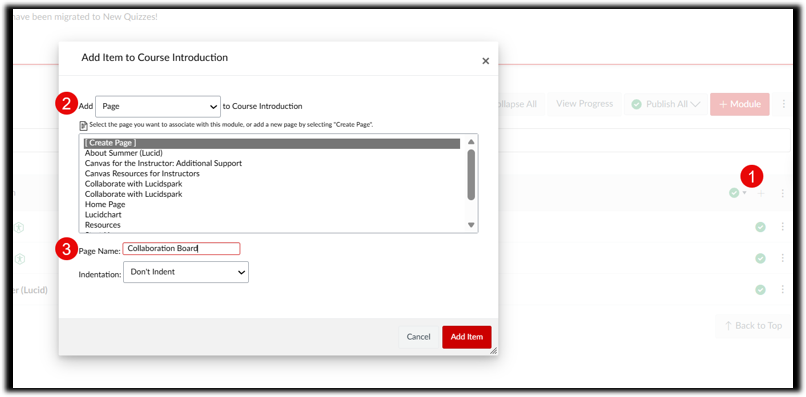
To create a Lucid collaboration board you will first need to create a page to place the Lucid activity. One way to do this is to navigate to your Modules area and select the plus sign icon on the top right of your module (1), change the dropdown to ‘Page’ (2), give the page a name (3), and then select Add Item (4):
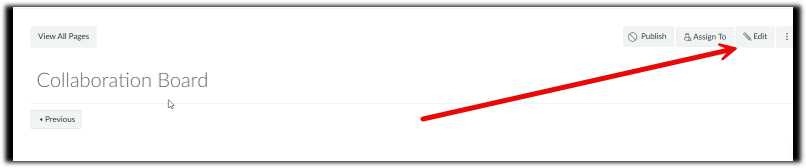
Once the page is created, open it and select the Edit button in the top right:
Note: If you would like this to be a group activity that is submitted, you can choose Assignment instead of Page. As a submission, the students will submit the shareable url to their group’s board.
Add a Lucid Board
From the rich text editor, Lucid can be located via the plug icon (1) and choosing Insert Whiteboard or Diagram (2):
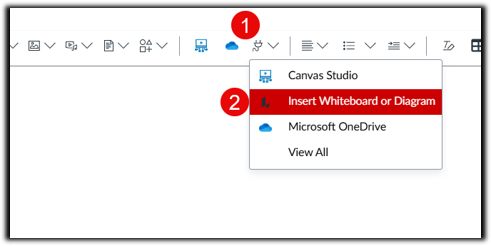
If this is your first time using Lucid, you may need to search for the link using the View All option.
A menu will appear allowing you to choose what kind of board you would like to make, and also providing various templates to choose from. For this activity we will search for a ‘Student breakout board’ template in the search box (1) and then select the Student breakout board template (2):

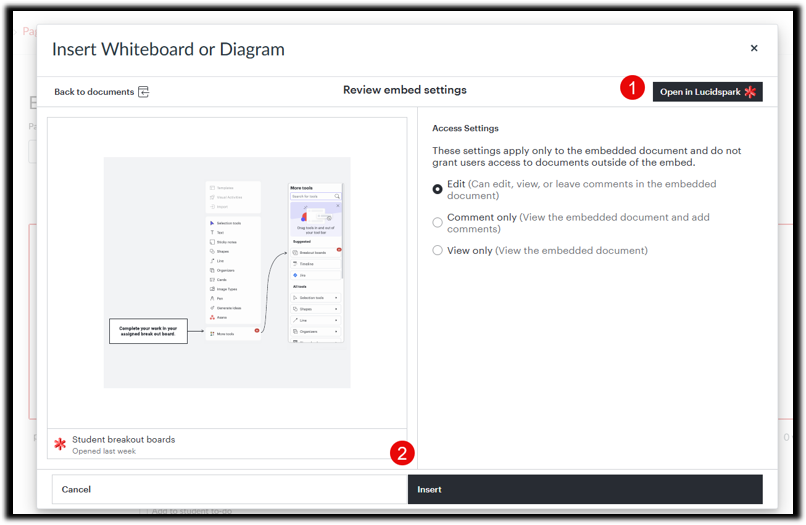
The next menu will let you choose what privileges students will have. For this activity, choose Edit (1) and then select Insert (2):
Edit the Lucid Activity
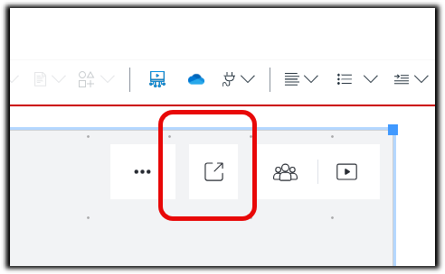
You will now see a blank Lucid board on your page. You can save the page at this point, or continue to edit the board. The board can be edited directly from this embed, however, some menu options will be lacking. For the full editing experience, click the Open in a new tab icon. This icon looks like a square with an arrow pointing to the top right:
This will open the full Lucid editor. All changes made here will be reflected on the embedded item.
Once the page is open, you will see that the template has provided an diagram of the menu showing students how to access their board. This can be left as is for student information purposes:
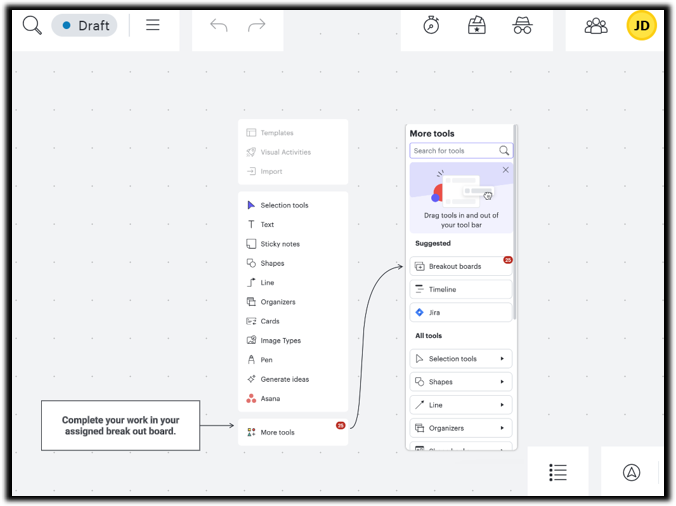
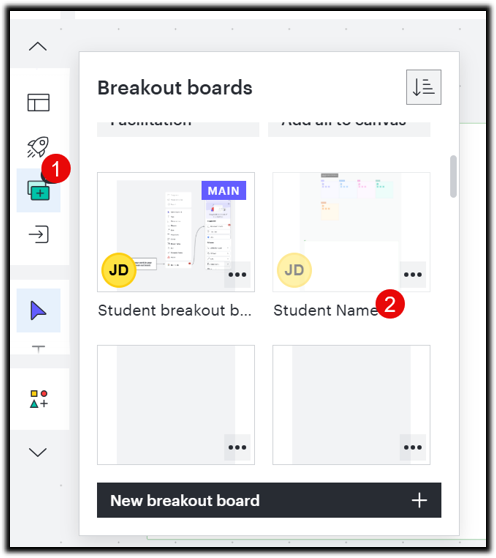
Selecting the Breakout Boards icon (1) from the left toolbar will show you the default groups. These groups are called ‘Student Name’, and the template allows for each individual student to have their own board. To have the boards used collaboratively by a group, click on the ‘Student Name’ text and change it to read ‘Group 1’, ‘Group 2’ etc (or whatever group names are appropriate):
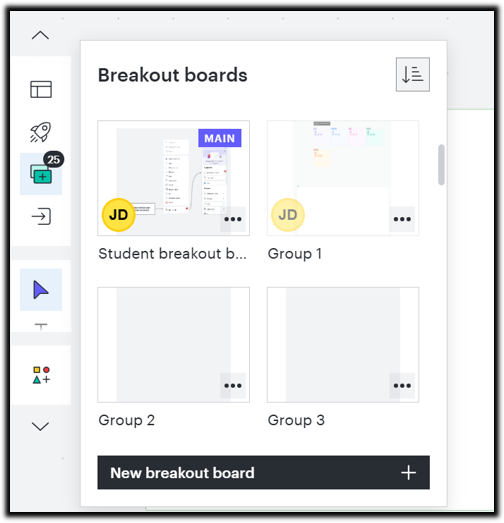
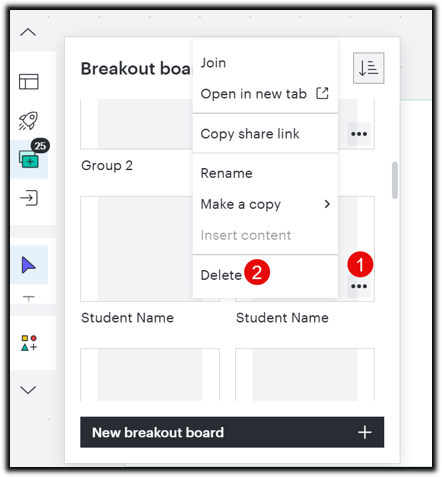
Any excess boards can be removed by selecting the three dots at the bottom right of the board and selecting ‘Delete’:
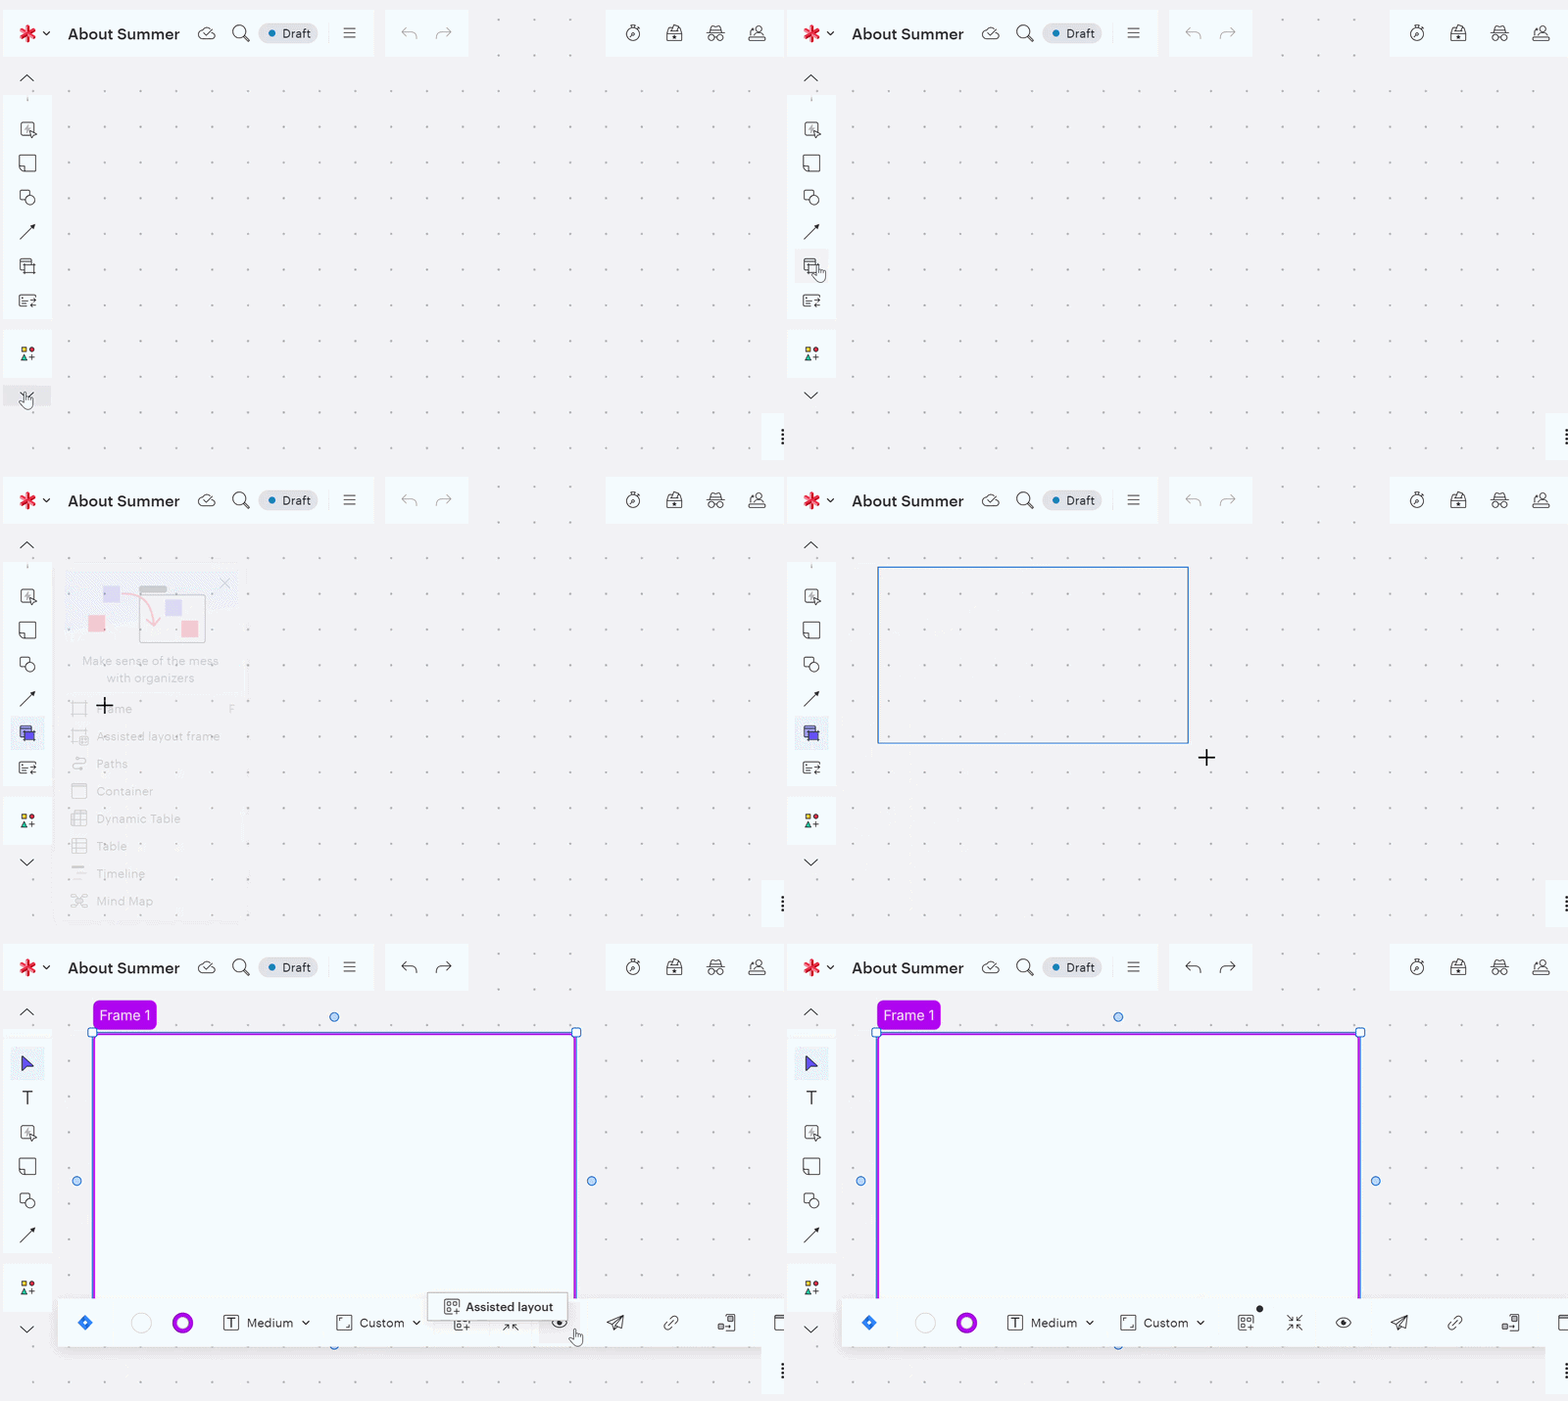
Students can now follow the template instructions to find their board. Once on their board they will have the lucid tools at their disposal to collaborate. You can also add starter items to the board if desired. For instance, you can select the Frame tool to draw a frame on the board for students to work in:
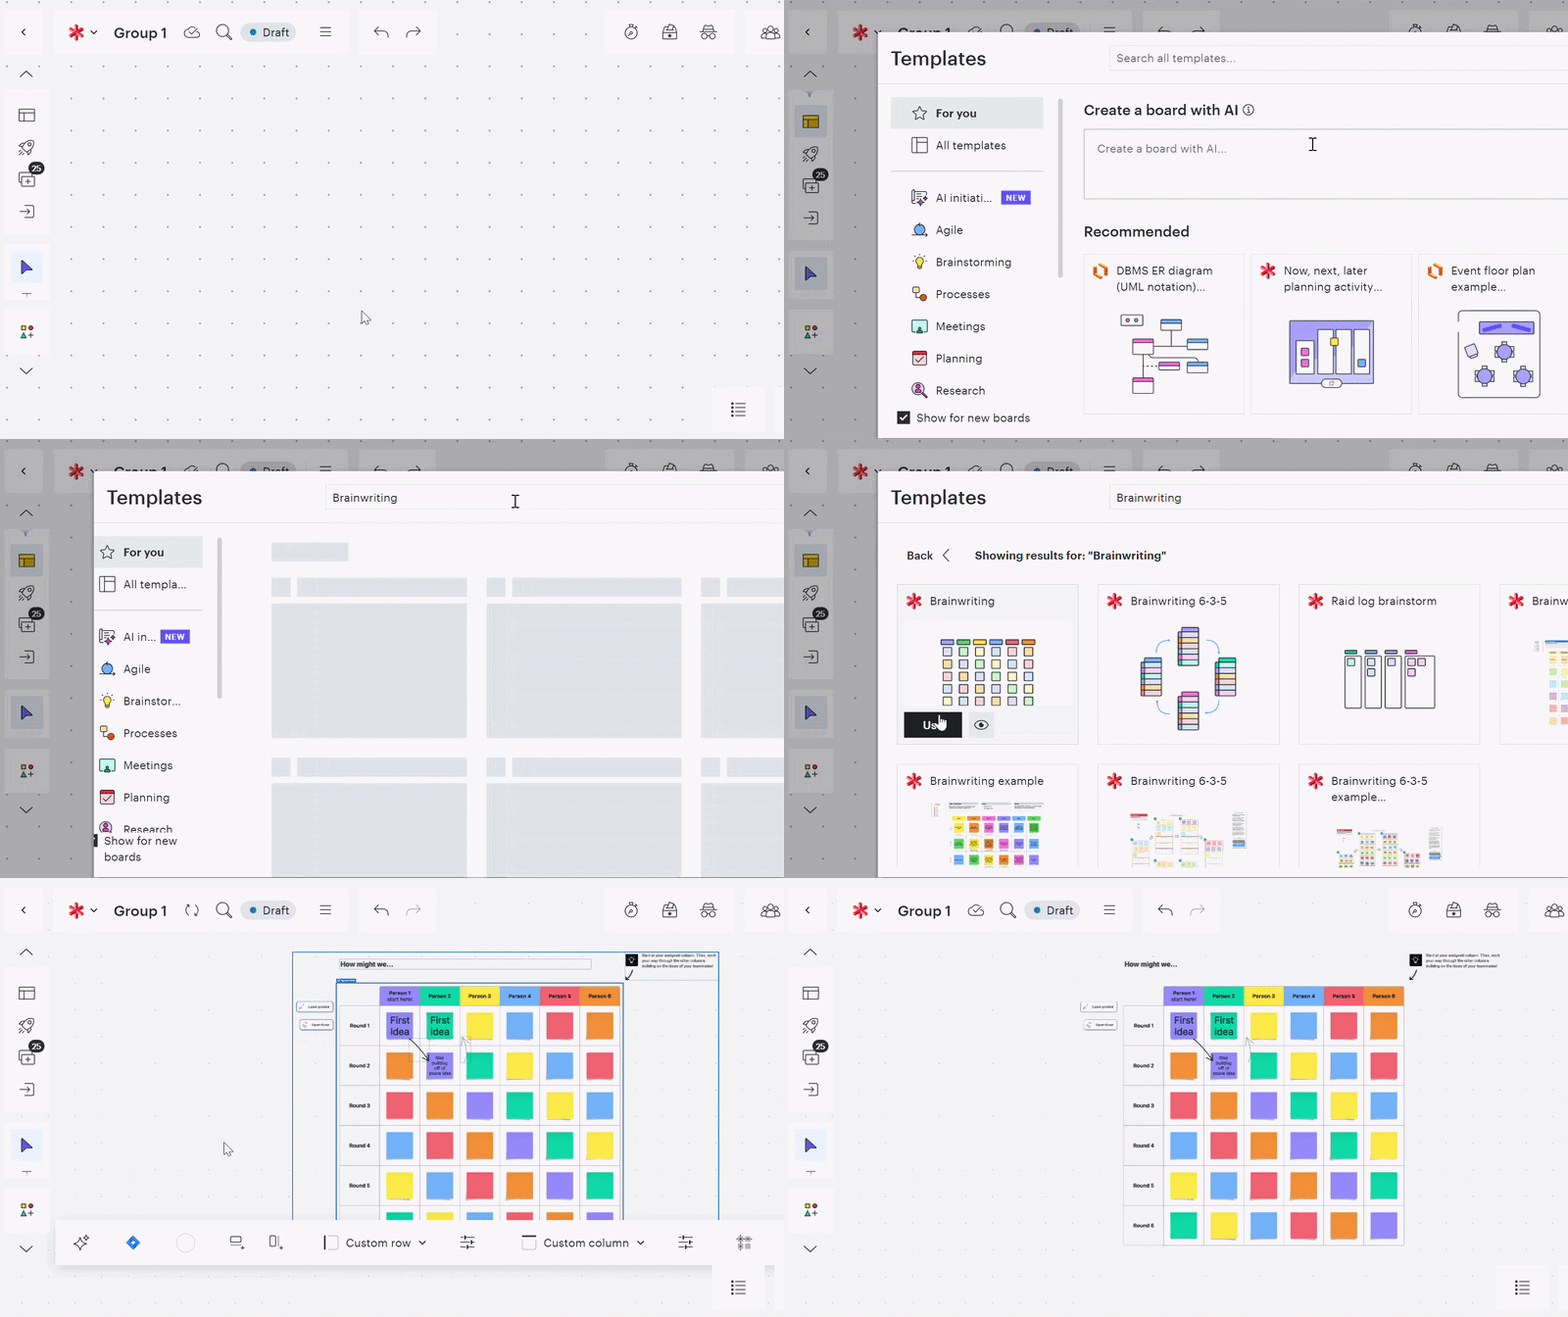
For more advanced starters, you can select the template option and add items such as a Brainwriting template. Students are also able to add these to their boards on their own:
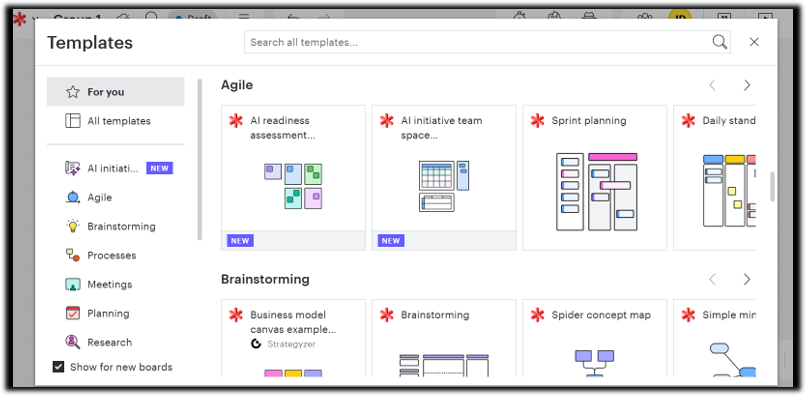
Browse through the options to find other starter templates which may be beneficial:
If you want all the boards to start with a specific template, you can add it to the first group’s board, and then either click the three dots and choose ‘Make a Copy’ to create the subsequent boards:
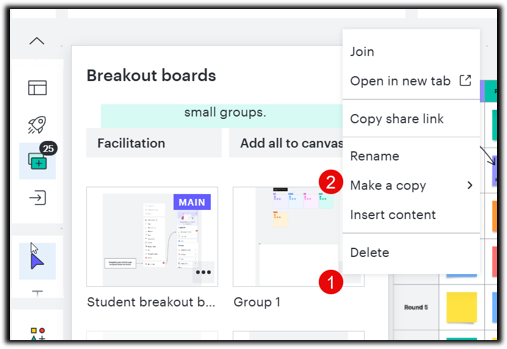
Or simply copy and paste the template into other boards.
Once you’re satisfied, be sure to save and publish the page where you embedded the board.
Edit the share settings
Select the Collaborators icon in the top right of the board (1), and then choose Make me a facilitator (2):
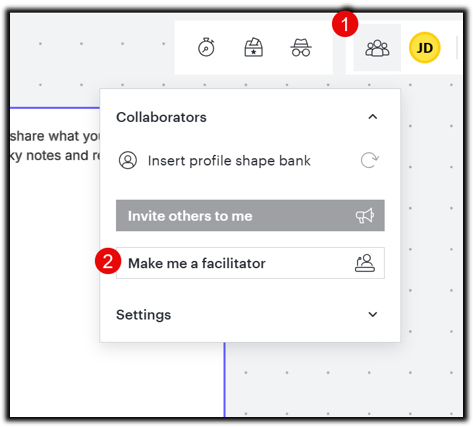
Your board is now created. If you have not already done so, you can go back to the Canvas page and click Save to create the page:
The activity will now be embedded into the page you created:
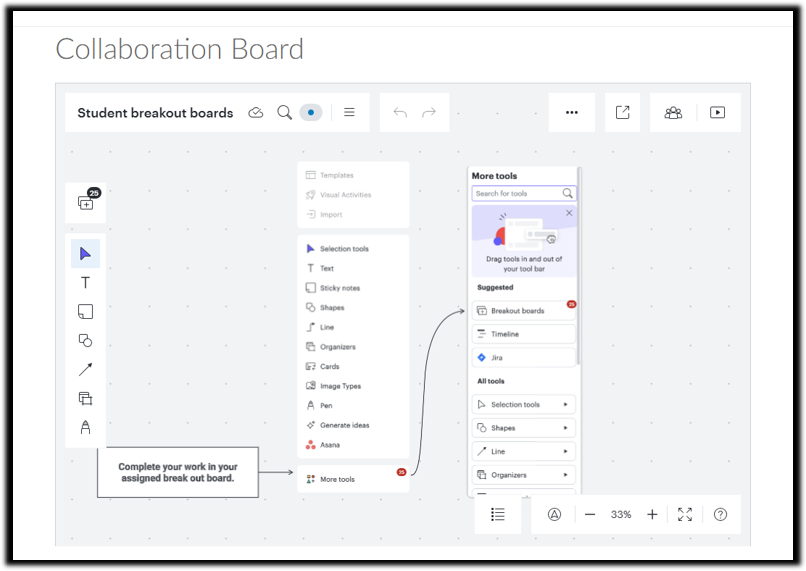
Students can access this and edit directly via the page or choose the option to open in a new tab to edit in the full version. To respond, they can simply drag a sticky note from the bank pile and write their own response. Their name will appear on the bottom right of their sticky.
If using the board synchronously with a lecture, you can share the page link (or the board link directly) at the appropriate point in the lecture.
RaiderCanvas Support
-
Phone
806-742-5944 -
Email
online@ttu.edu