
RaiderCanvas Support
Lucid Overview
Lucid is a tool available in Canvas designed to allow instructors and students a space for virtual collaboration. Its functions are divided between Lucidchart (for diagramming) and Lucidspark (for whiteboards). Using Lucid, instructors can create spaces such as Collaboration Boards and Whiteboards, which can be used for anything from creating icebreakers to facilitating group interaction during presentations. On the student side, students can use the tools for things such as working together on research projects, doing project planning, or simply visualizing their discussions.
This document will provide basic overview of how to enable and access Lucid in your course, how to create a group assignment using the tool, as well as a basic tutorial on how to use the Lucidchart and Lucidspark options.
Enable and Accessing Lucid in Your Course
Open Settings
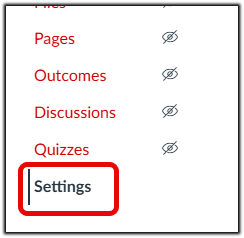
In Course Navigation, click the Settings link.
Choose Navigation
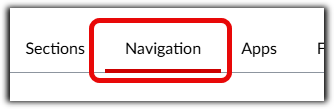
Click the Navigation tab.
Enable the Lucid (Whiteboard) option
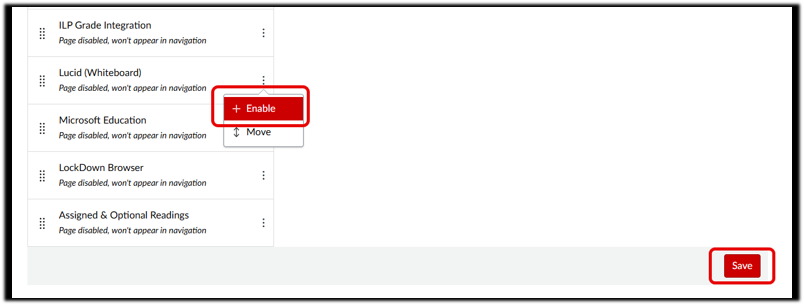
Click the three-dots next to the option and select Enable. Select Save.
Select Lucid (Whiteboard) from Navigation
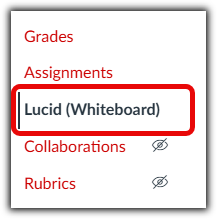
In Course Navigation, click the Lucid (Whiteboard) link.
Select ‘Open Lucid’ Button
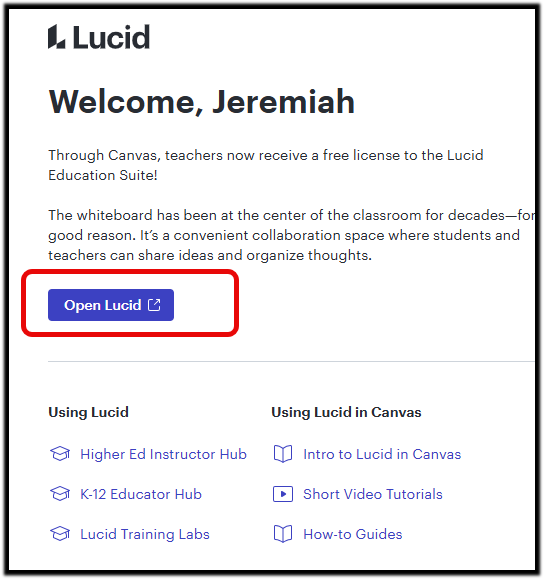
The Lucid (Whiteboard) link will bring you to the Lucid page in Canvas. To access Lucid, select the blue Open Lucid button.
If accessing from the rich text editor of a Canvas page or assignment, Lucid can be located via the plug icon and choosing Insert Whiteboard or Diagram:
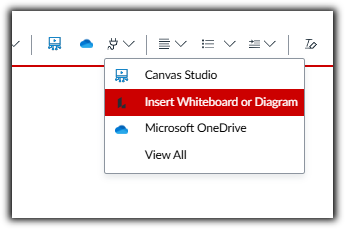
If this is your first time using Lucid, you may need to search for the link using the View All option.
Creating Lucidchart content in Canvas
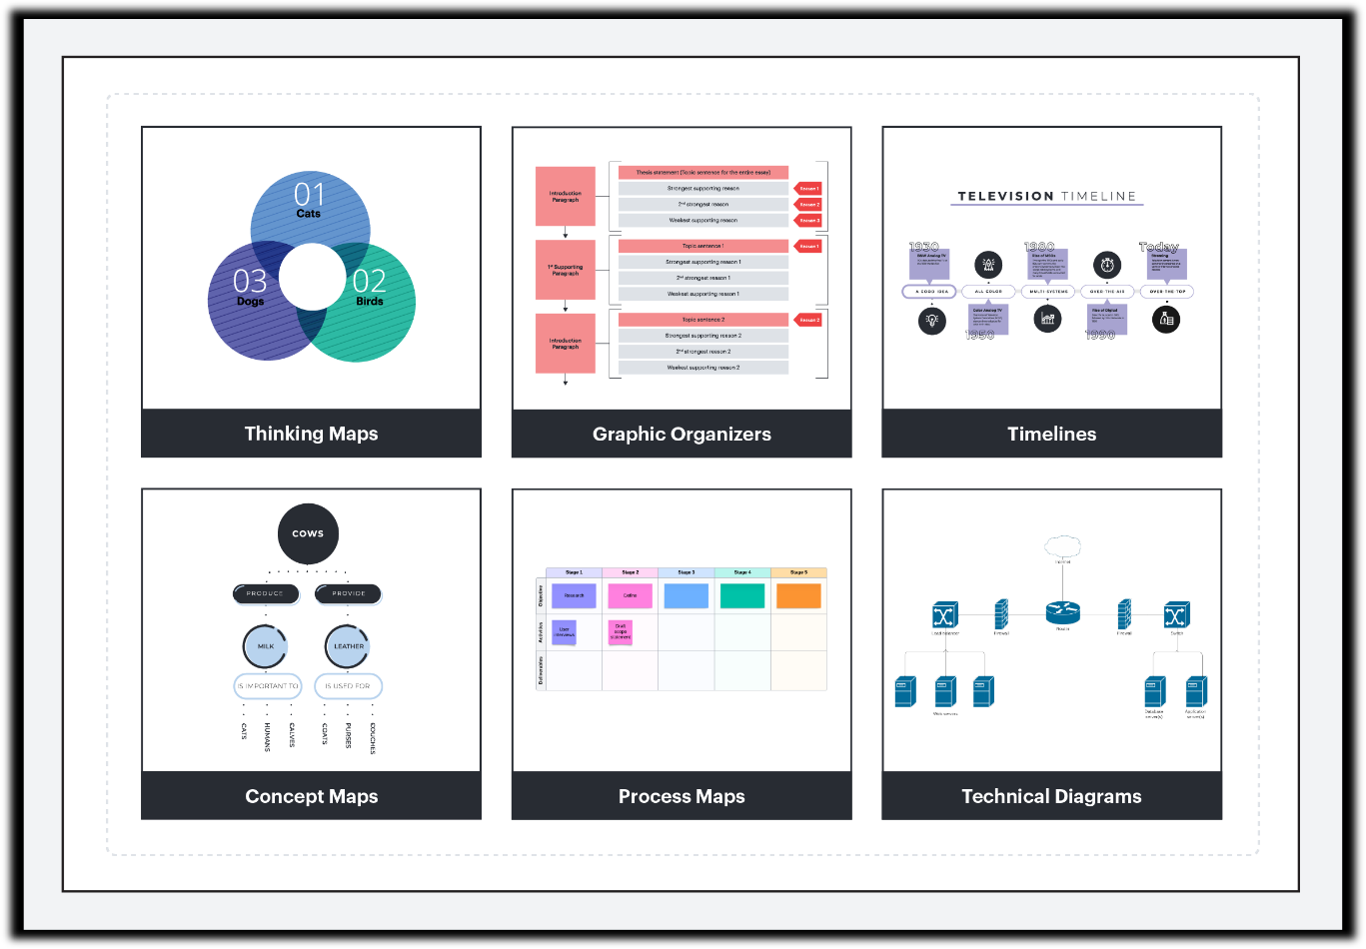
Lucidchart is an interactive diagramming tool ideal for creating concept maps, graphic organizers, process flows, timelines, technical diagrams, thinking maps, and more.
Navigation
- Trackpad Users: Swipe with two fingers to pan and pinch to zoom in and out.
- Mouse Users: Right-click and drag to pan.
Tip: If you need to scroll to the bottom of the Canvas page, place your cursor outside the Lucidspark board first.
The primary toolbar
The primary toolbar contains the essential tools for adding content to your workspace, including templates, shapes, images, and more. Let's begin by exploring the most commonly used tools.
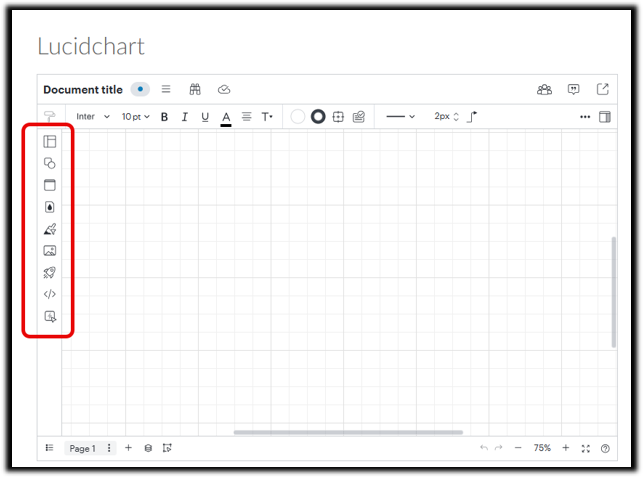
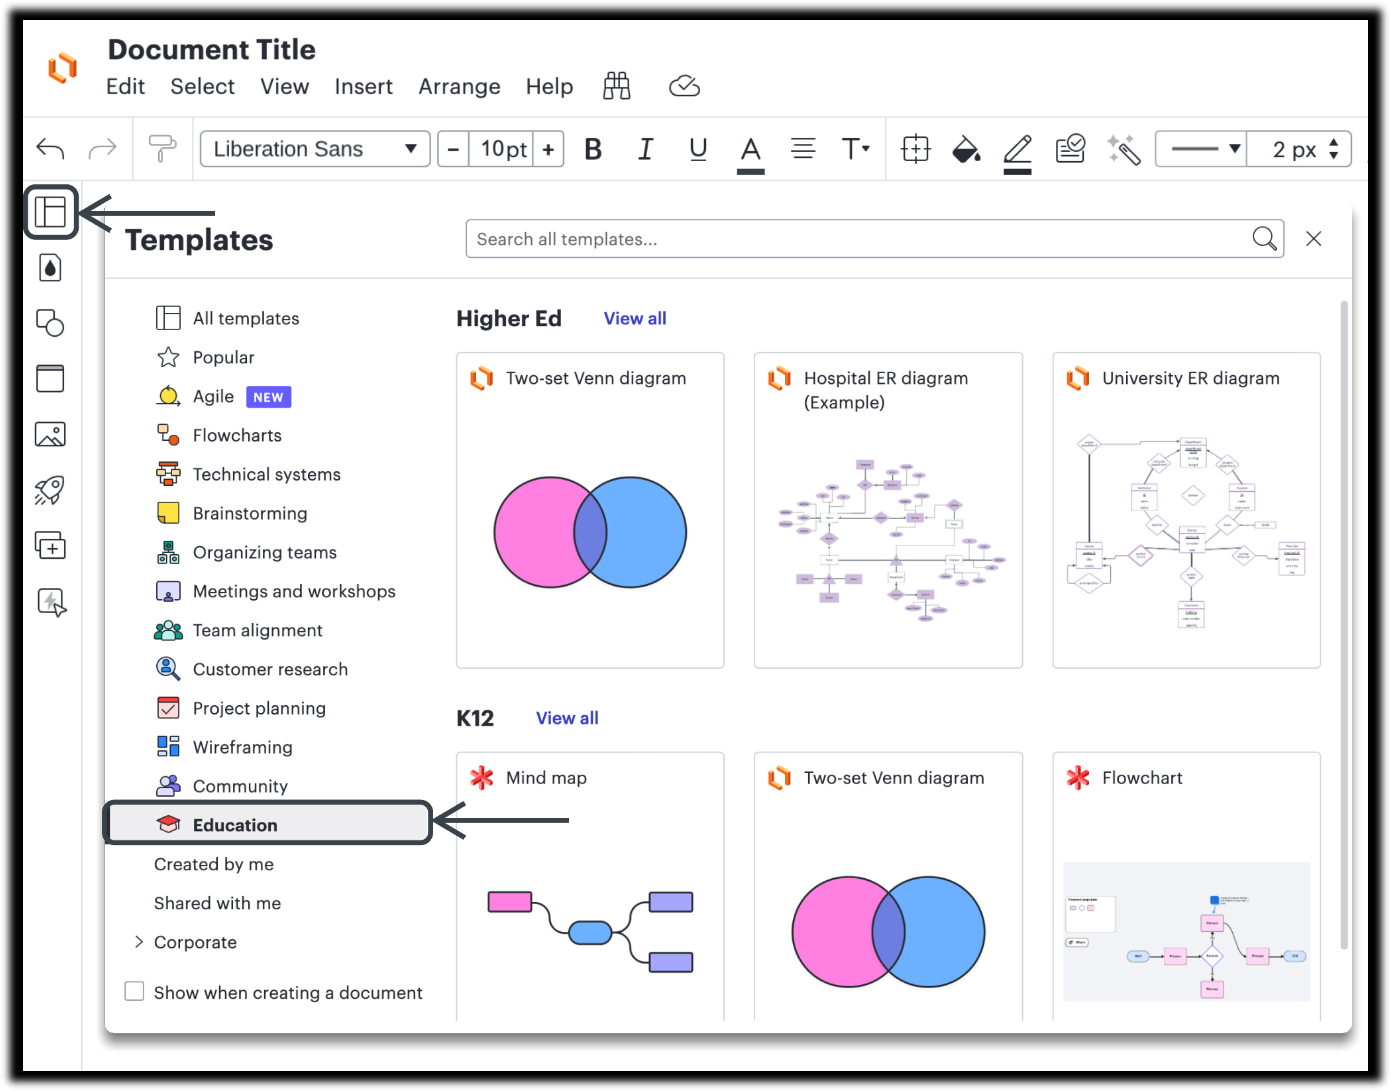
Template gallery
Explore and add pre-built education templates directly to your Lucidchart document.
The shapes panel
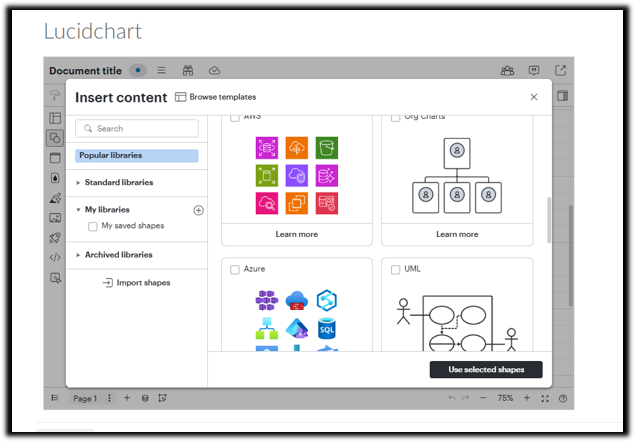
Add content to your workspace by dragging shapes, text, stickies, and lines directly from the panel.

Click at the bottom of the shapes panel to access and add more shapes to your toolbar. Explore the full range of shape libraries to enhance your designs.
Containers panel
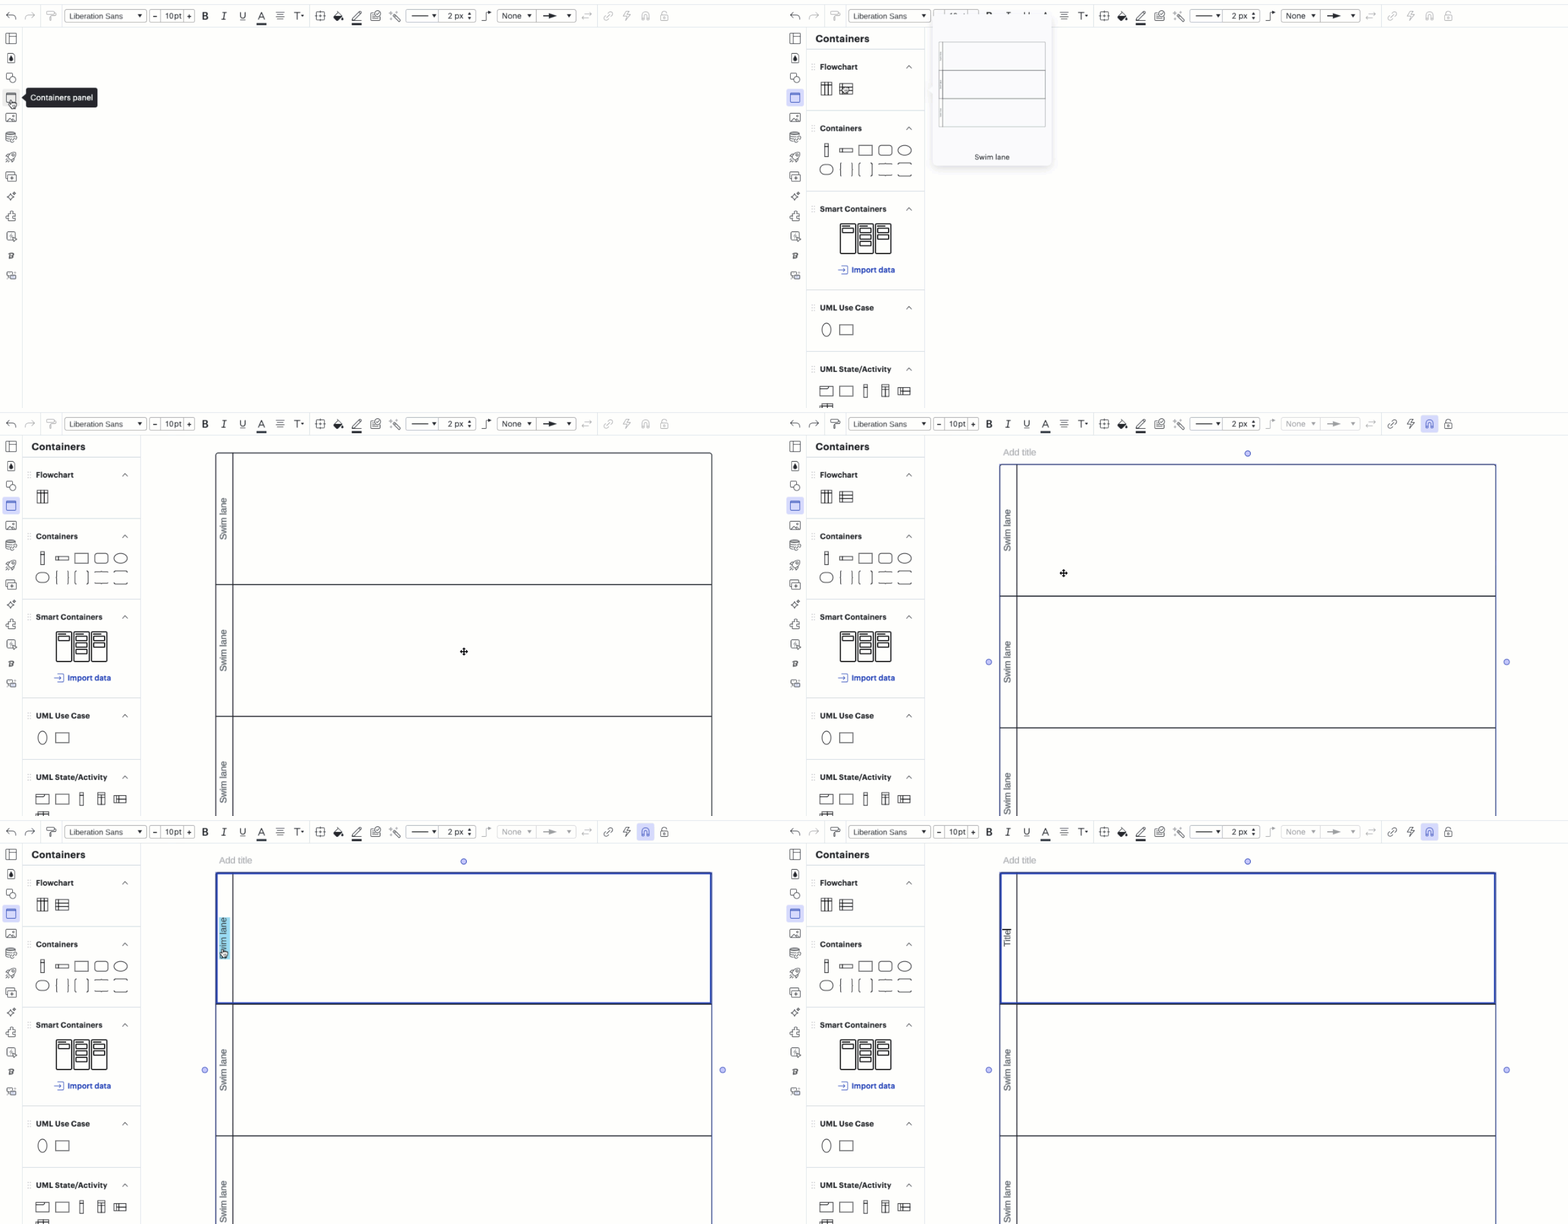
Use the Containers panel to organize your content by dragging containers, swim lanes, or other organizational tools onto the workspace.
Images panel
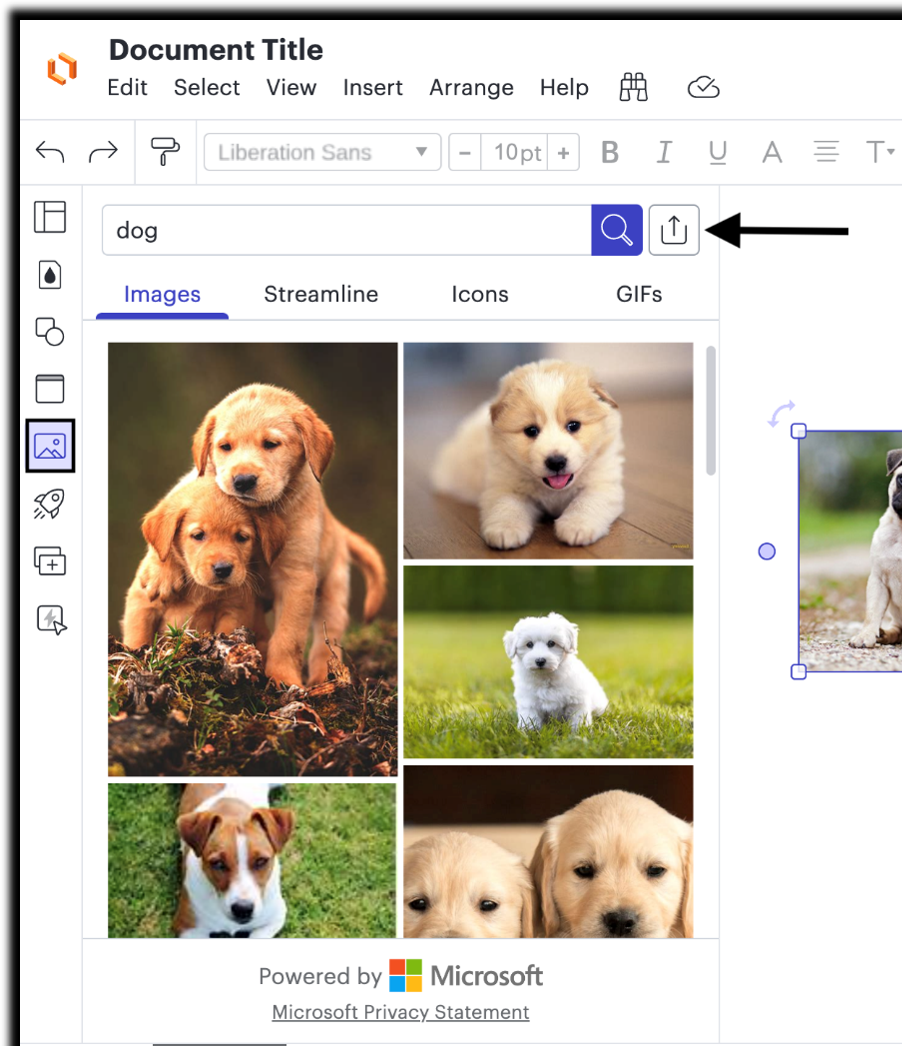
Search for or import images, then drag them onto the workspace.
Visual Activities
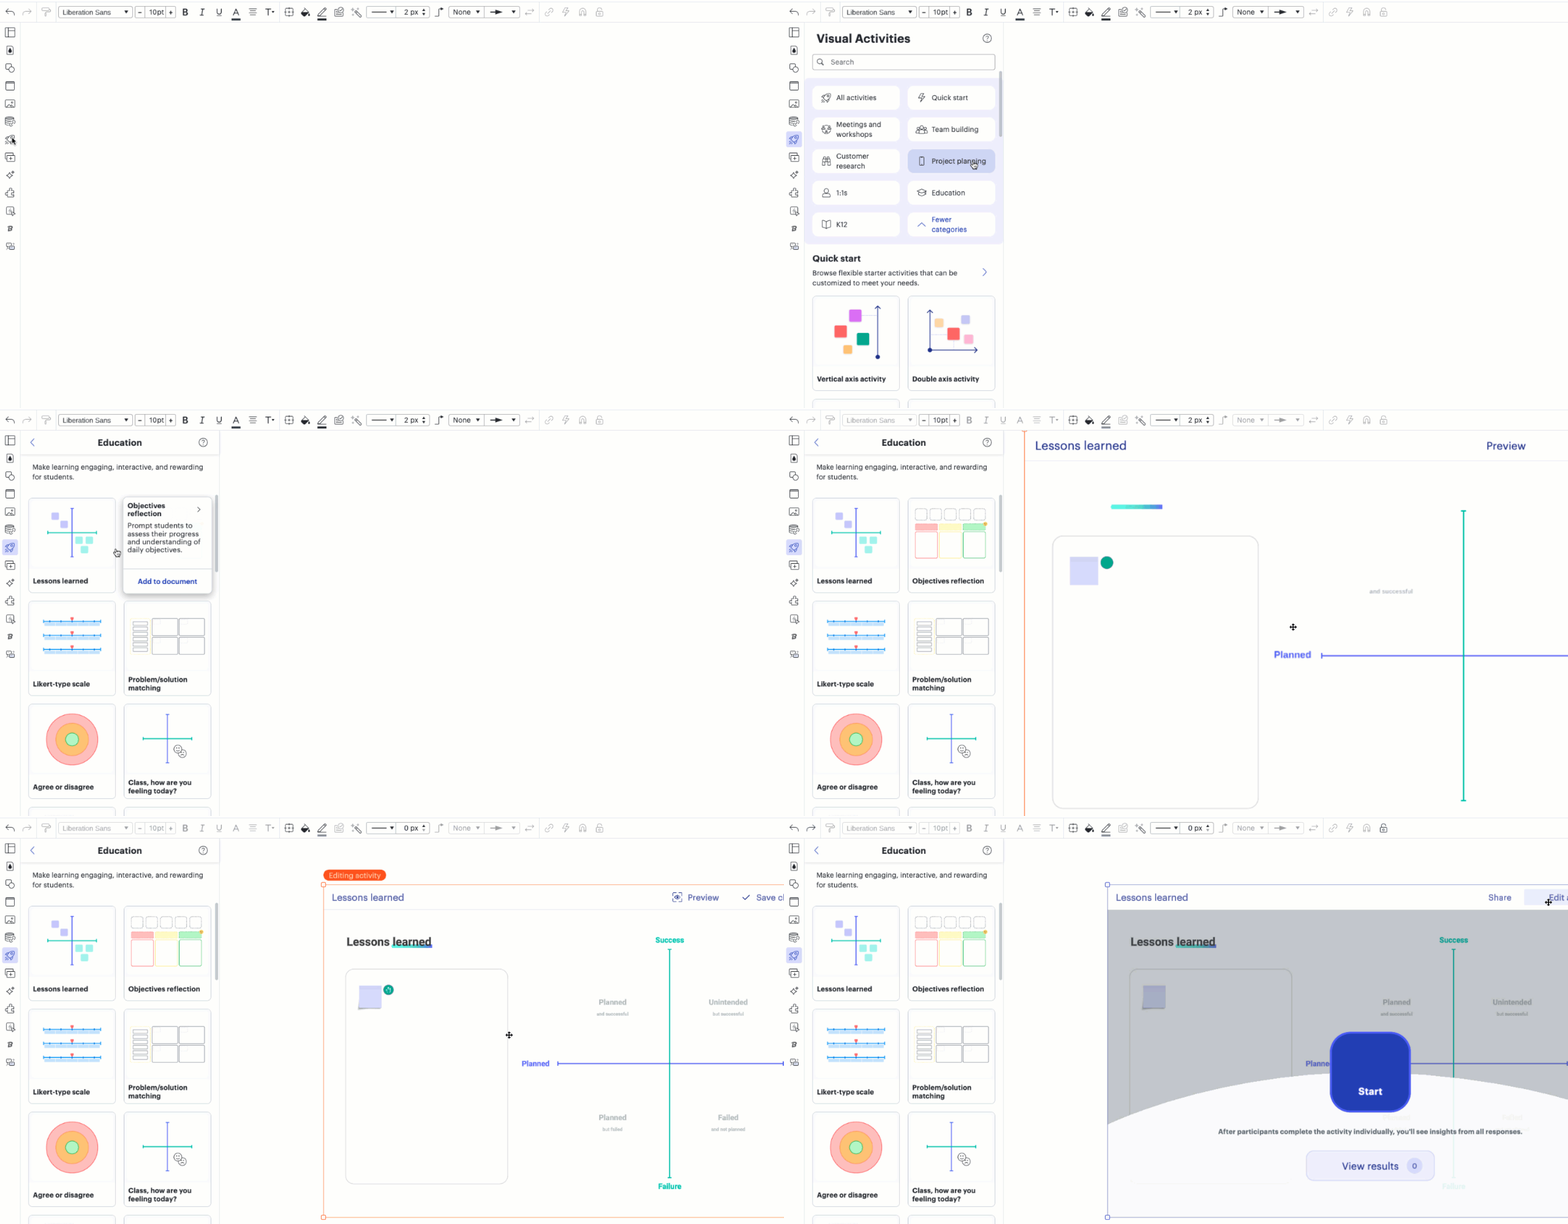
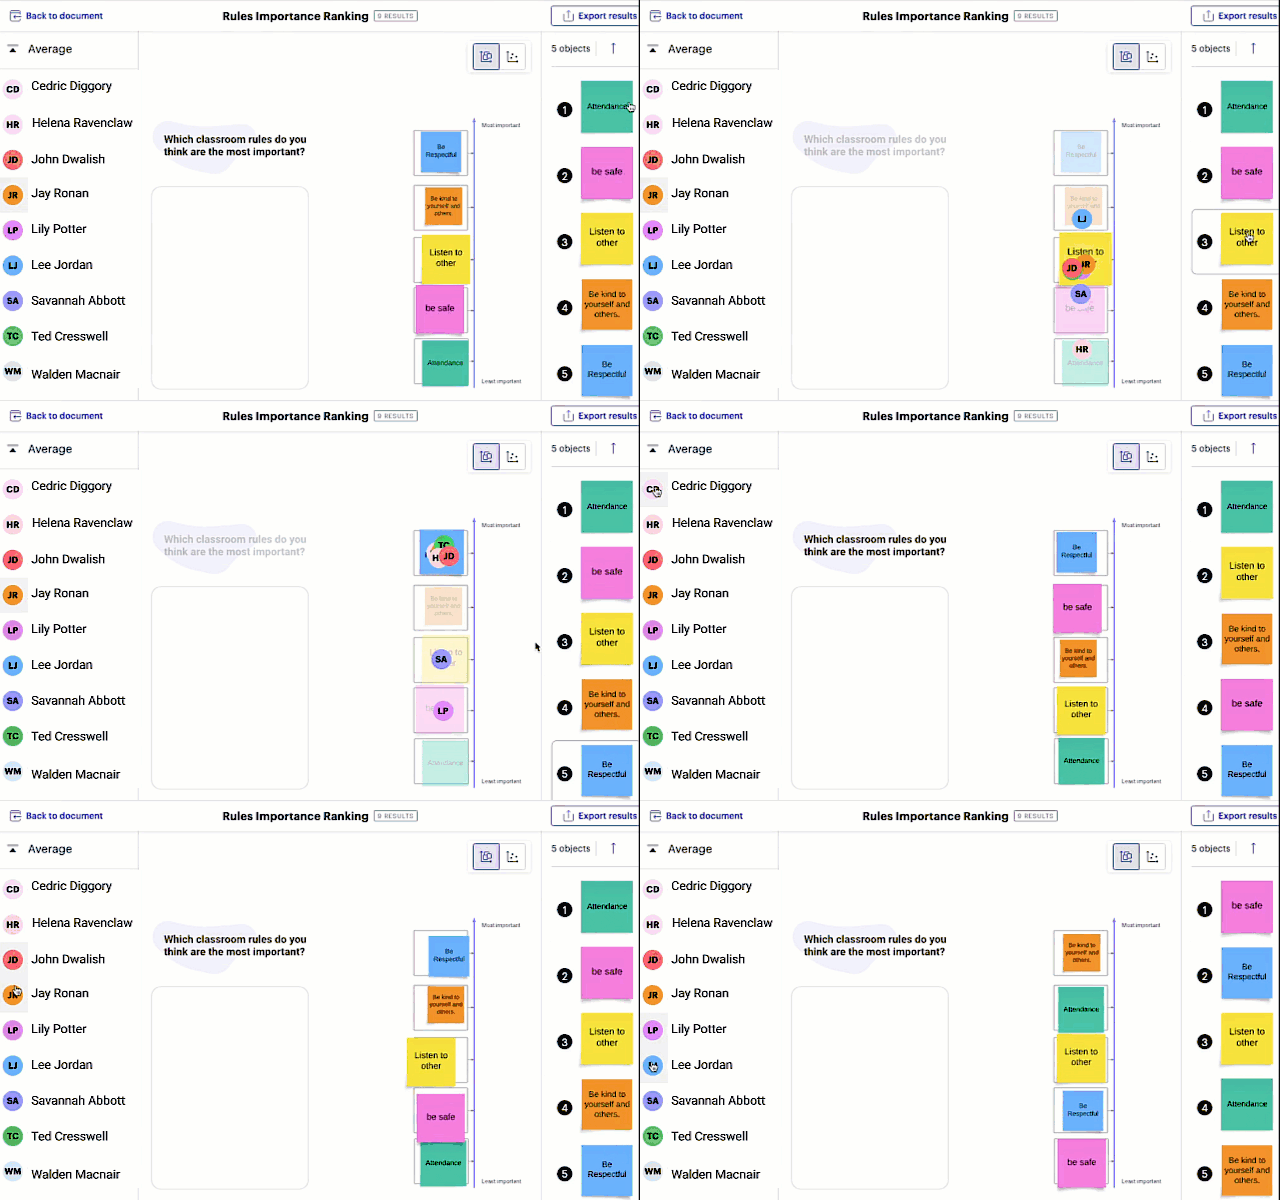
When collaborating with a group, add a visual activity to the workspace for students to complete independently. Lucid then compiles participation and performance data, providing an overall class average and individual responses. Explore more about Visual Activities.
Breakout boards
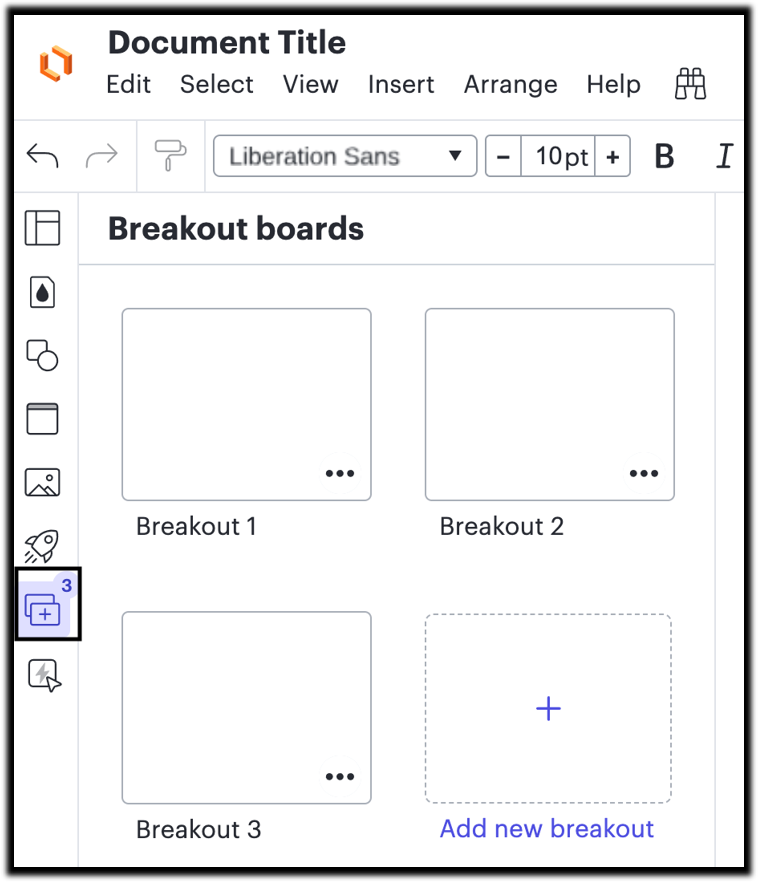
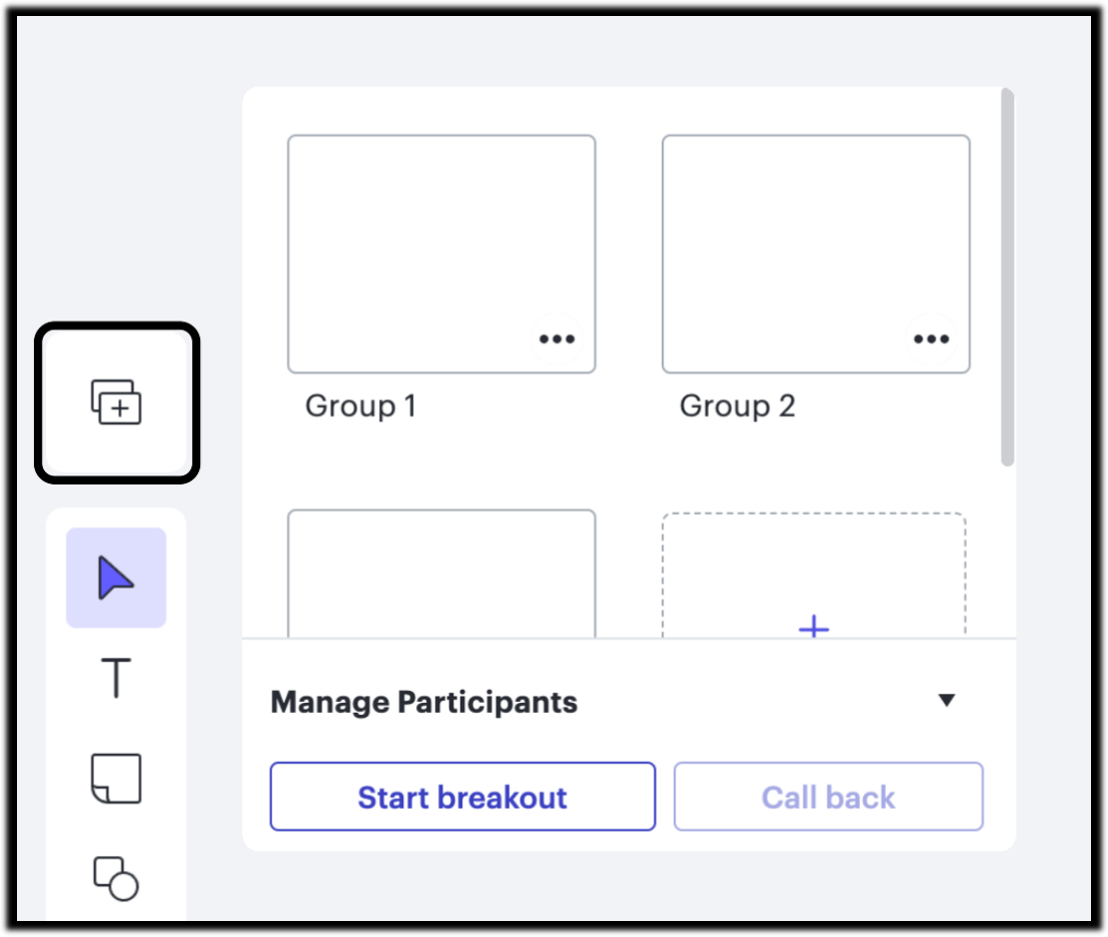
Breakout Boards are separate Lucidchart workspaces linked to the main document, perfect for small-group collaboration. Create and customize breakout boards, then click 'Start Breakouts' when students are ready to begin.
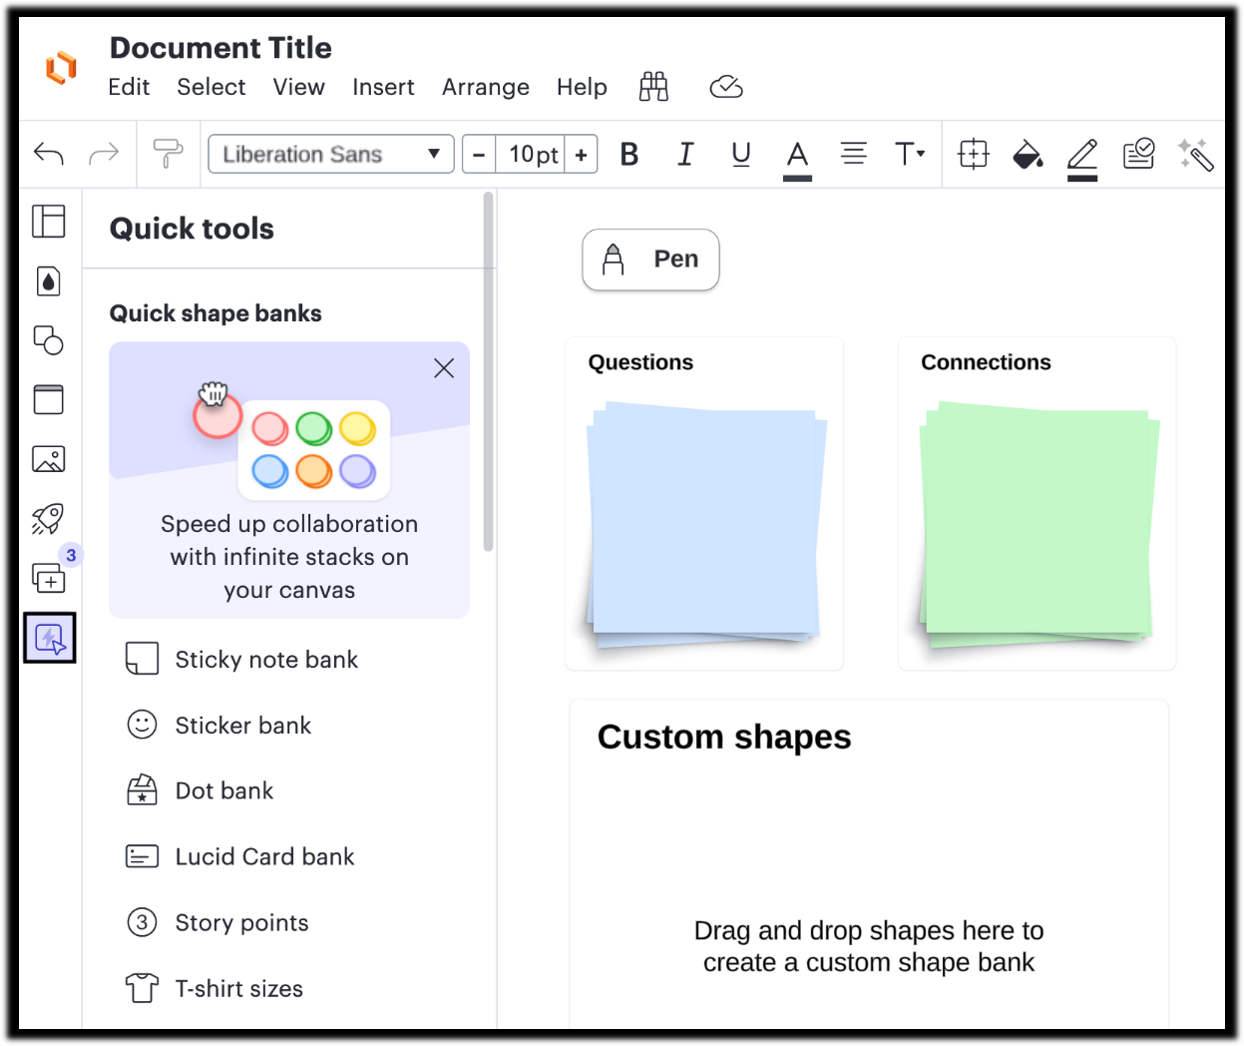
Quick tools let instructors add shortcuts to the workspace, streamlining access to essential tools like sticky banks, dot banks, custom shape banks, and the pen/highlighter.
Lucidchart pages
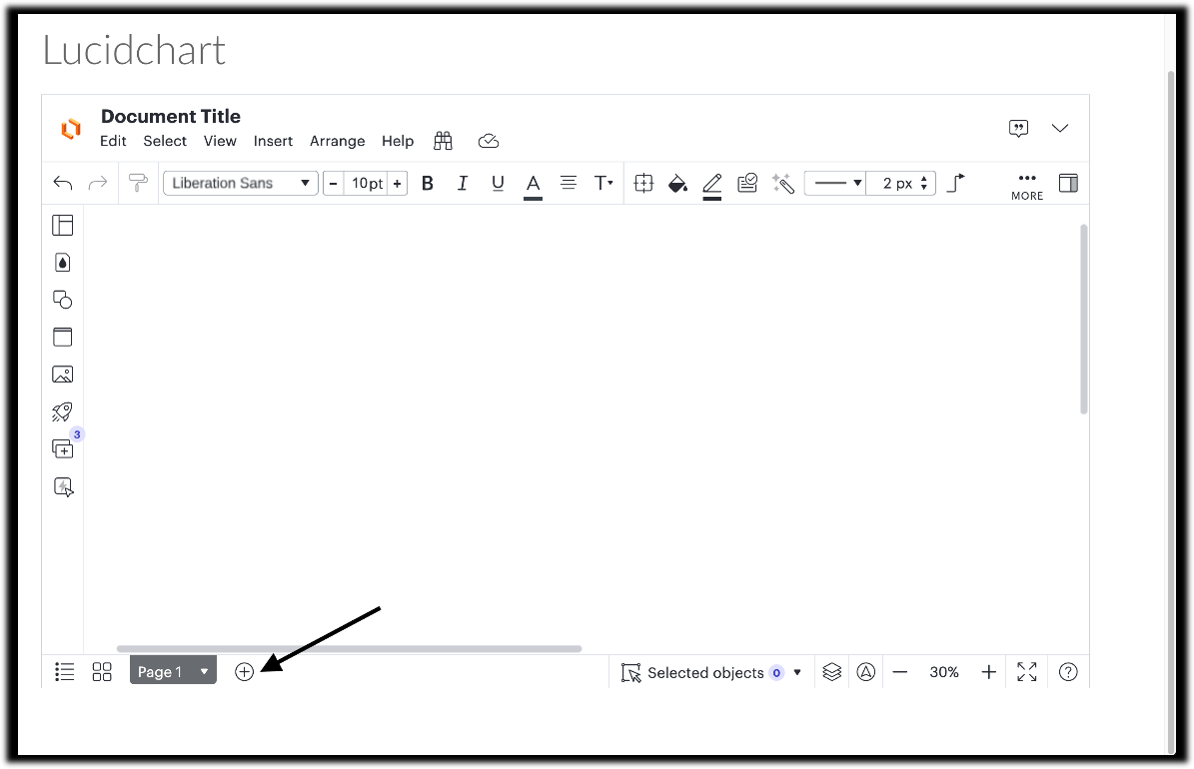
Access and add pages to your document at the bottom of the Lucidchart interface. If you're having trouble within Canvas, use the Canvas page scroll bar on the far right to navigate.
Line connections
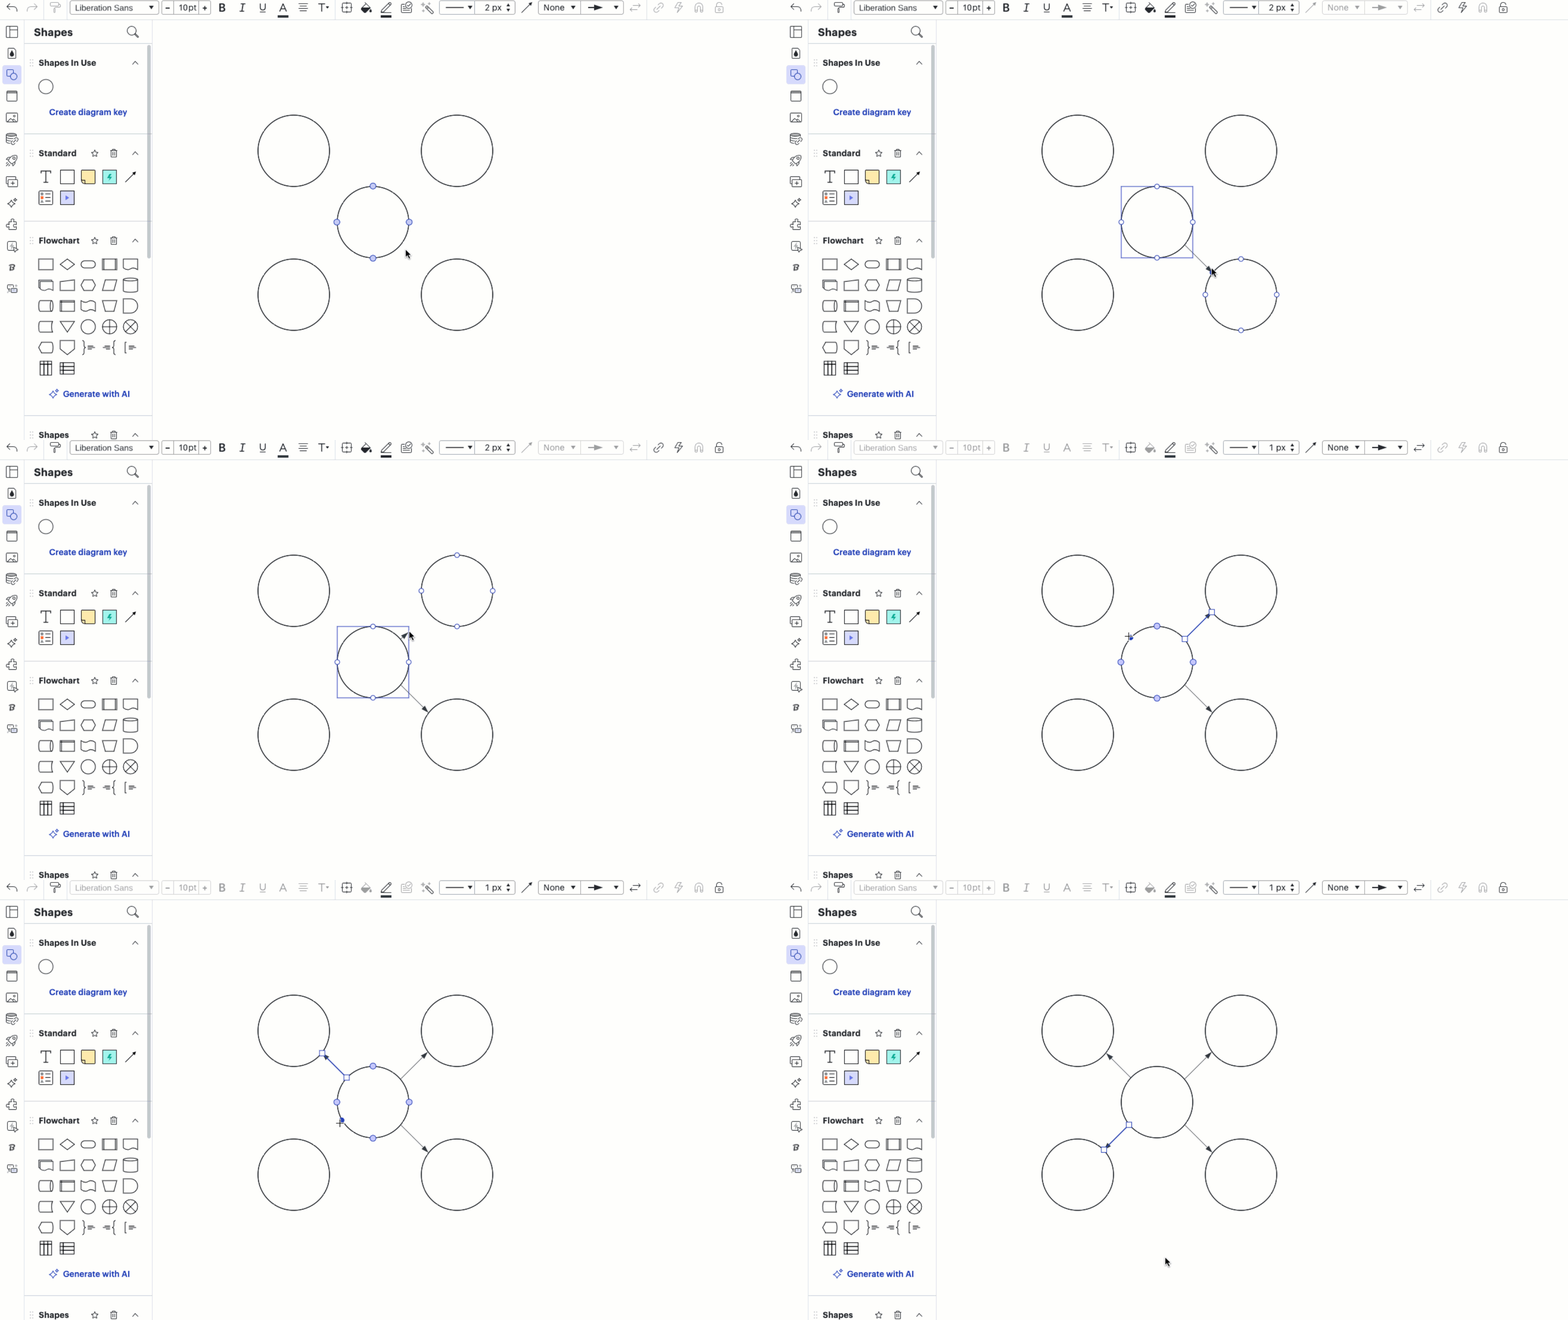
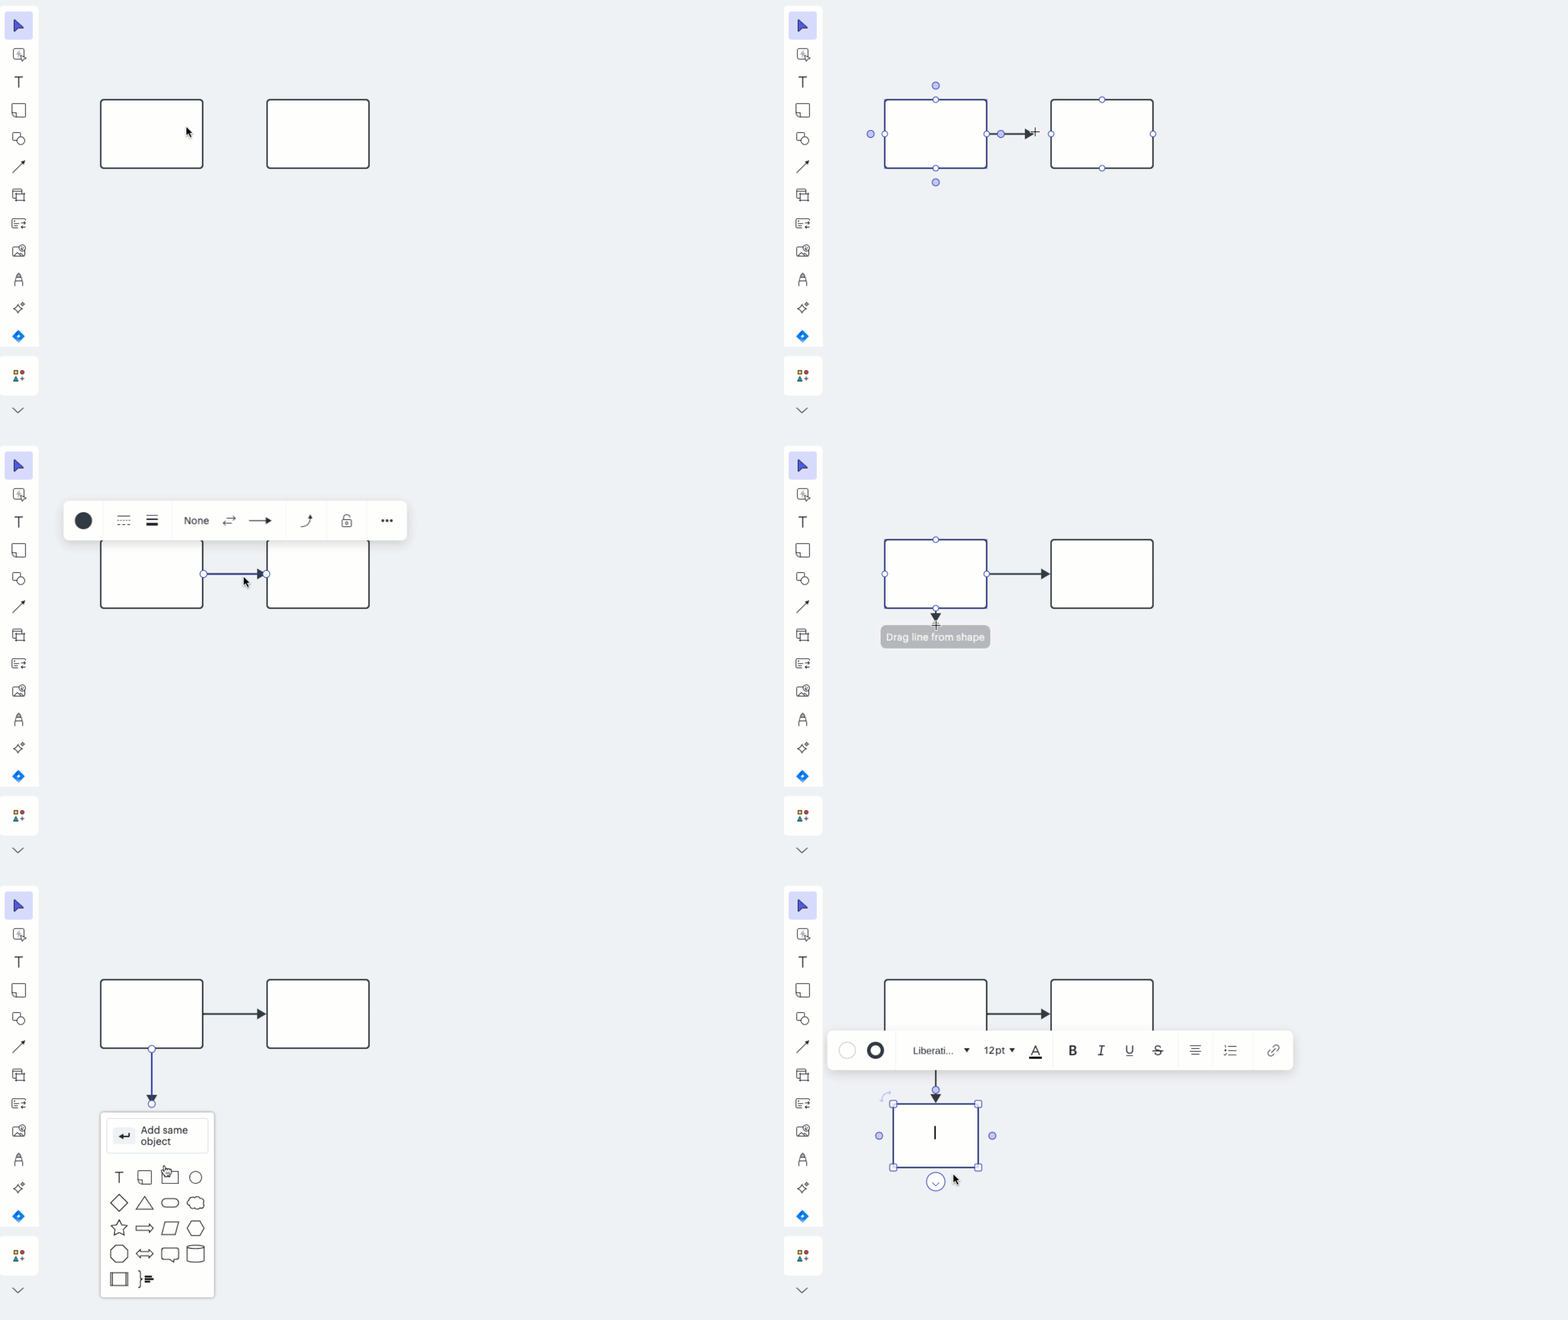
Line connections can be made between any object on the canvas. Click on the blue nodes to automatically add a connecting arrow and shape.
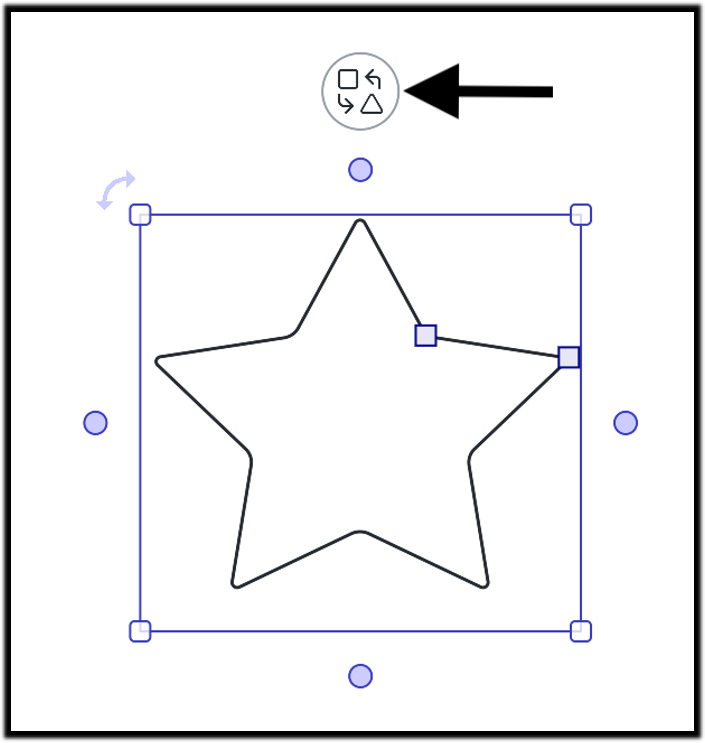
Use the change shape icon to modify each shape as needed.
Formatting Toolbar
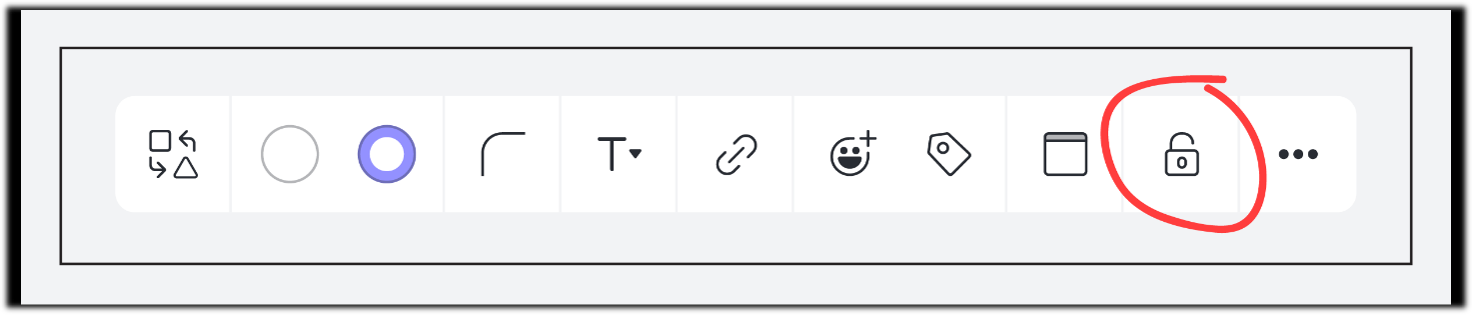
The Formatting Toolbar allows you to style text, lines, and shapes, and access advanced tools like conditional formatting, actions, locking, and magnetizing.
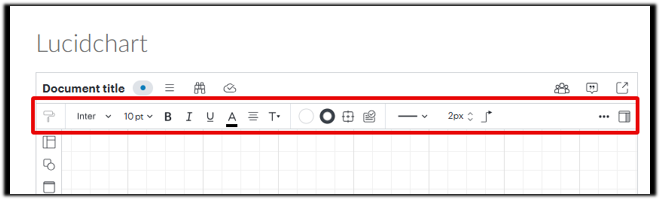
Formatting options from left to right include:
- The back arrow to undo your last change.
- The forward arrow to redo the action.
- The Paint format icon to copy and paste shape styles (see our Add and Customize Shapes in Lucidchart article for details).
- Text font, size, color, and more settings.
- Shape and line styling options (refer to Add and Customize Shapes in Lucidchart and Add and Style Lines in Lucidchart for details).
- Icon sets and Conditional Formatting rules (see Add Conditional Formatting in Lucidchart for more info).
- Click the 3 dots for additional features.
- The action icon to add actions to an object (learn more in our Add an Action or Link to a Shape in Lucidchart article).
- The magnet icon to attach shapes to a container or table row.
- The lock icon to lock a shape's size, position, style, or content.
The contextual panel icon on the far right for advanced shape options.
The header
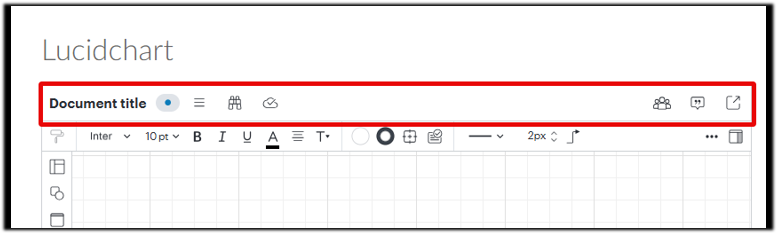
The Header includes:
- The Lucidchart icon to return to your Lucid Dashboard outside of Canvas.
- The Comments icon to discuss ideas with collaborators (see our Collaborate in Lucid article for details).
- The Edit menu for copying/pasting objects, setting default styles, spell check, and find & replace.
- The Select menu is used to choose different groupings of objects for bulk styling.
- The View menu for zoom options, turning off webGL, and showing/hiding guides, rulers, and margins.
- The Insert menu adds images, gifs, templates, and document-specific info like creator names, creation/modification dates, and page numbers.
- The Arrange menu for arranging shapes (e.g., bring to front, align, distribute).
- The Help menu for onboarding tutorials, Lucidchart Help Center, hotkey shortcuts, and product updates.
- Feature Find to search for features and help within the workspace.
- Revision History to view edits and restore previous document versions.
Note: Some options may be grayed out based on your selection on the canvas. For example, many "Arrange" options require selecting multiple objects.
The footer
Beneath the workspace, you will find the footer.
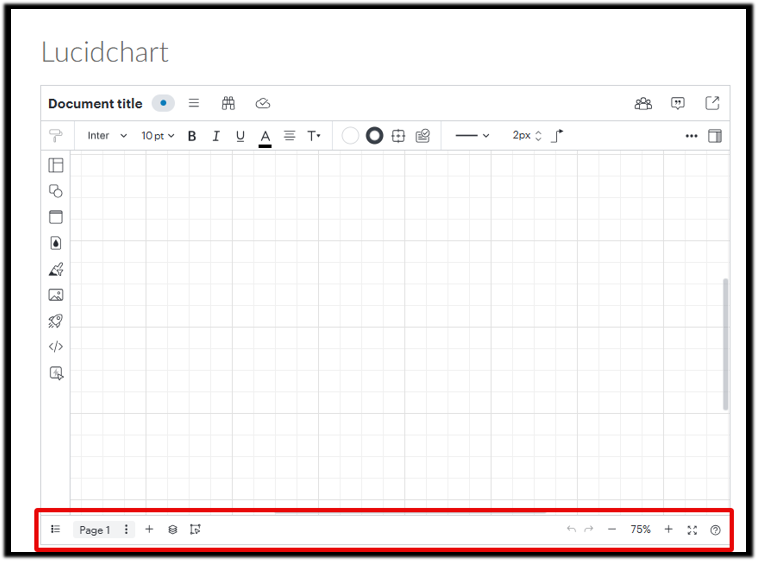
Manage your document pages with the icons on the left side of the footer:
- The page list icon to view all pages in your document.
- The page thumbnail icon to see a pop-up with thumbnails of each page.
- The dropdown arrow next to a page title for options like renaming, duplicating, deleting, changing tab color, converting to a master page, or creating a new document from the page.
- The add page icon to add a new page.
On the right side of the footer, find document options including:
- The Page Insights menu icon for creating formulas.
- The layers icon to access and edit layers.
- The minimap icon to view and adjust your canvas location.
- The subtraction and addition icons to zoom in or out, with additional options for zooming to content, width, page, or resetting zoom.
- The fullscreen icon expands the canvas to the entire workspace.
Your Lucid homepage
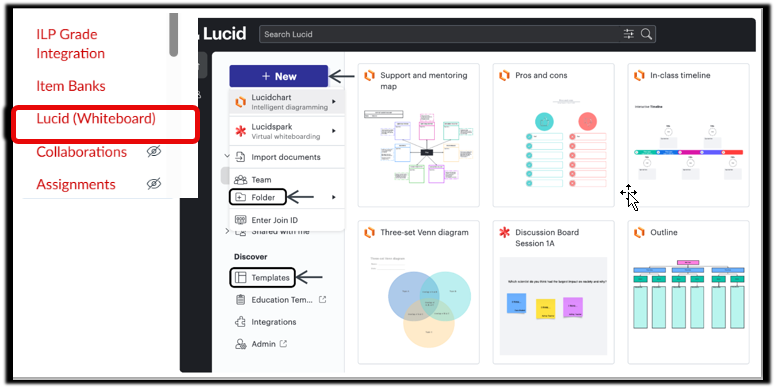
Use the Lucid shortcut icon in your Canvas course navigation to access your Lucid home page. From here, you can create new documents, access all your existing documents, organize them with folders, and browse hundreds of ready-to-use templates. Learn more about your Lucid home page.
Creating Lucidspark content in Canvas
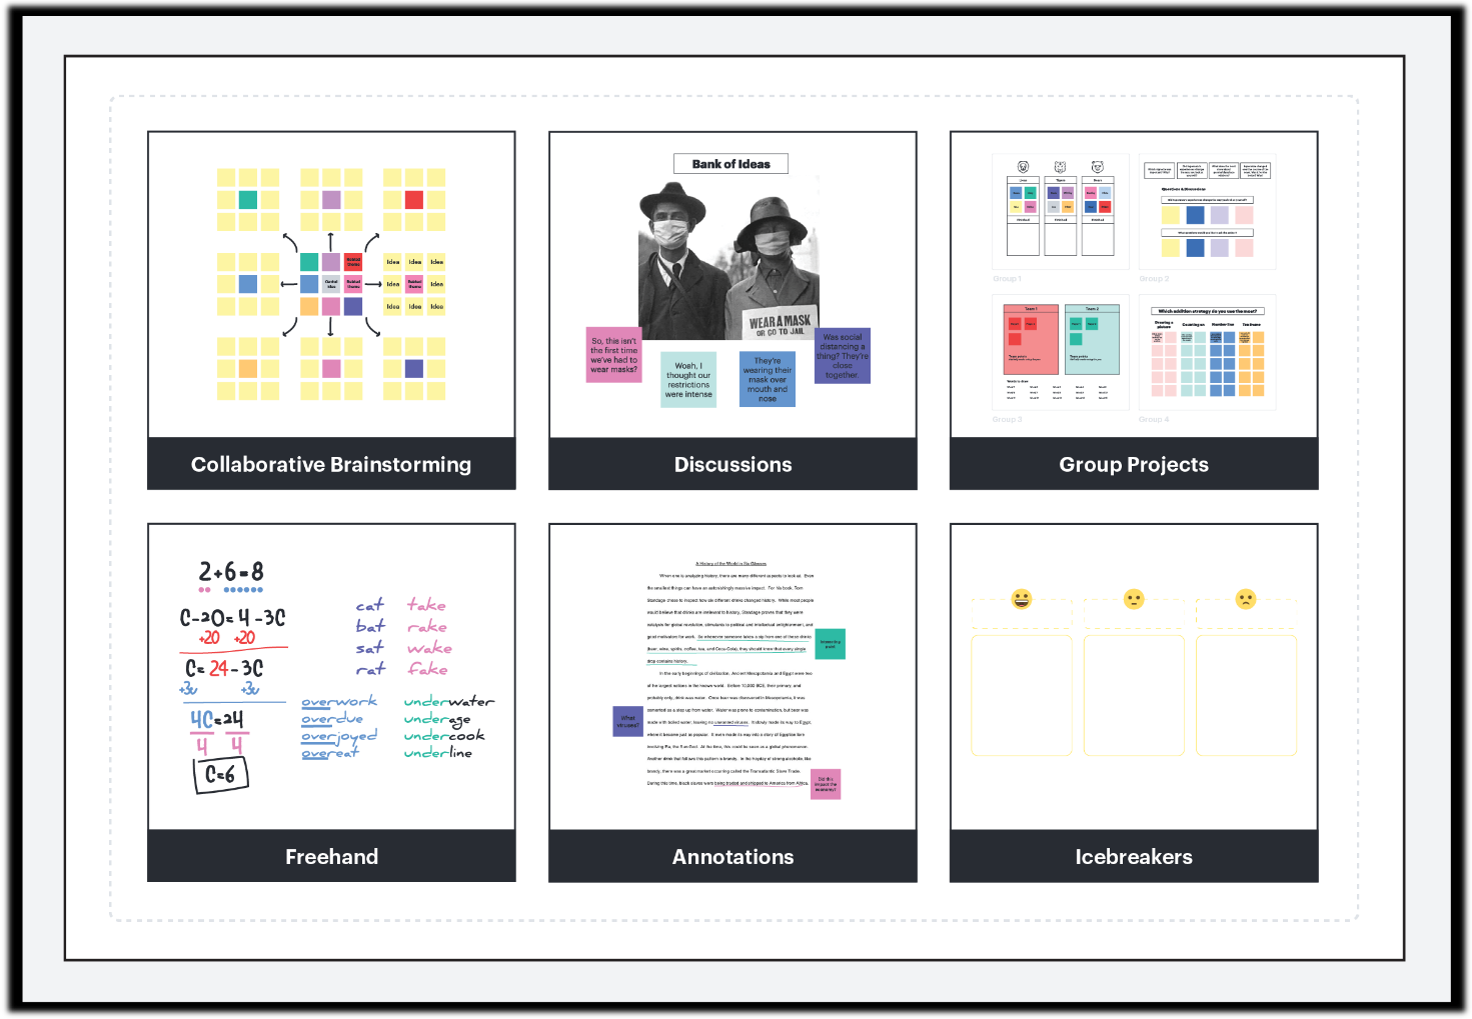
Lucidspark is an interactive virtual whiteboard perfect for facilitating discussions, group brainstorming, text annotation, and group projects.
Navigation
- Trackpad Users: Swipe with two fingers to pan and pinch to zoom in and out.
- Mouse Users: Right-click and drag to pan.
Tip: If you need to scroll to the bottom of the Canvas page, place your cursor outside the Lucidspark board first.
Collaboration Toolbar
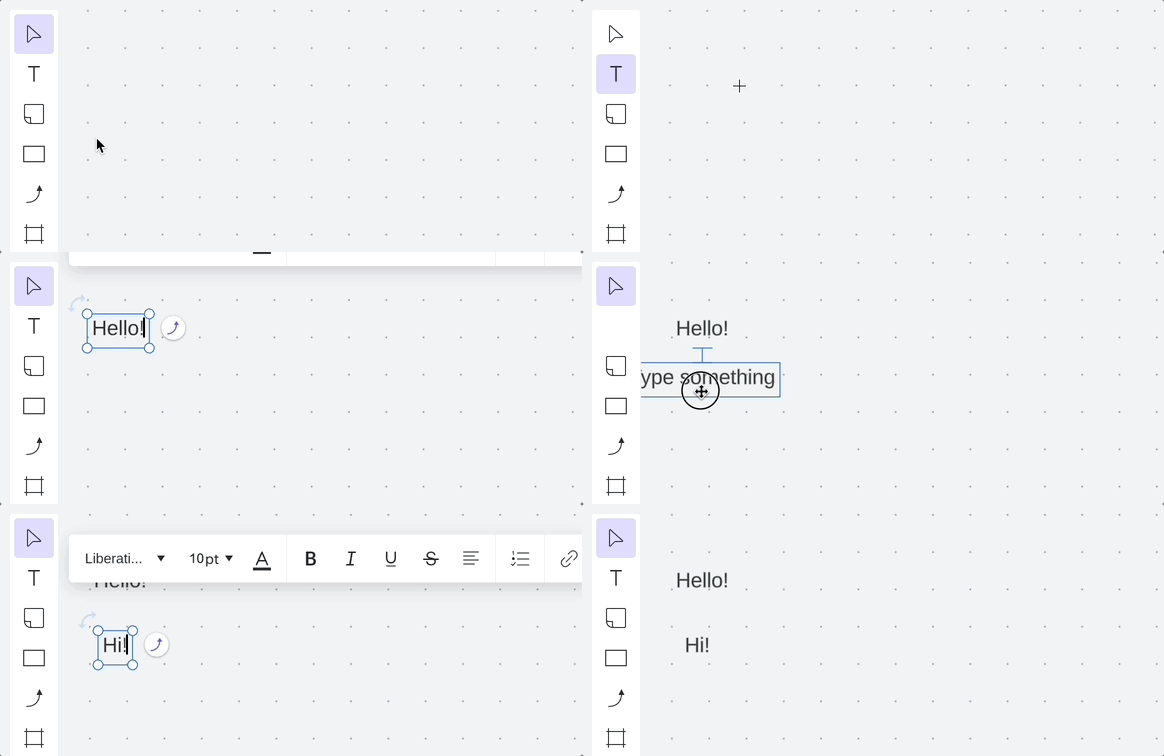
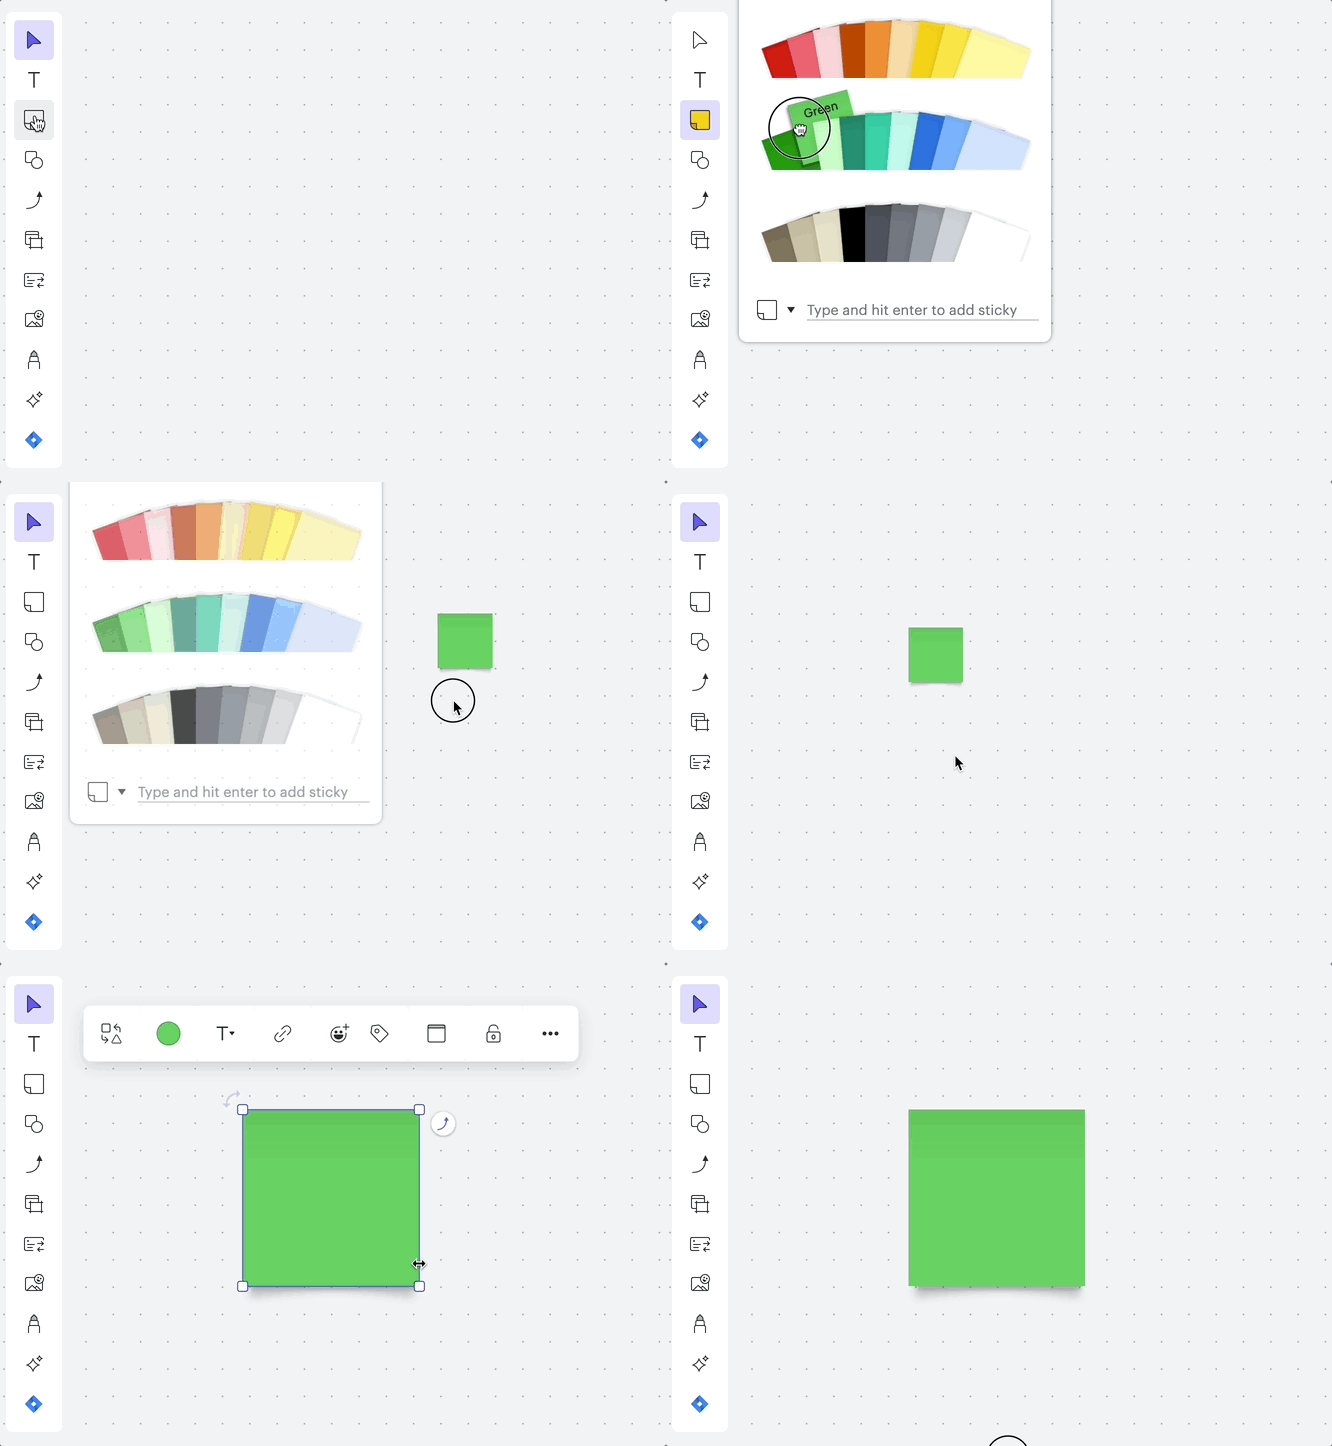
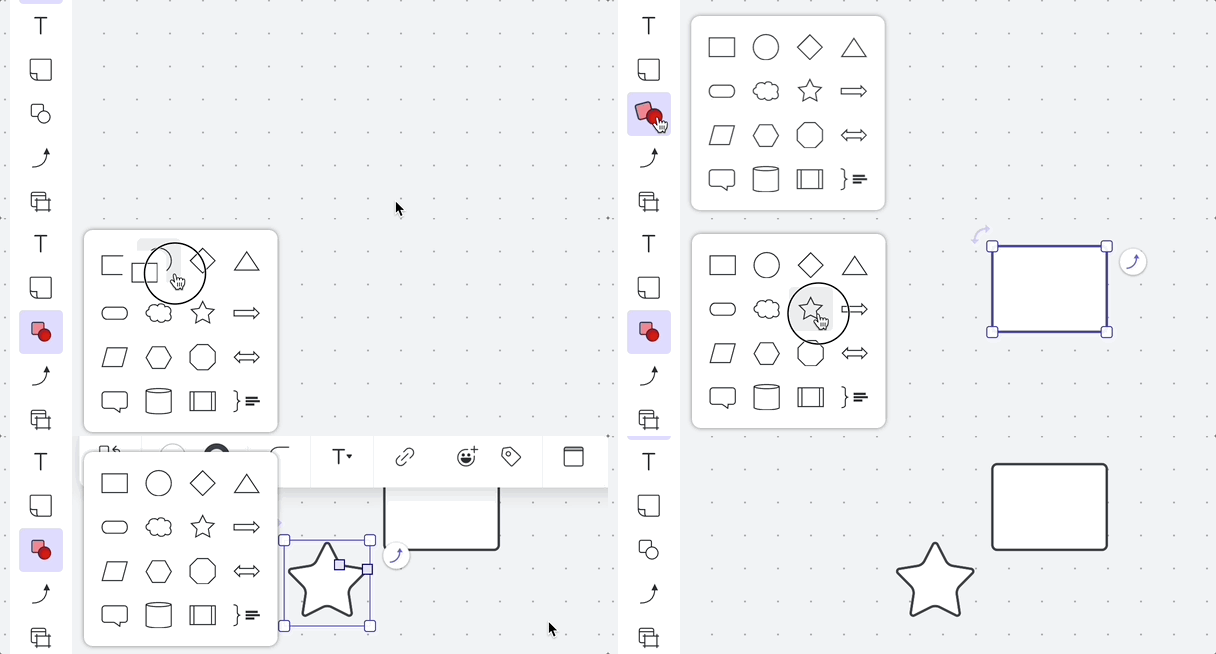
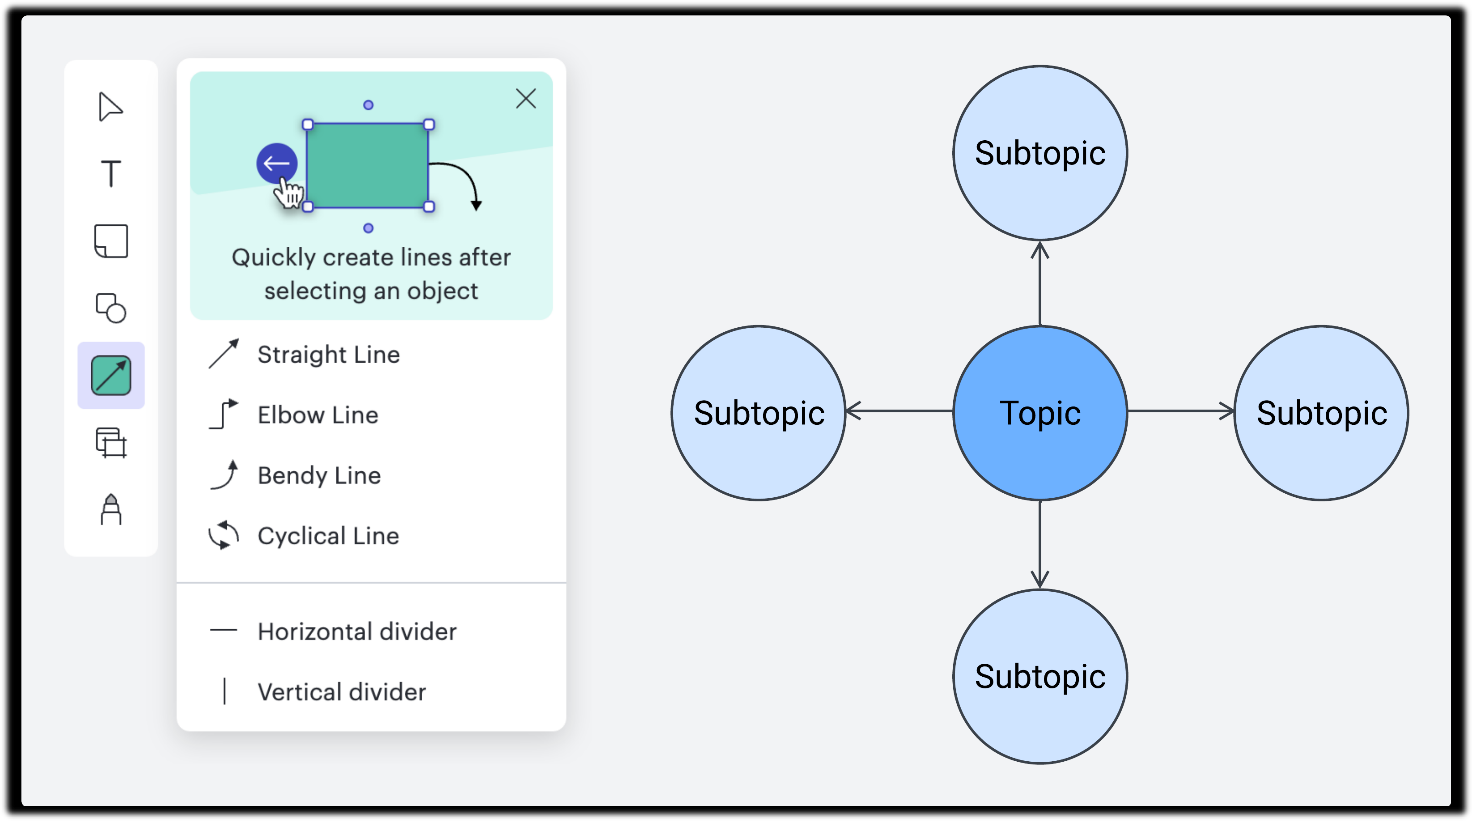
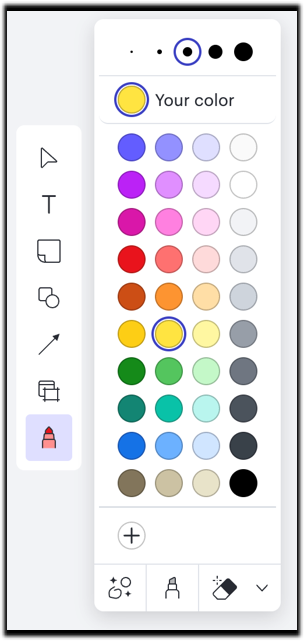
Both you and your students will use the collaboration toolbar on the left side of the Lucidspark board to add elements such as text boxes, sticky notes, shapes, lines, organizational tools, and the pen tool.
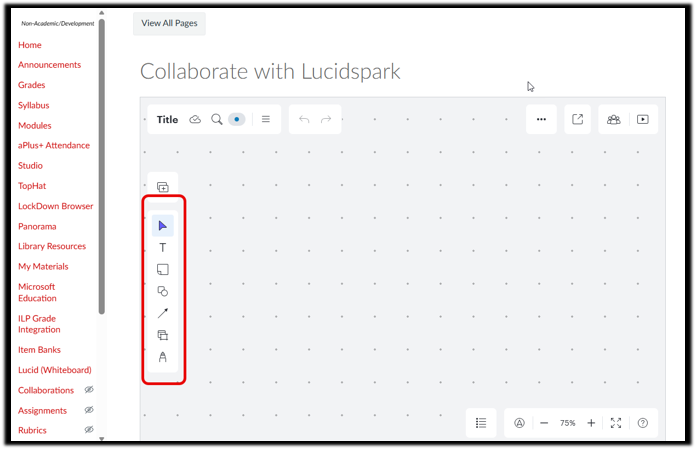
- Drag text boxes onto the board
- Drag sticky notes onto the board
- Drag shapes onto the board
Formatting Toolbar
Select a text box, sticky note, or shape, and use the formatting toolbar to customize the font, size, color, and more. You can also use the lock feature to prevent students from deleting, moving, or changing the selected item.
- Use lines to make connections
- Pull out from any object on the board to connect two items
- Use the pen tool to draw or highlight on the board
Organization Tools
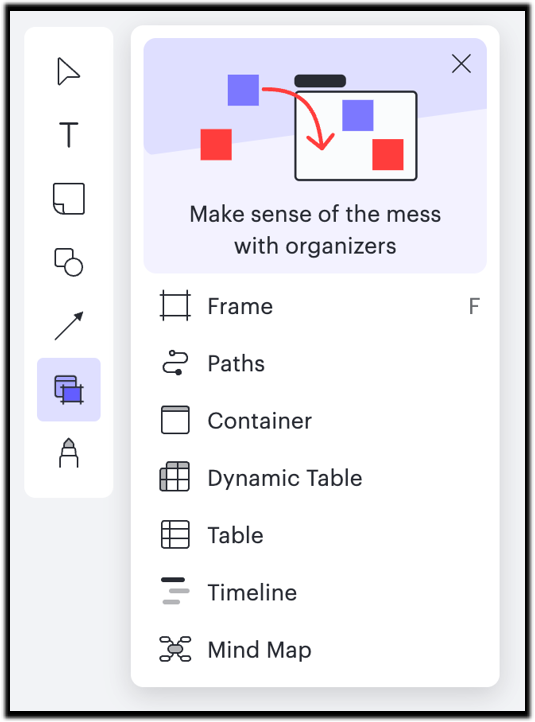
Organize your workspace with frames and paths. Use containers, tables, and dynamic tables to keep your content structured. Visualize your ideas with timelines and mind maps.
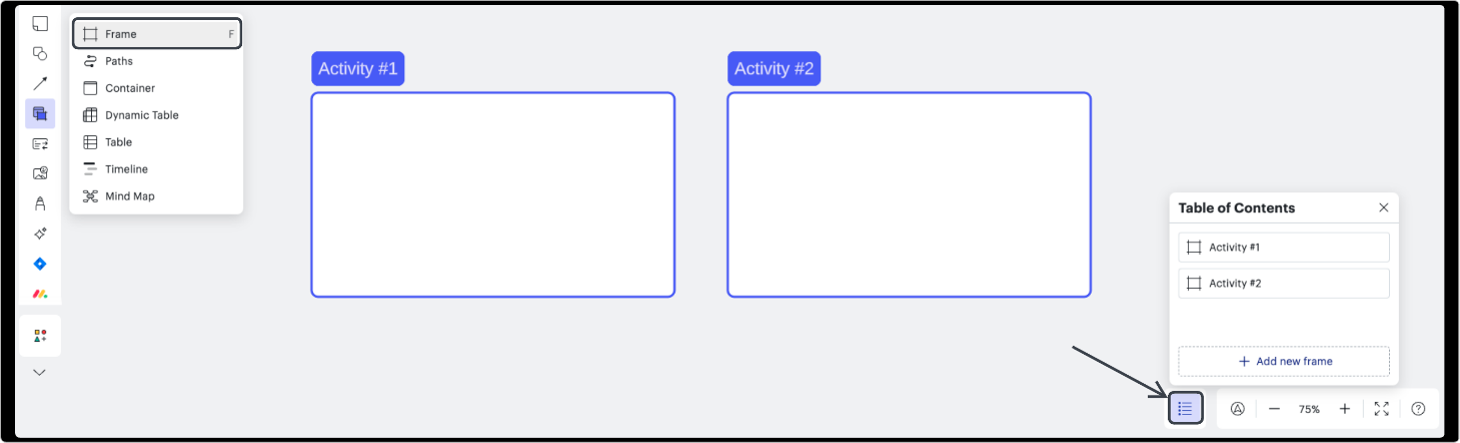
- Start by dragging a frame onto the board, name the frame, and use the table of contents to navigate between multiple activities on the board easily.
Breakout Boards
As the instructor, you can create breakout boards to facilitate small-group collaboration. You can add up to 50 separate workspaces connected to the main board, streamlining access, organization, and the feedback process.
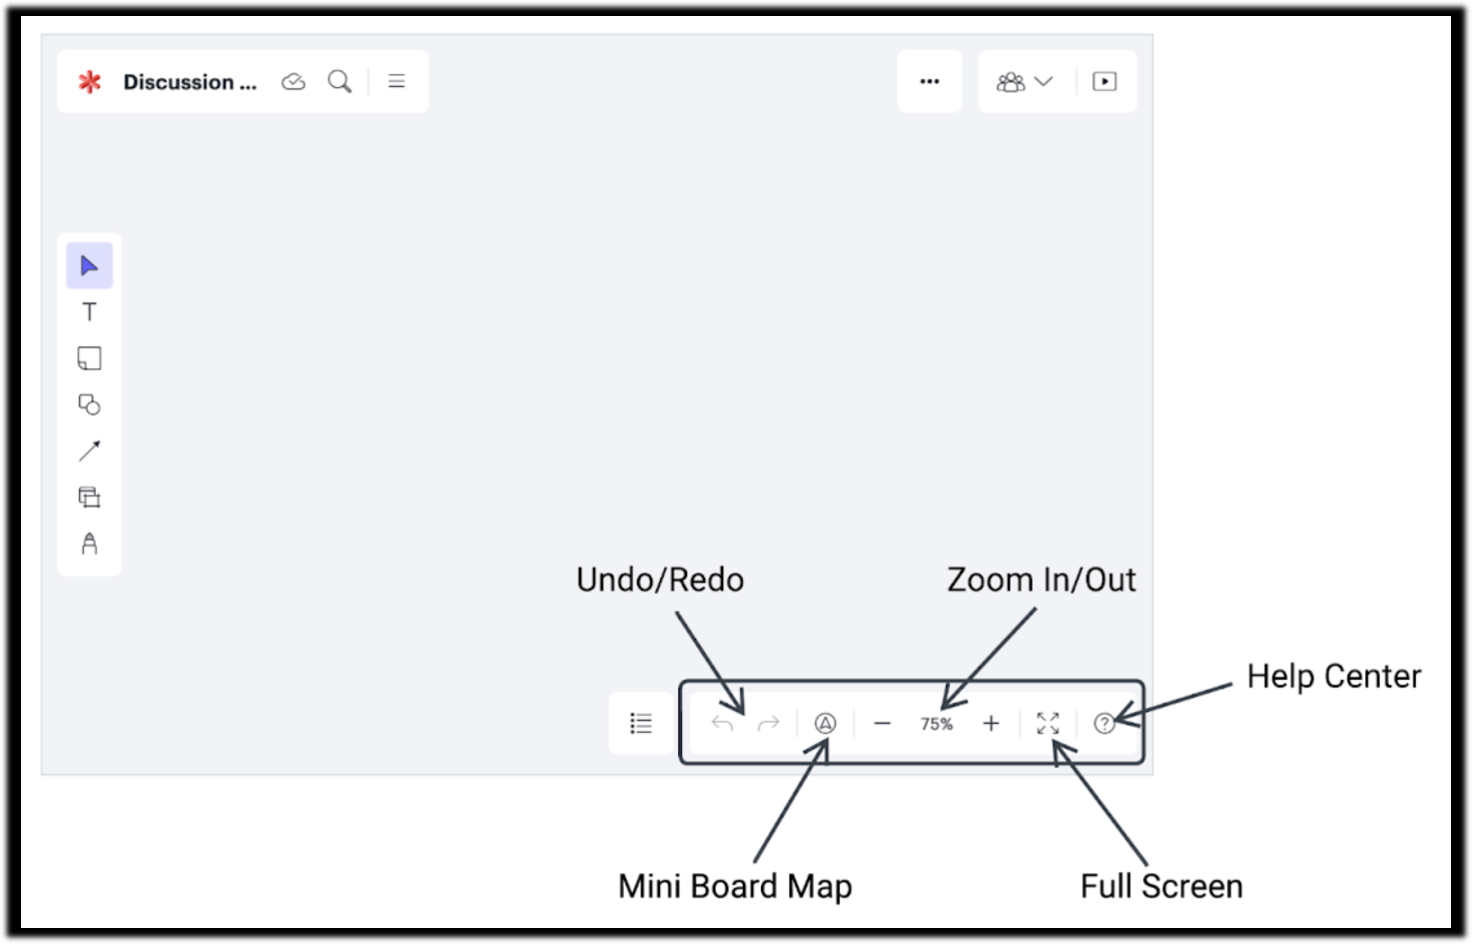
Navigation Toolbar
Collaboration Controls
Instructors should configure the board settings and designate themselves as the facilitator before publishing the activity for students in Canvas.
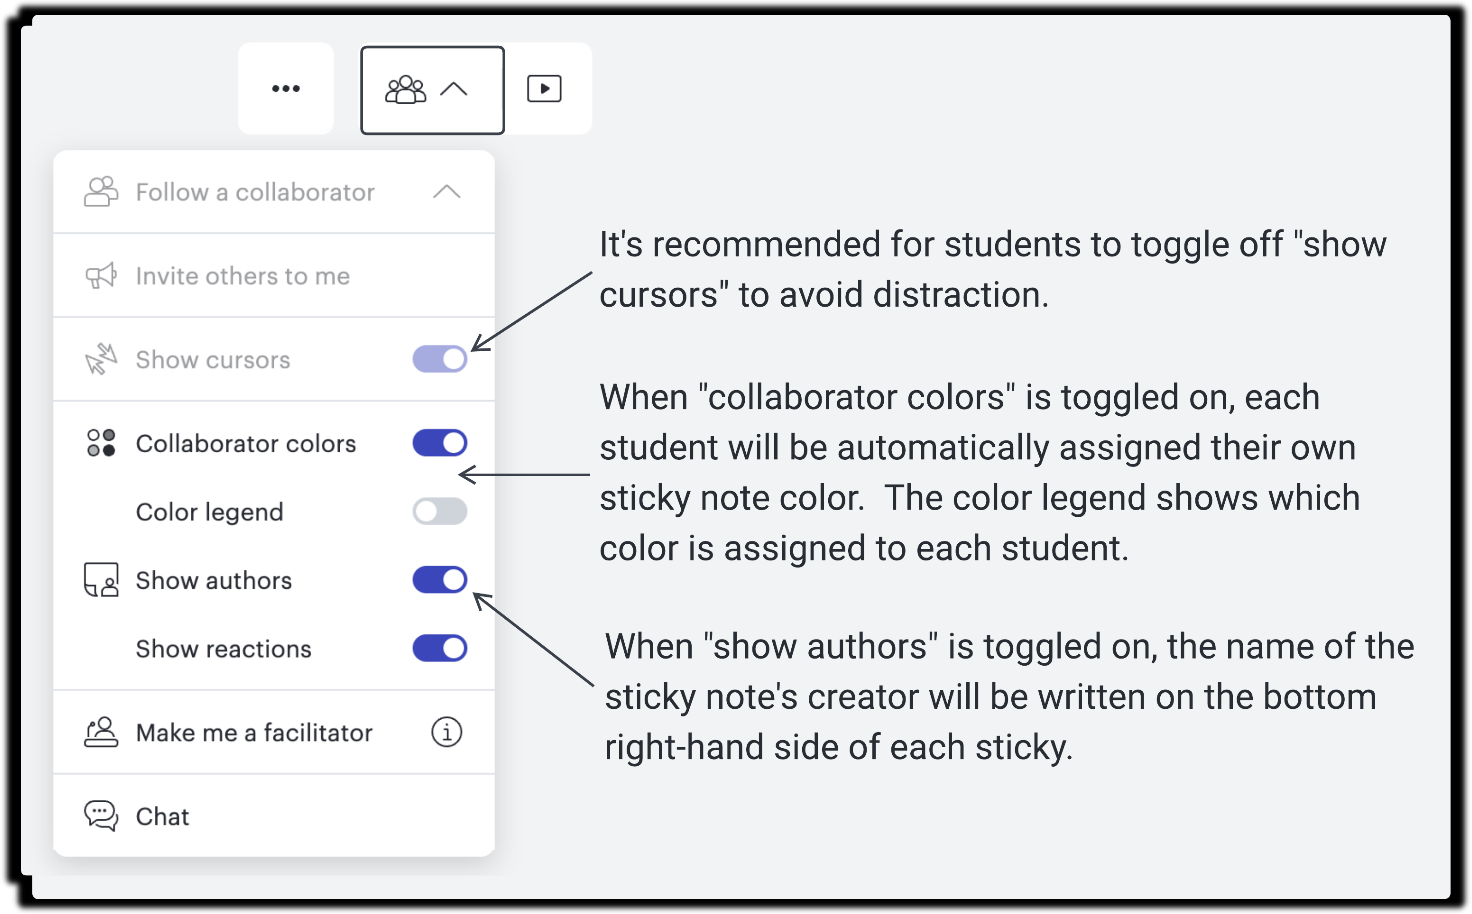
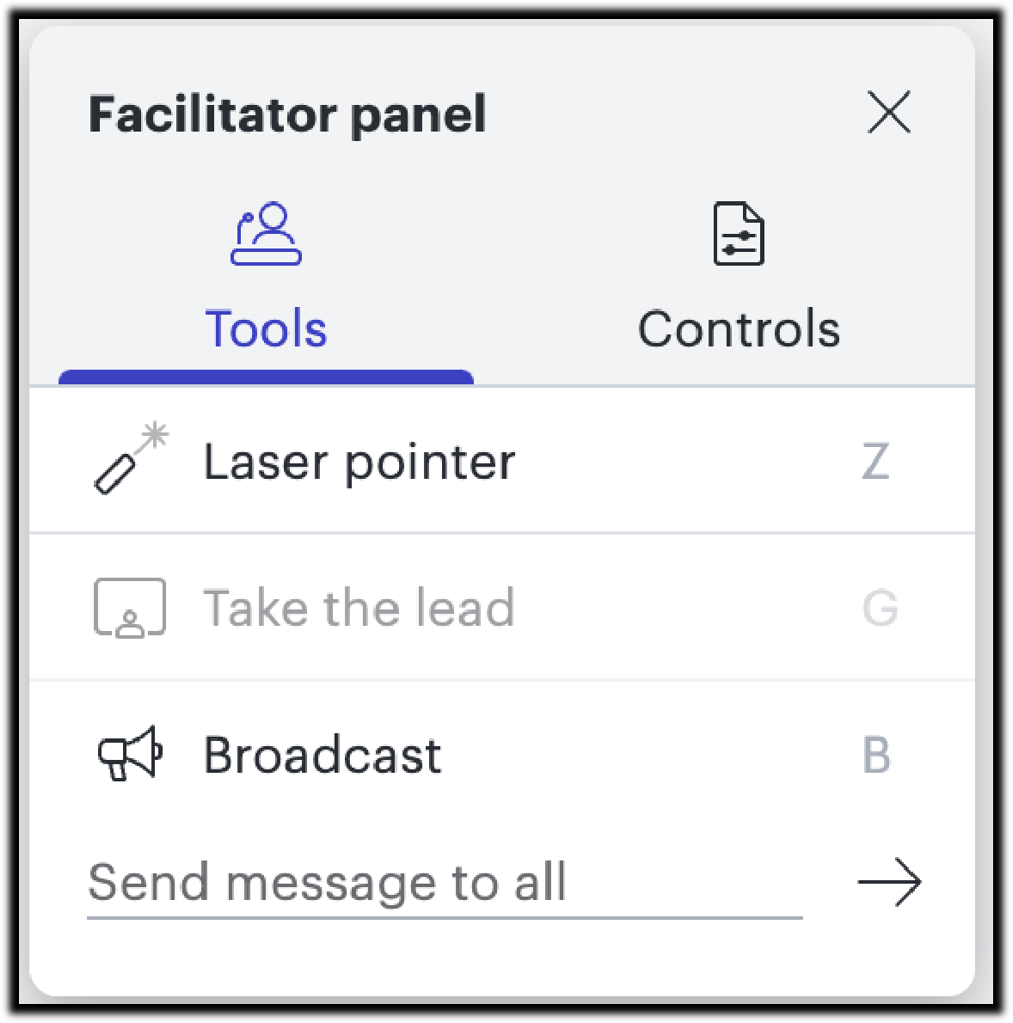
Once instructors designate themselves as the facilitator, they gain additional controls over the board. It is recommended to enable all facilitator controls, ensuring that only the instructor has access to these tools.

During a live collaboration session, facilitators can use:
- Laser Pointer: Highlight sections of the board.
- “Take the Lead”: Pull students to their view on the board.
- Broadcast Messages: Send written messages to the entire class.
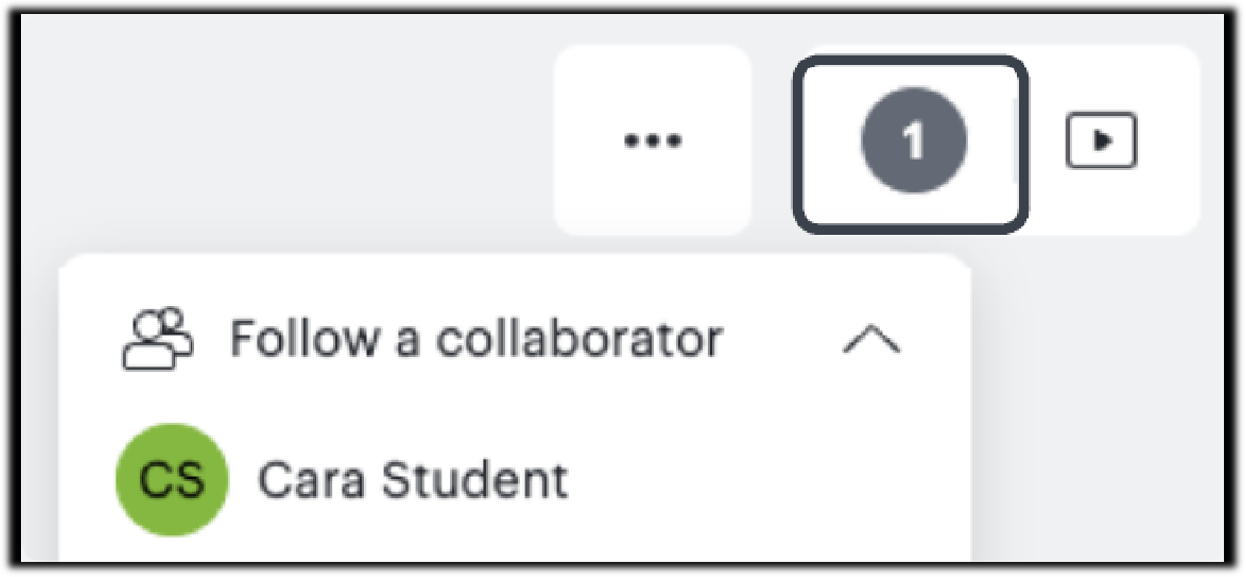
As students begin to join the board, the icon in the upper right corner will display the number of active collaborators. Instructors can monitor each student's contributions in real-time by selecting their name from the list.
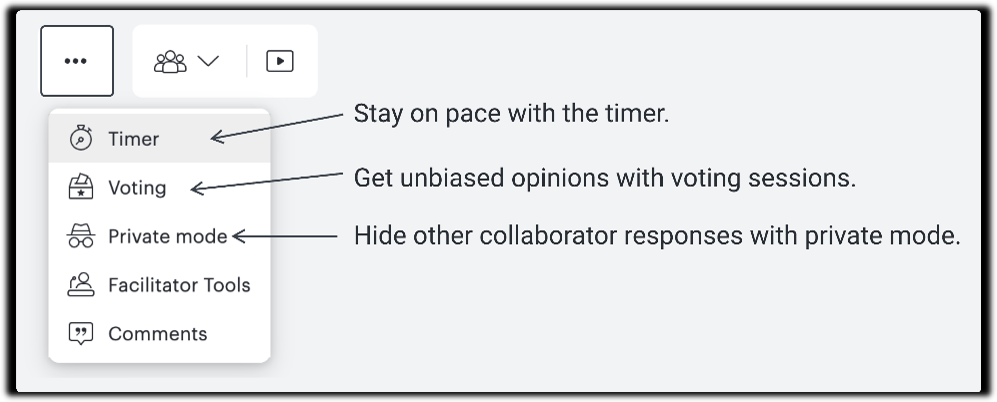
Access additional features to enhance collaboration: Timer, Voting, and Private mode
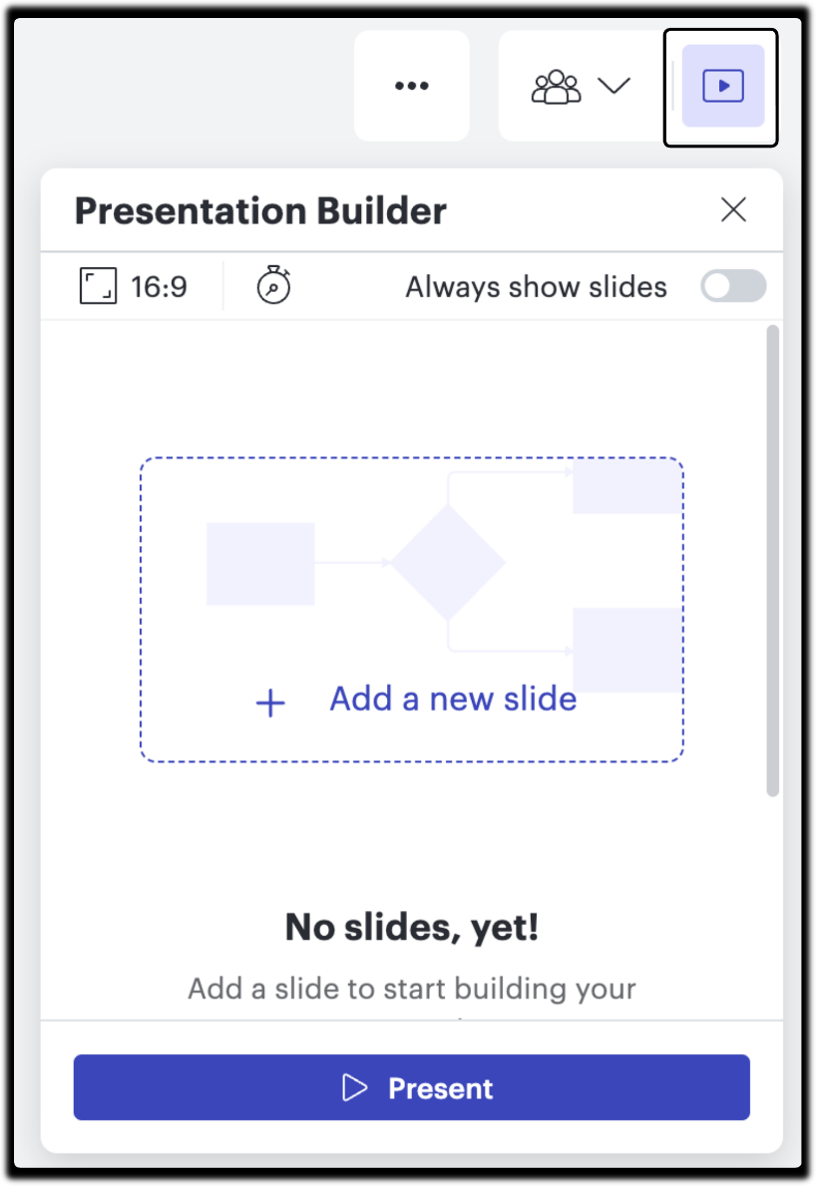
Create presentations to share content with students easily.
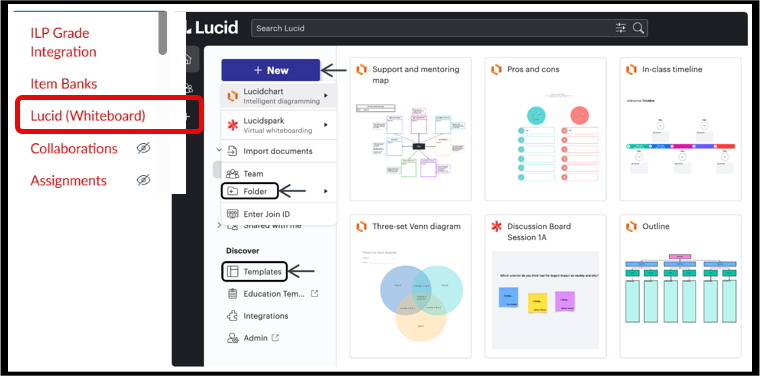
Your Lucid home page
Access your Lucid home page using the Lucid shortcut icon in your Canvas course navigation toolbar. Here, you can create new Lucid documents, view all your saved documents, organize them into folders, and browse through hundreds of ready-to-use templates.
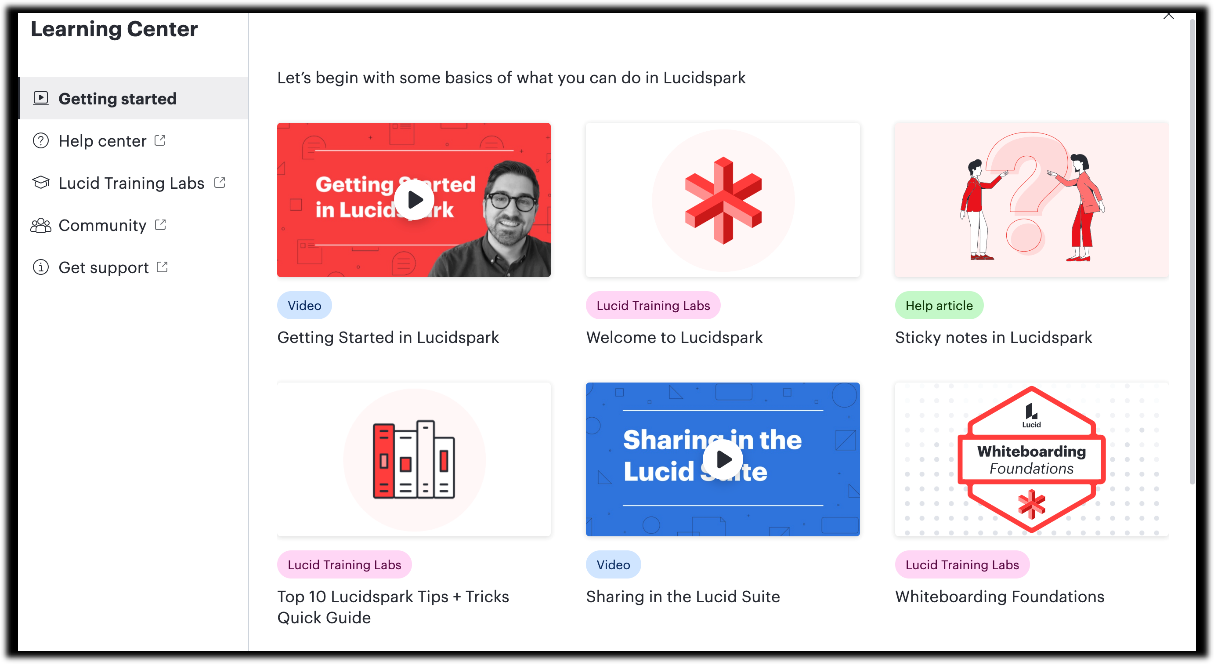
Lucid’s Learning Center
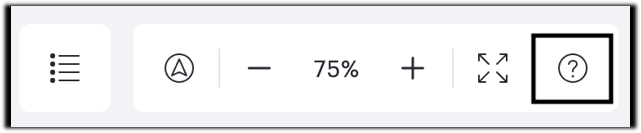
Click the question mark in the navigation toolbar to access a range of support materials to help you learn more about Lucid.
Create a Group Assignment in Lucid
Although Canvas doesn’t offer a Lucid-specific submission type for group assignments, you can easily set up a collaborative Lucid project with just a few steps.
For teachers: Setting up the group assignment
- Create a force-copy link: Start by setting up a force-copy link for the Lucid template(s) you want students to use for their group project.
- Create the assignment in Canvas: Set up a new assignment in Canvas as usual.
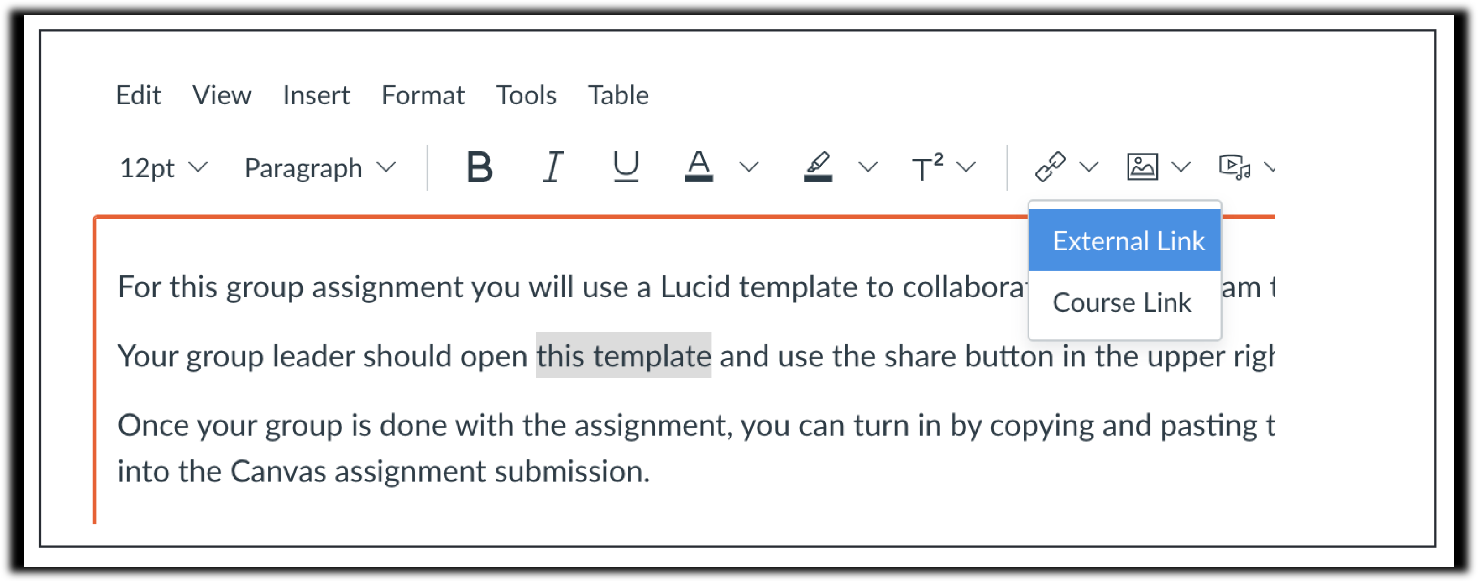
- Add instructions and link: In the Canvas Rich Content Editor, provide instructions for the assignment and insert the force-copy link to the Lucid template. This ensures that each group has their own document.
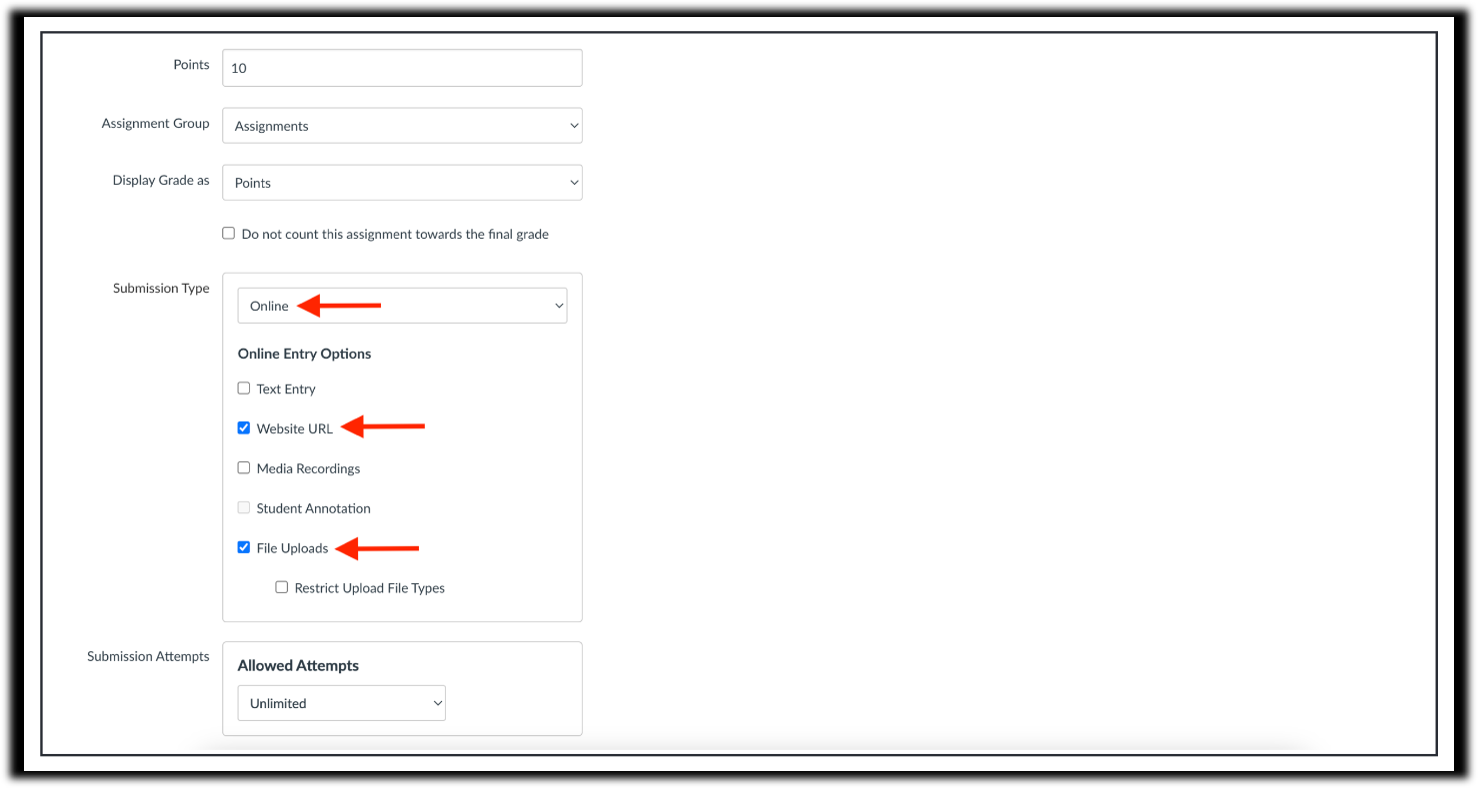
- Select submission type: Set the Submission Type to "Online: Website URL" and/or "File Upload" so students can submit either a link or a PDF version of their work.
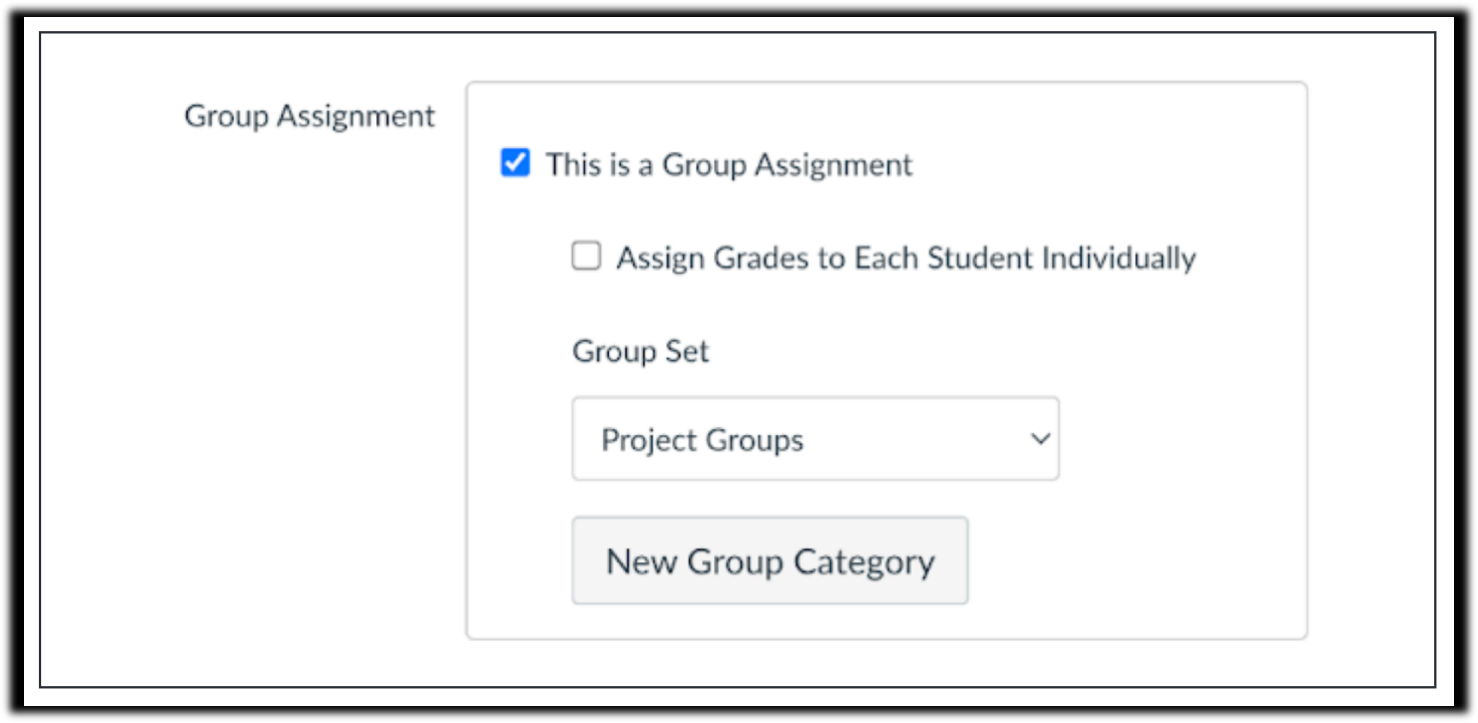
- Choose the group set: Under group assignment settings, select the group set you’d like to use.
- Save and publish: Once everything is set up, save and publish the assignment to make it available to students.
For students: Accessing, collaborating, and submitting
- Access the template: One member from each group should click on the force-copy link provided by the instructor to open a new copy of the Lucid template for their group.
- Share the document: Using the "Share" button in the upper right corner, this student can invite other group members to join and collaborate in real time on the document.
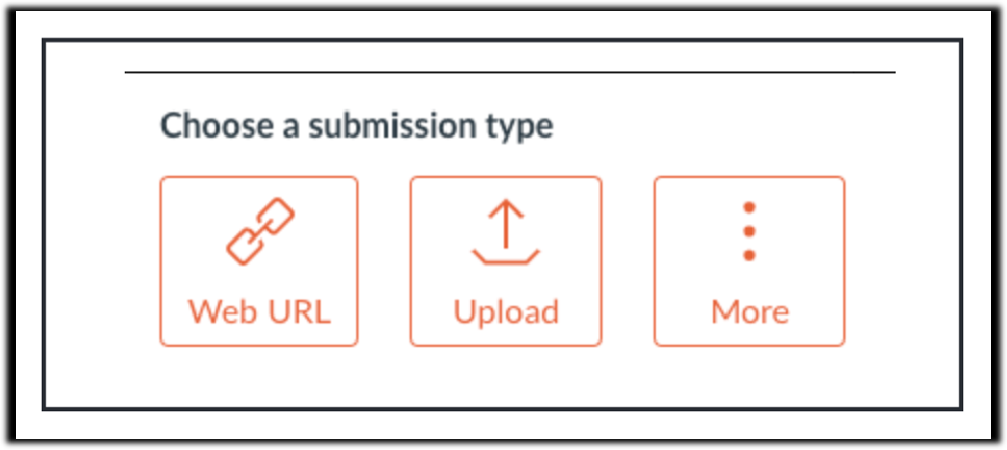
- Submit the assignment: When the group is ready to submit, they have two options:
- URL submission: Copy the Lucid share link and submit it in Canvas as a URL. (Note: When grading, instructors will need to click "view in a new tab" in Speed Grader to open the link.)
- File upload submission: Export the Lucid document as a PDF (File → Export as PDF) and upload it to Canvas as a file submission
With these steps, you can transform your Canvas assignments into dynamic, collaborative experiences that help students build teamwork and creativity skills using Lucid.
For a visual guide, check out the how-to video!
RaiderCanvas Support
-
Phone
806-742-5944 -
Email
online@ttu.edu