Recording Videos and Presentations with Loom: Step-by-Step Guide
How to Sign Up and Use Loom
Although fancy recording software can meet your needs, Loom offers an easy and free way to record videos and screen recordings with the click of a button. There is no need to purchase expensive software thanks to Loom. The Loom application works with your built-in microphone and webcam to make recording videos simple and pain-free.
You can use Loom to record the content on your computer screen along with footage of yourself narrating. Or choose to just record yourself with the camera-only mode. In the step-by-step guide below, we will show you how to utilize Loom for your next guest speaker video, screen recording, or lecture.
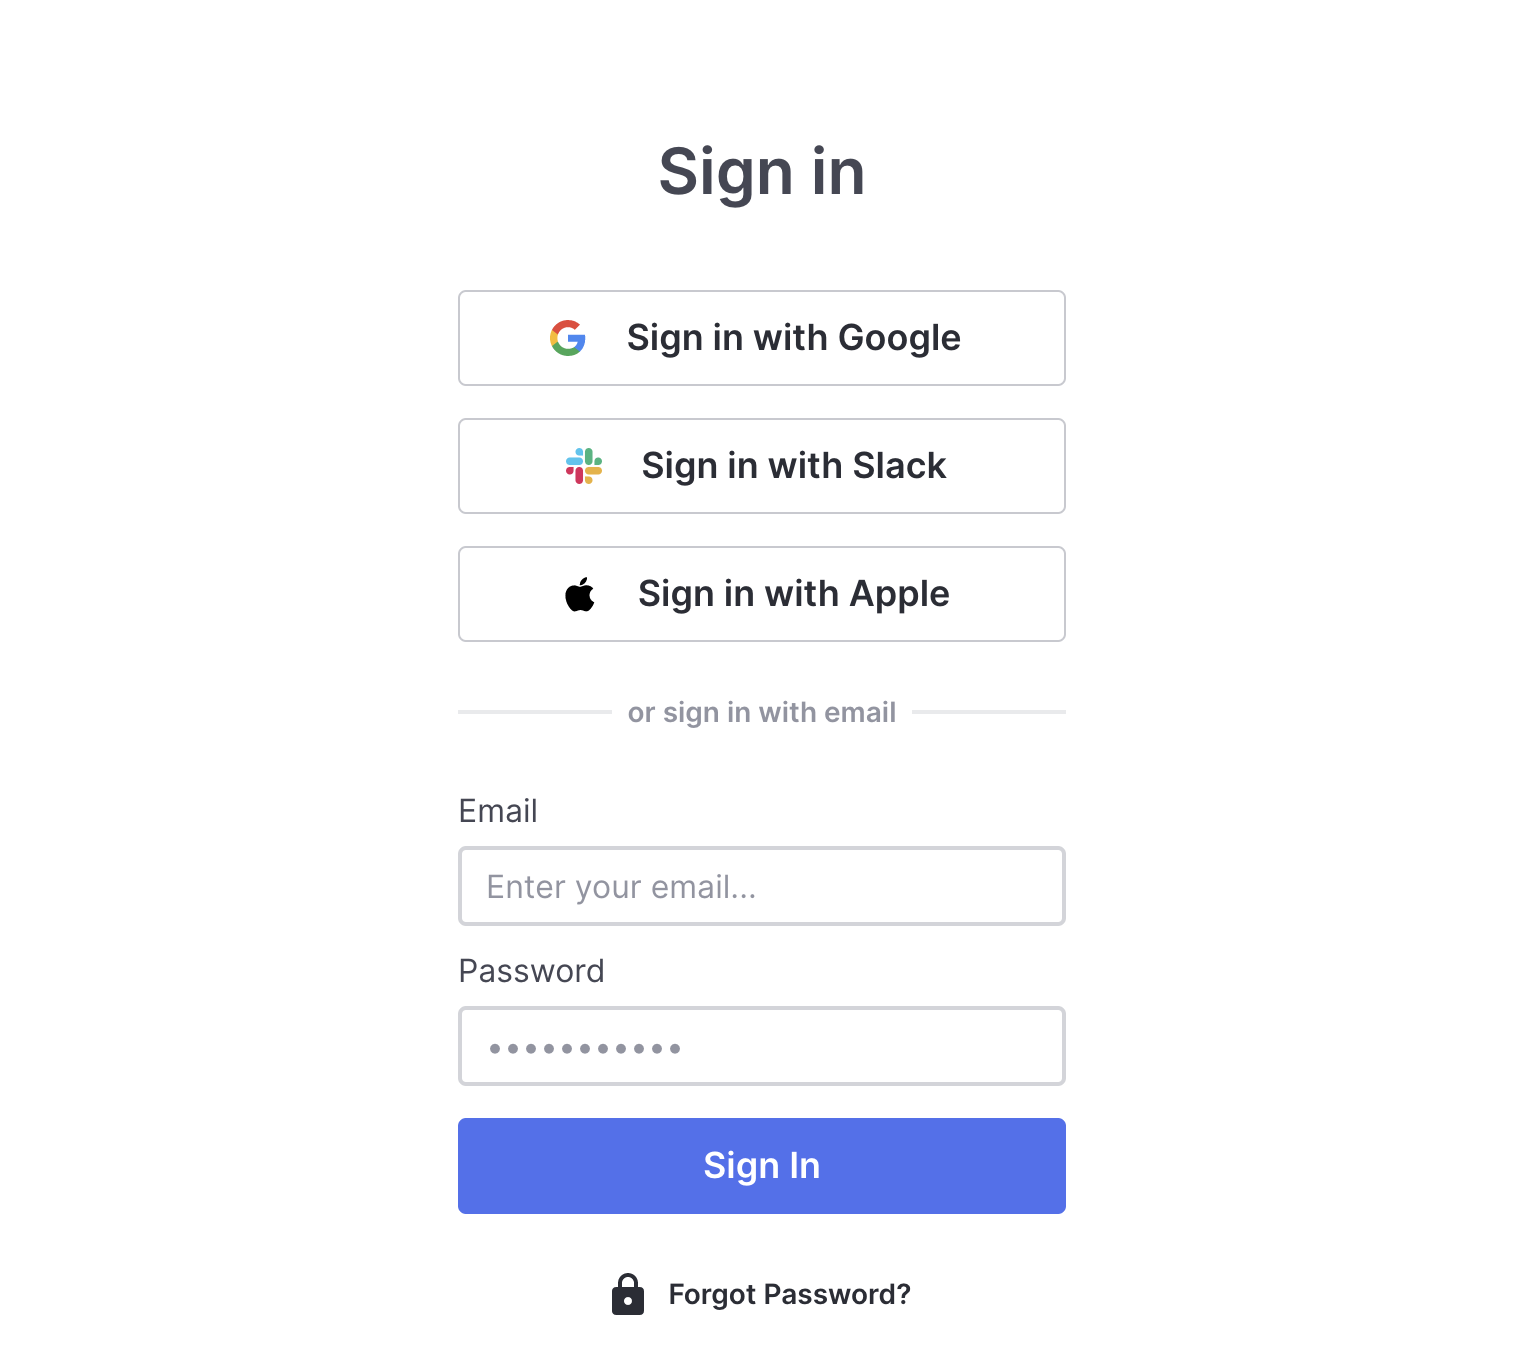
New users can sign up by using an email and creating a custom password. We suggest using your TTU email if you will be using Loom for educational and/or work needs. If you sign up using a .edu email, you will get a free Pro account upgrade! Note: You will need to create a password specifically for Loom (not your TTU account password). To be able to access the program, ensure that you have completed registering your account.
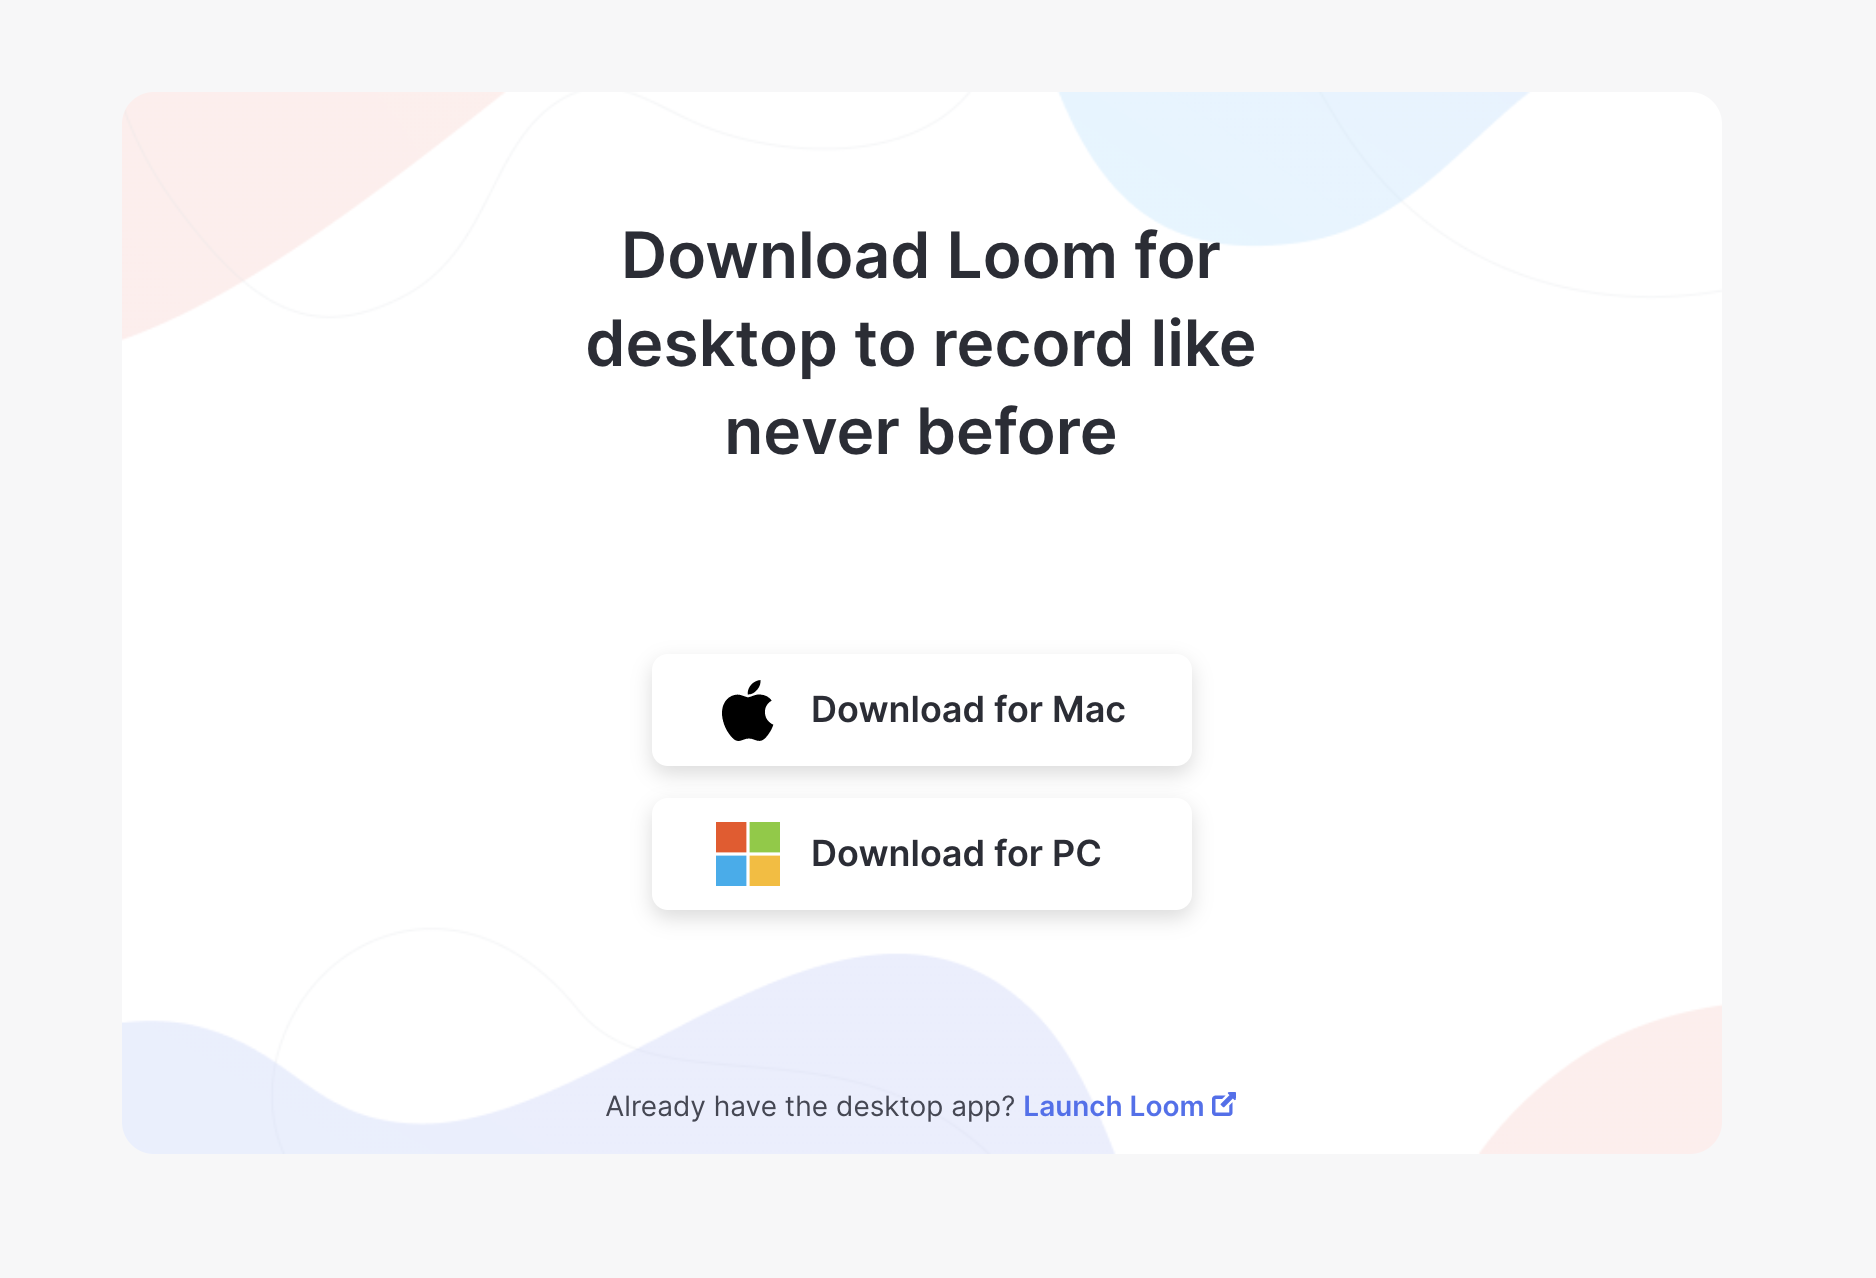
After you have successfully signed in and created an account, you can download the Loom desktop app or utilize Loom in your Chrome internet browser. You can use Loom on both Windows and Mac devices, as well as devices running iOS. The two main ways of using Loom involve either the Desktop Client Application (this is a separate app on your computer) or the Google Chrome Extension (this is attached to your internet browser).
If you want to use the Google Chrome Extension, you will need to download the Google Chrome browser first. There are no real disadvantages when it comes to one version or the other; it primarily comes down to personal taste. In either case, you can record videos with ease.
How to Use the Loom Desktop Client App
After you have downloaded the app to your computer, you will need to search for Loom in the Windows search bar and click the red pinwheel Loom logo to open it. On a Mac, navigate to the finder and click on applications. Then double click on the Loom application. Once the app is open, you will be able to select the type of video recording that you want to create.
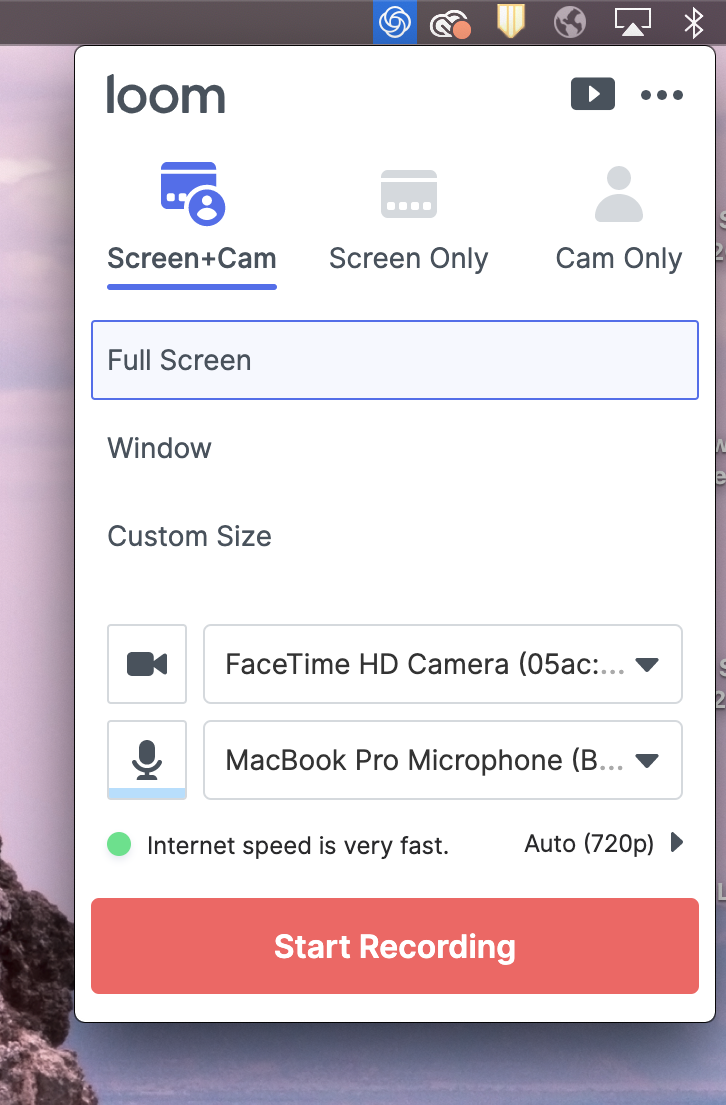
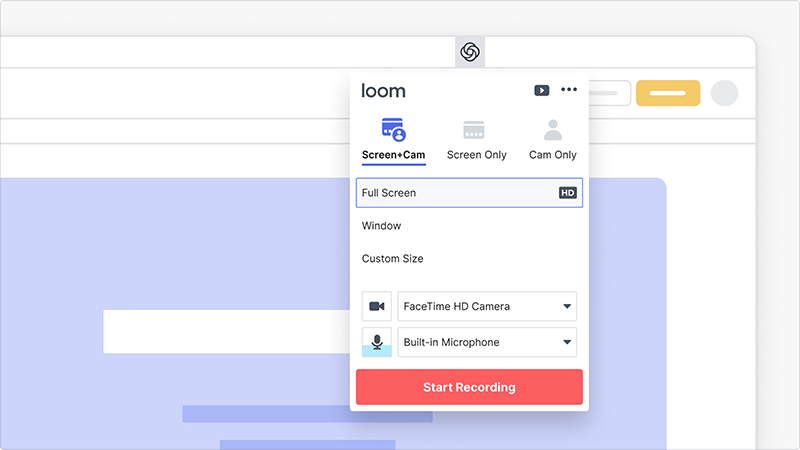
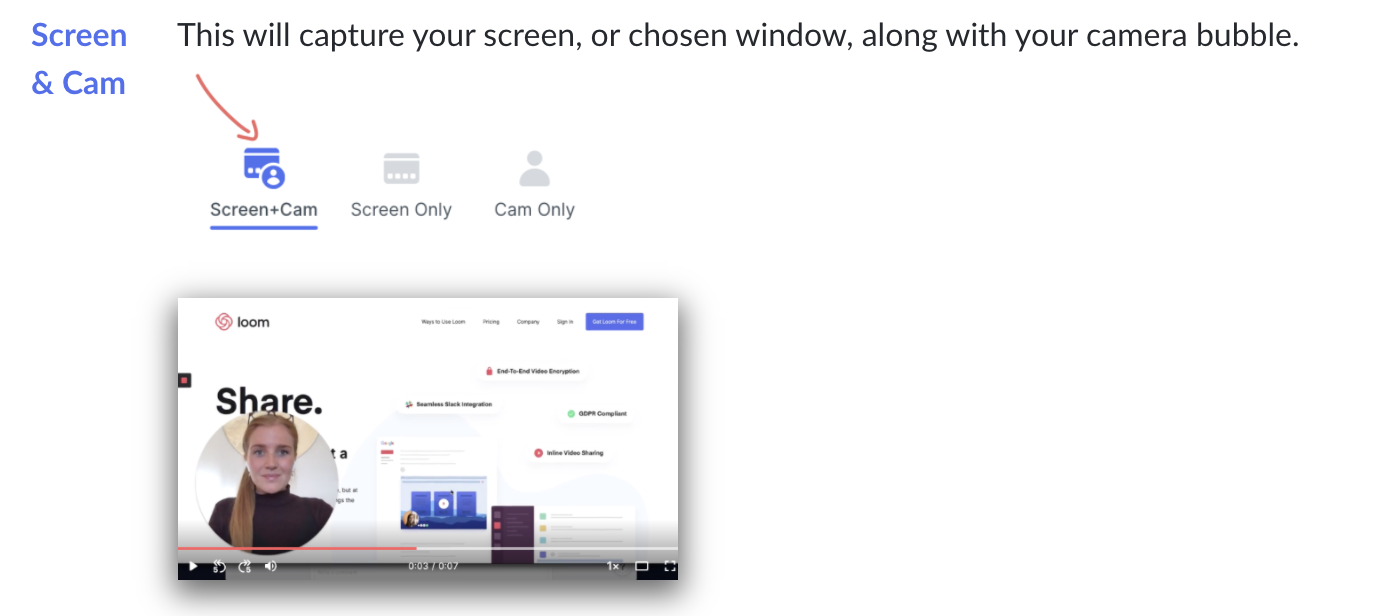
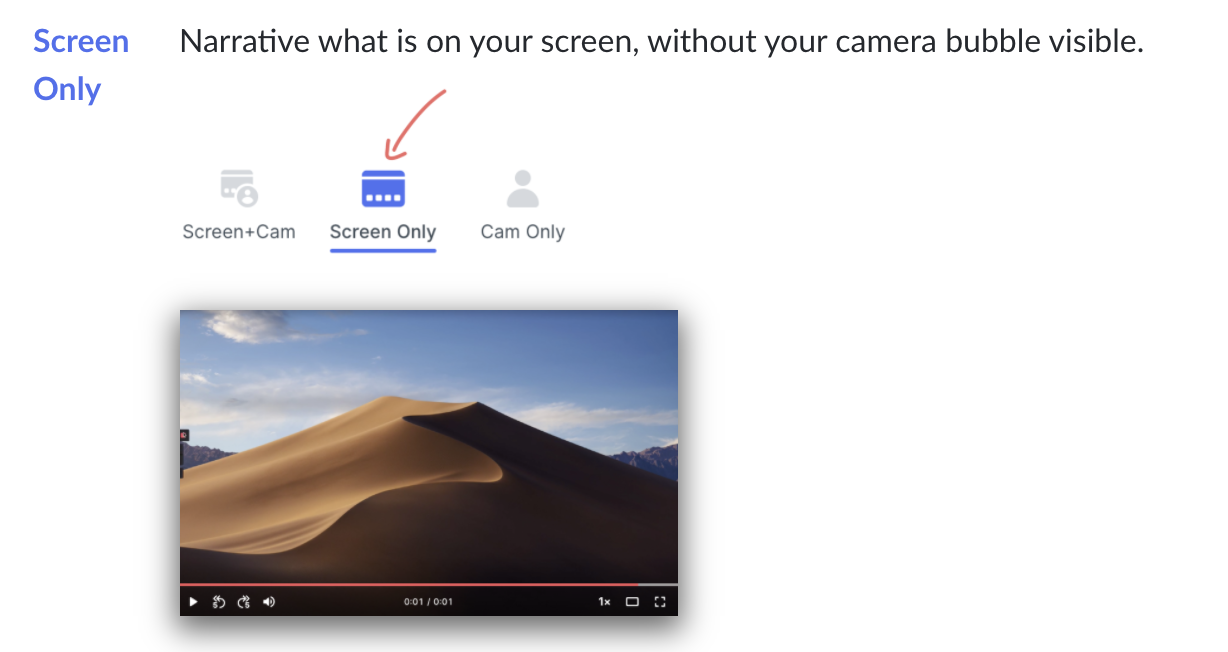
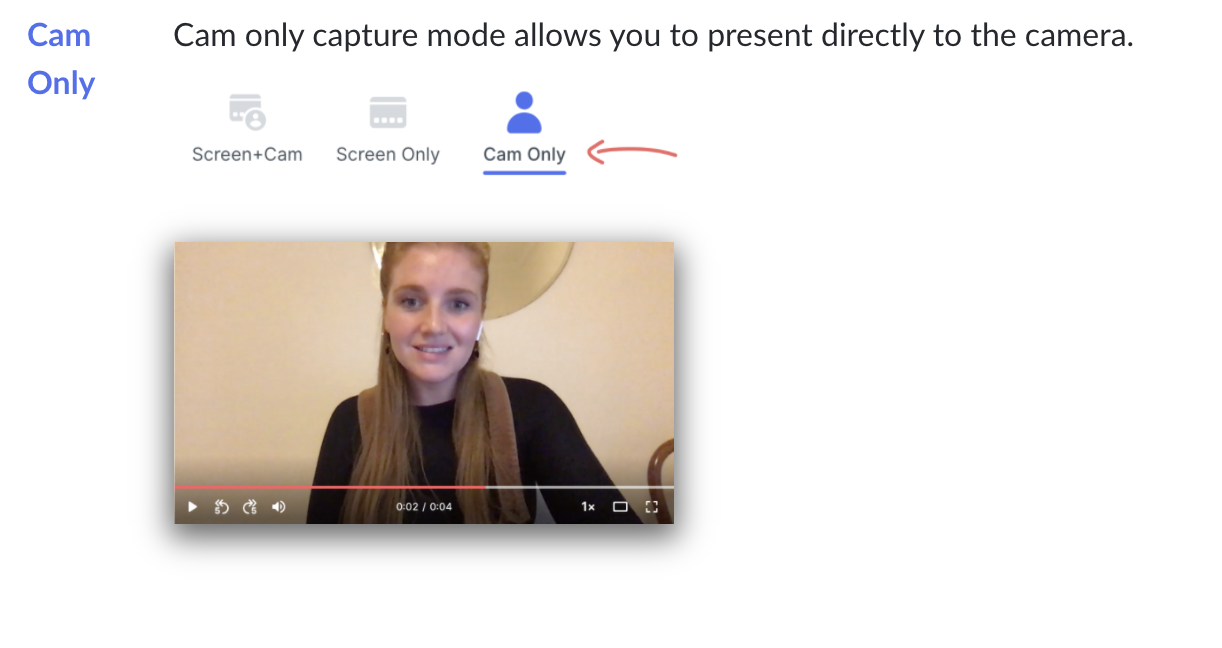
The three available options for the basic version of Loom are Screen + Cam, Screen Only, and Cam Only. As the names of the options imply, Cam Only and Screen Only allow you to record either the content on your screen or yourself via a webcam. Screen + Cam will enable you to tape both yourself and the content so others can see you narrating your presentation being recorded in real-time. You will also need to select your camera and microphone sources at the bottom of your Loom window. This is shown next to the video camera and mic icons, just above the start recording button.
Below the recording options, you can choose how much of your screen to record by choosing between Fullscreen, Window, and Custom Size. Full Screen records everything that is on your monitor or display so people can see every mouse click and follow along on their own computers. If you are trying to create a more limited tutorial that cuts out any distractions, you can make use of the Window option to make a recording of a single computer application. Custom Size is only available to users who have upgraded to a Pro account, and it allows them to create custom windows to record specific portions of their computer screen.
How to record videos with the Loom Google Chrome Extension
In order to use the Loom Google Chrome Extension, you just have to download it from the Chrome Web Store and install it. Once you do so, you can activate the extension by clicking on the red pinwheel Loom logo in the upper right corner of the browser and load its user interface. To record your video, the interface works much like the desktop app.

How to Start Recording Your Video
Once you have finished finalizing your options, you can begin recording your video. Simply press the Start Recording button. You will get a short countdown and then your recording session will begin. When the recording begins, a red "recording" button will appear on the left-hand side of your screen. If you hover on it, it will expand down vertically to reveal a few more control buttons:
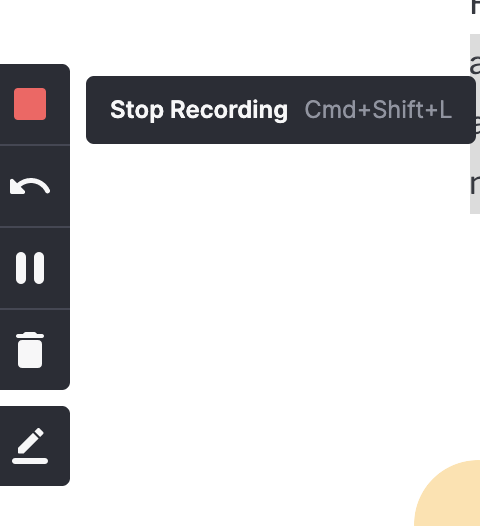
- Stop Recording button
- The recording button has two functions. It indicates that you are recording when it is red and also when pressed while recording, ends the recording.
- Restart button
- The restart button will restart your recording over.
- Pause button
- The pause button pauses the video. You can also pause the video by pressing the following keyboard shortcuts: option/alt, shift, P
- Delete button
- The delete button, indicated as a garbage can, stops the recording and deletes the video.
- Drawing button
- Draw on the screen during your recording. Only available for Pro accounts.
Where to Find Your Recorded Videos
If you are wondering where to find the video you just recorded, you will navigate to your My Videos Library on Loom.com. Your My Videos library is where all your Loom videos and folders live. Once you finish recording, your video will automatically process and appear in your video library. You can create folders to organize your videos and star them for quick access.
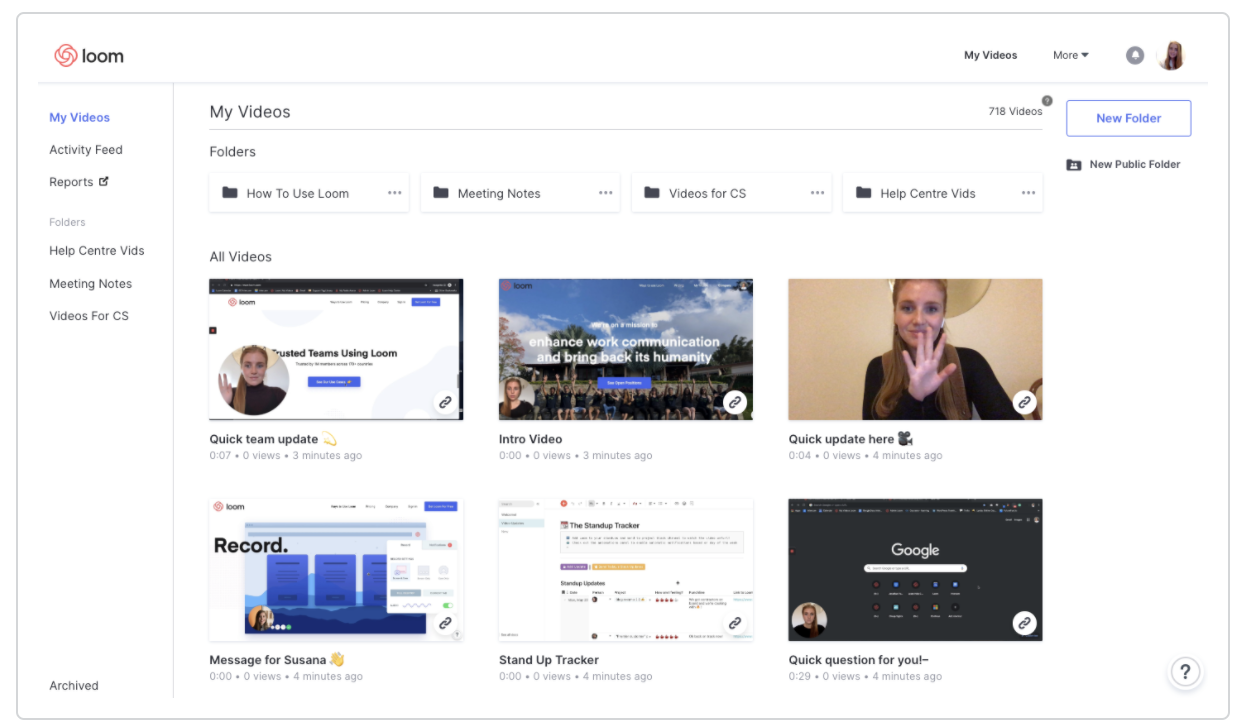
The My Videos library is divided into three main sections:
- All Files: where you can manage your Folders and Loom Videos.
- Left Sidebar: where you can quickly access Starred items and Archived videos.
- Top Navigation Bar: where you can access your account settings and other Loom pages (Use cases, Help Center, Careers, Loom Blog).
Video Folders
- Folders allow you to neatly organize your Loom videos from your My Videos library.
- You can move, star, and rename your folders. Just keep in mind that your videos will populate in chronological order within their respective folders.
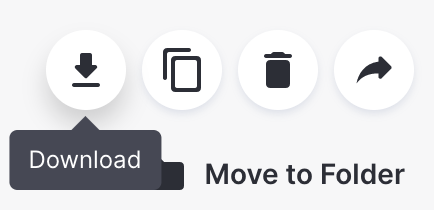
How to Download or Share Your Video
Once you are in the My Video library, click on the video you want to download or share. Once that is opened, you will see a share video link option to the right of your video.
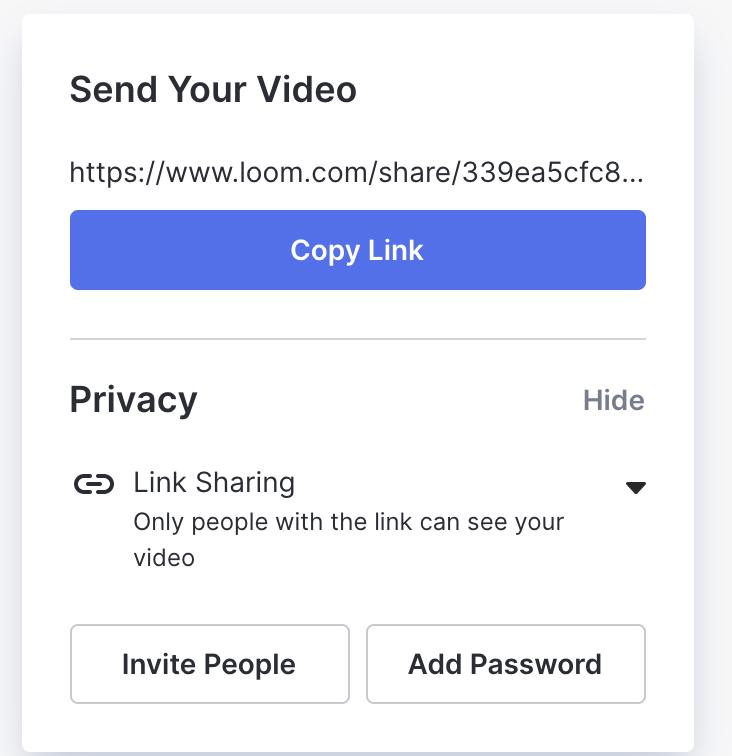
Just below the video is an underlined arrow, which will start your video download.