Step-by-step tutorial for adding a registration page for your event or Zoom meeting
Sign In to Your TTU Zoom Account
You will need to log in to your online Texas Tech University Zoom account at Zoom.com. If you still need to request a pro account, please contact Human Sciences Technology Services to request joining the college's pro license. After you have successfully signed
in, you will need to navigate to your meetings tab.
Setting Up Zoom Registration Page
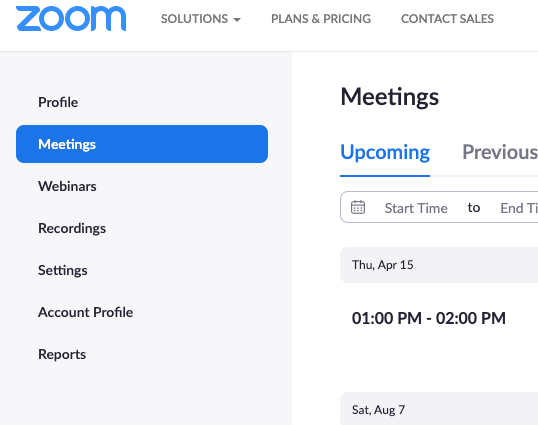
Once you've signed in, click on My Account. On the far left tab of your Zoom account,
choose "Meetings." Then find and click on the meeting you want to add the registration
page to.
Adding Registration Page to Zoom Meeting
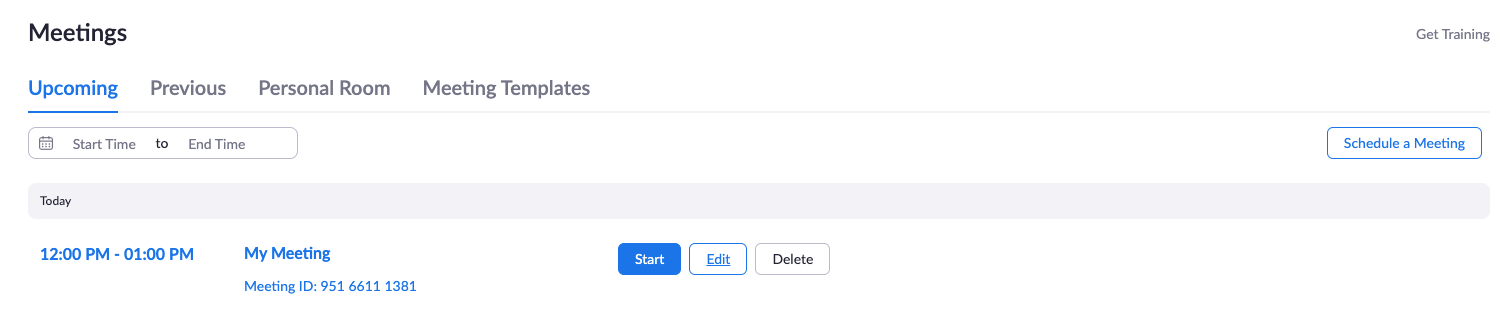
Schedule a new meeting or edit an existing meeting. If you are adding the registration page to a meeting that you've already created, click the edit button located next to the blue start button. If you are creating a new meeting, you will click the top right "schedule a new meeting" option.
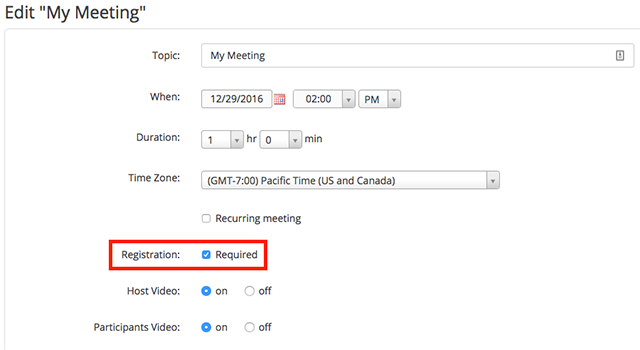
Once you've clicked "edit" for your meeting, scroll down until you see the registration
requirement. In the registration section, you will need to select the required check box. Then scroll to the very bottom and save your meeting. You've now created the registration
page, but we have a few more steps to complete in order to customize the registration
page to your event.
Registration Page Link (URL)
Looking for your registration page link? This link is different from the Zoom meeting link. This is the link you want to send to anyone that you want to register for the meeting. After checking the registration required check box, save your meeting. The registration link will appear below the meeting ID.

Registration Settings
Double-check the registration settings to see if you need to change anything such as the approval settings, notifications, or other options. We recommend automatically approving those who request to join the meeting. If you want to close the registration option after the event date, you can do so in this window.
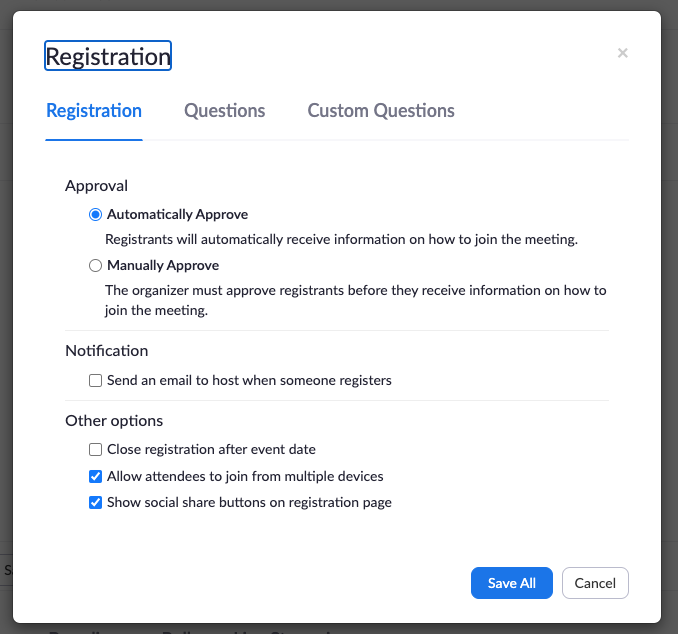
- Automatic Approval: Anyone who signs up will receive information on how to join.
- Manual Approval: Anyone who signs up will need to be approved by the host on the meeting management page.
- Send an email to the host when someone registers: Check this option if you want to receive an email each time someone registers for your webinar. Attendees will receive an email when you approve their registration.
Adding or Changing Registration Questions:
Did you know? You can customize the question fields that appear on your registration page. This is a great way to gather additional information about your attendees for meeting follow-up emails, or other future connections.
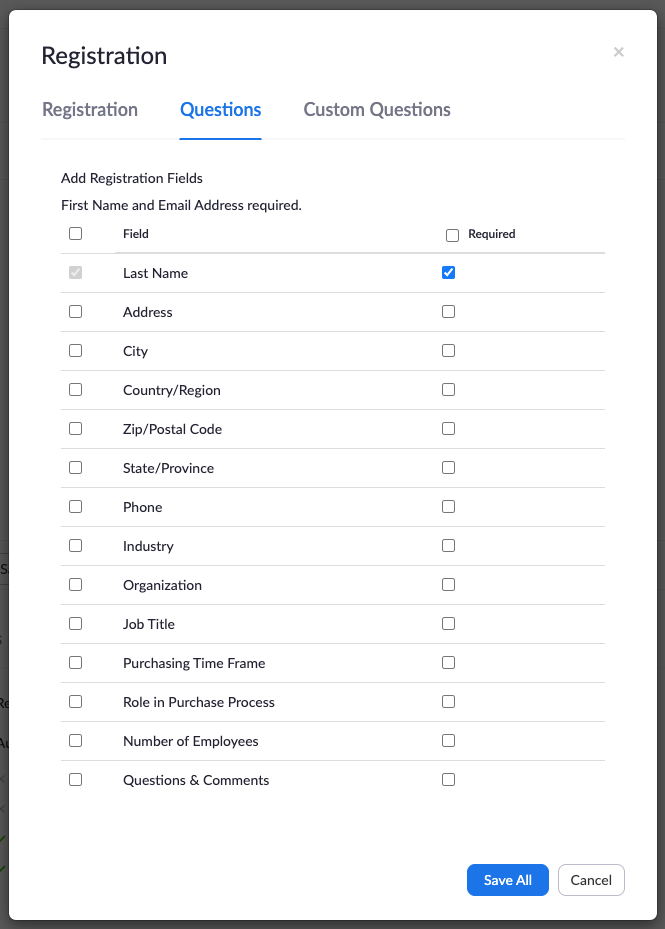
- Click the Questions tab.
- Check the Field(s) you would like to include on your registration page.
- (Optional) Check the Required box if you want to make that field required.
- Click Save All.
- Note:
- Name and email address are always required.**
Custom Questions Tab
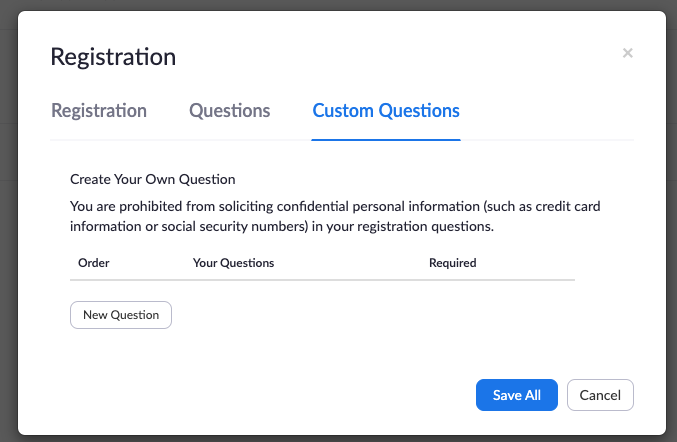
- Click the Custom Questions tab to add questions to your registration page.
- Click New Question to add a question.
- Choose the type of question: Short answer or Single answer.
- Check whether the question is required.
- Enter the question.
- For single-answer questions, enter the answer options.
- Click Create. Repeat the above steps to create more custom questions.
- Click Save All to save your customized registration.
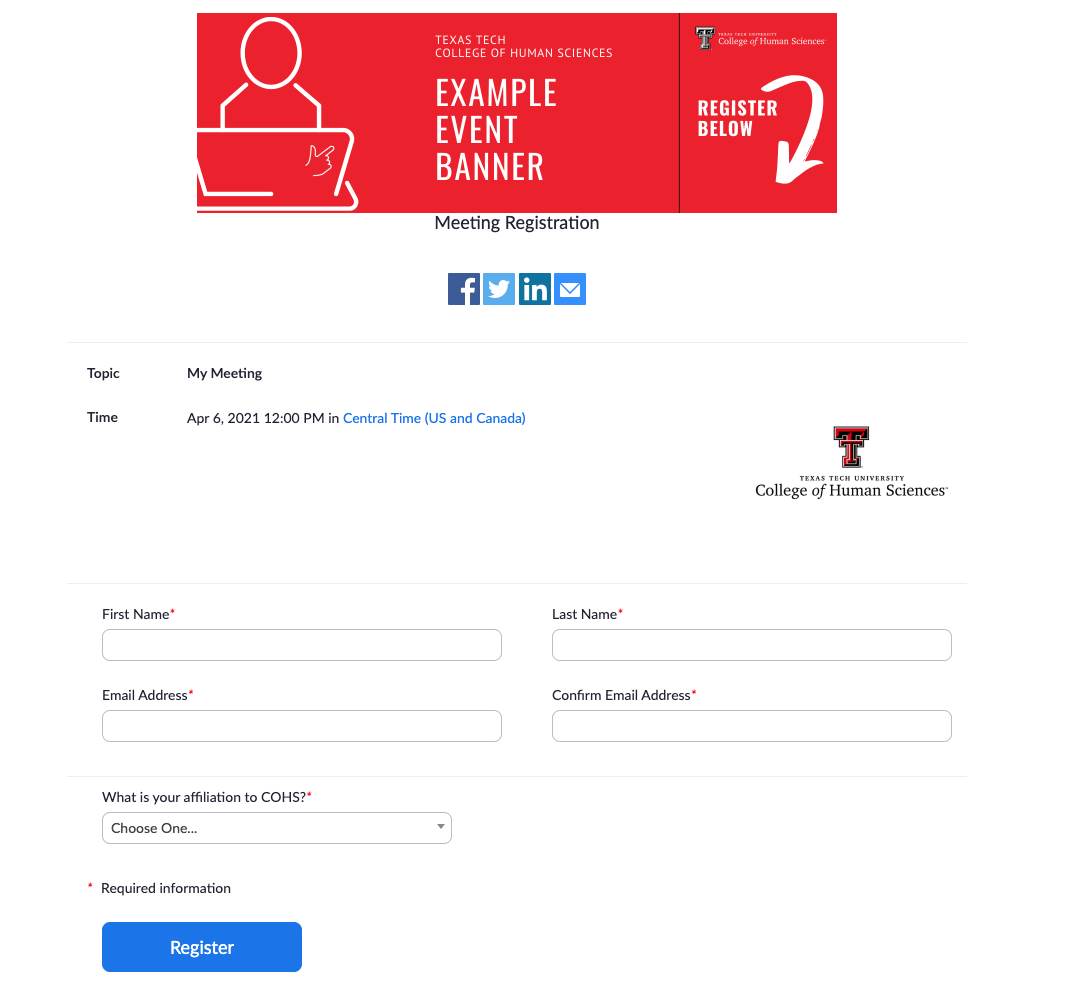
Customizing Branding
After you schedule the meeting, click the branding tab at the bottom of the page to customize branding options for your registration page. This is important to do for your meeting's registration page to show college branding and to ensure attendees that this is an official college meeting or virtual event.
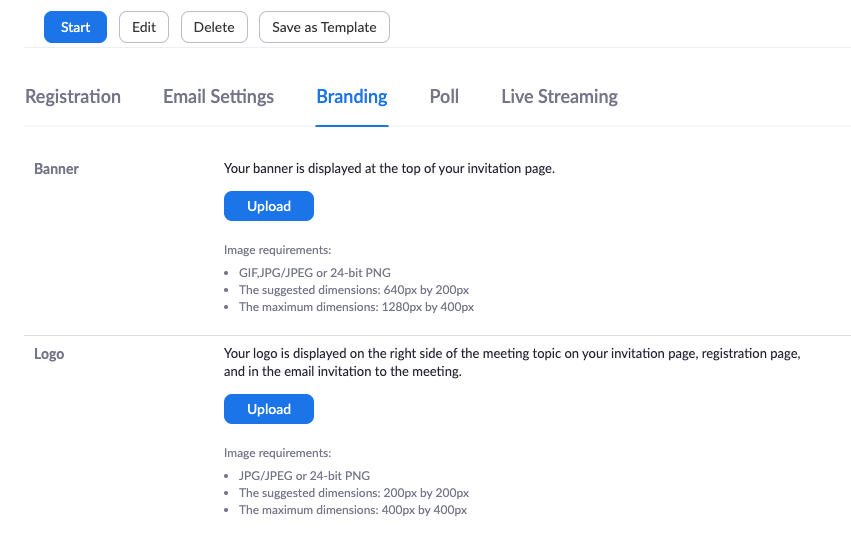
- Banner: Click Upload to add an image that appears at the top of your registration page.
- Logo: Click Upload to add an image that appears to the right of the meeting topic on your registration page. The logo also appears in the email invitation.
- (Optional) Click Add Description to add alt text to the image. The description isn't visually displayed on the screen but helps people with visual impairments to access and understand the image.
Now you're done creating your Zoom meeting registration page! It should now look similar to the below (depending on your customization).