
Jupyter Lab
The TTU HPCC Open OnDemand dashboard offers a convenient option to launch Jupyter
Lab directly within your web browser , no local installation required.
Steps to start an OOD Jupyter Lab Session
1. Navigate to the Open OnDemand Dashboard.
2. Enter your eRaider username and password to authenticate and log in to the Open
OnDemand portal.
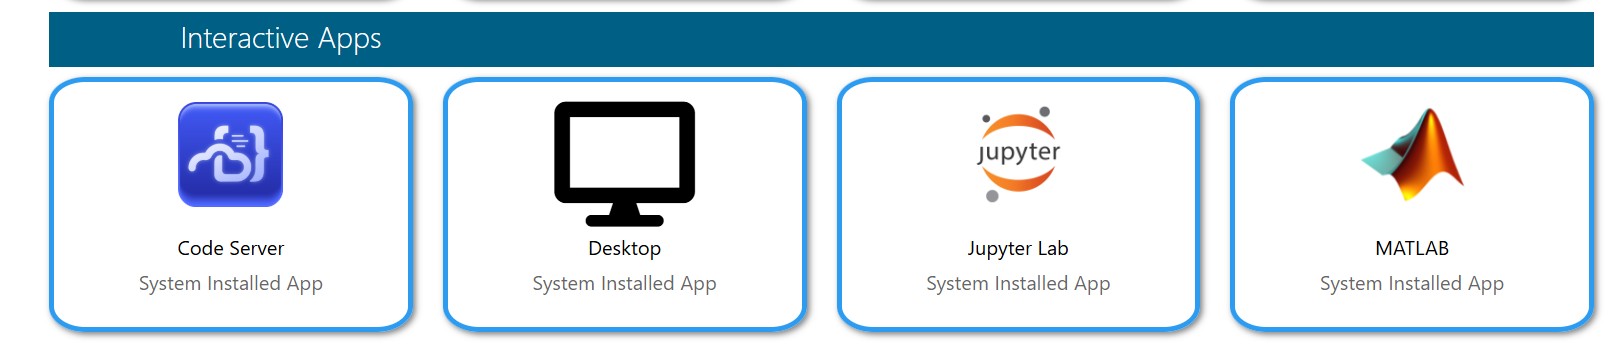
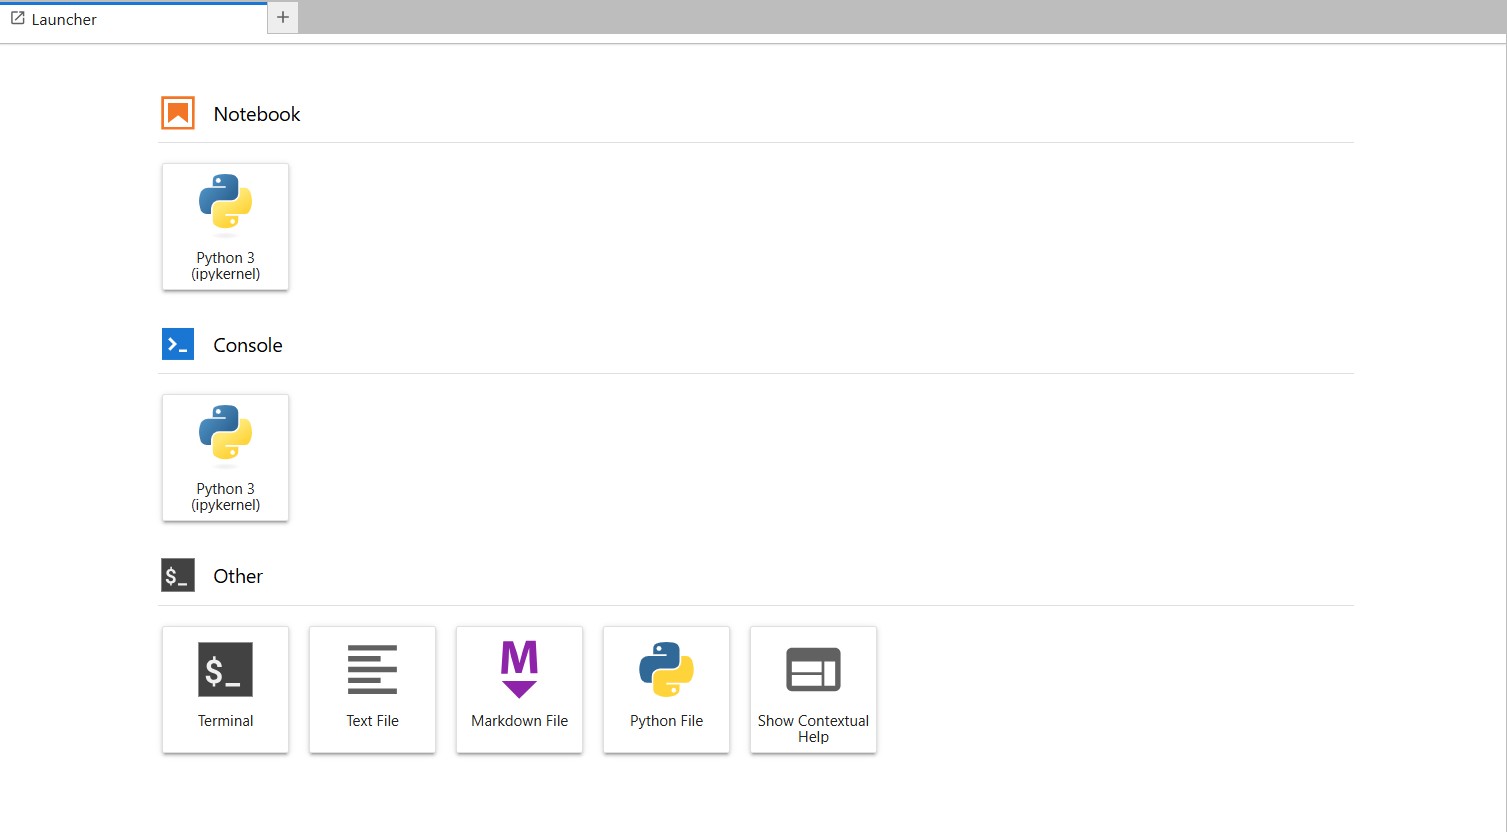
3. To open the Jupyter Lab Interactive App, you can do one of the following:
From the Interactive Apps menu, select > Jupyter Lab,
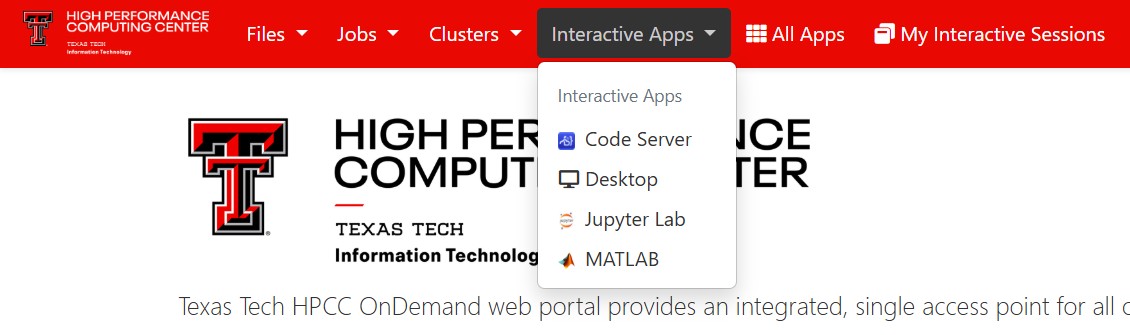
From the Pinned Apps section under Interactive Apps, choose Jupyter Lab.
4. Complete the form and select Launch to start the session.
-
- Slurm Account - Enter your HPCC Slurm account name if you are using dedicated or special resources (for example, xlquanah). Leave this field blank to use the default account
- Slurm Reservation - Enter the reservation name if one has been assigned to you otherwise, leave this field blank.
- Partition - Select a suitable partition from the dropdown menu based on your Slurm account access and job requirements.
- Number of CPU cores ( 1-10) - Select required number of CPU cores.
- Memory per CPU Core - Choose the amount of memory required. If not specified, the default memory per node will be allocated.
- Max Walltime - Specify the maximum walltime (in hours) for your session, this is the total duration your job will run before it automatically ends. Select the value based on the time you expect your job to need.
- Working Directory - Select the directory for your project. By default, it is set to your $HOME directory.
- Jupyter Modules - Select the Jupyter module version to load. The default is jupyterlab/7.0.6.
- Jupyter Extra Arguments - Enter any additional arguments for the jupyter lab command (leave blank if none).
- Other Lmod Modules - Provide a space-separated list of additional Lmod modules to load (e.g., gcc/13.2.0 cuda/12.9.0).
- Path to Conda/Miniforge Init script - Specify the path to the conda.sh file to activate a Conda or Miniforge environment.
- Conda Environment - Enter the name of the Conda environment to activate (e.g., base, myenv).
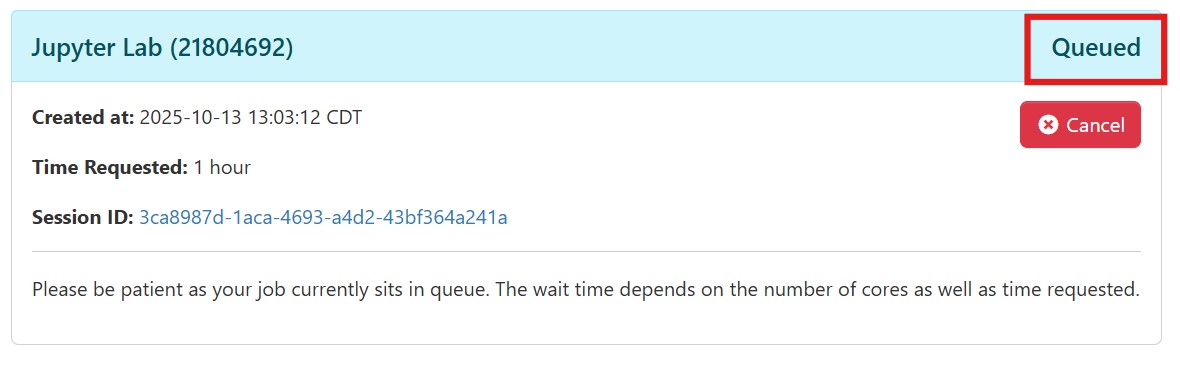
5. Once you click Launch, you will be redirected to My Interactive Sessions, where you can monitor the status of your session.
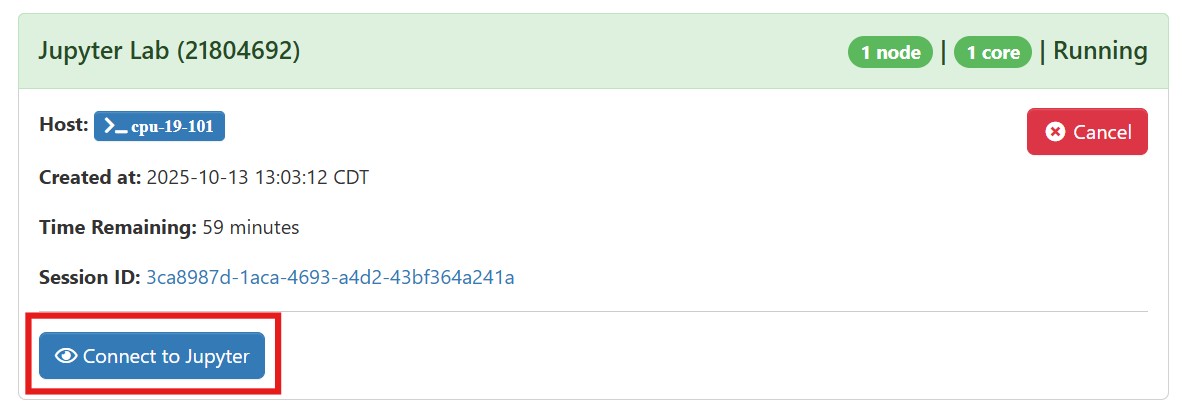
6. After your session begins, click Connect to Jupyter to open your Jupyter Lab. Please allow a few minutes for it to load.
7. You are now in your Jupyter environment
Creating Symbolic Links for Easier Directory Navigation
To navigate more easily within a Jupyter Notebook, you can create symbolic (soft)
links in your working directory (for example, your home directory if that is what
you selected when launching the notebook) that point to other storage areas. This
allows you to access those locations directly from your working directory inside the
Jupyter interface.
Open a Terminal and Navigate to your Home Directory 
pwd                 # Verify you are in your home directory
cd ~                # Navigate to your home directory (if needed)


# From within your home directory:
# Create symbolic (soft) links to scratch and work directories
ln -s /lustre/scratch/$(whoami) scratch
ln -s /lustre/work/$(whoami) work
After running these commands, the scratch and work links will appear as folders in your home directory listing within the JupyterLab interface, allowing easy navigation to those areas.

High Performance Computing Center
-
Phone
806.742.4350 -
Email
hpccsupport@ttu.edu