
Teaching Artist Corner
Teaching Artist for the Arnold Gallery
Teaching Artist Karla Man invites you to experience the artworks seen in this corner of the Arnold Gallery through looking, learning, and making. Spend time looking in the gallery, read about what you see, and do an art-making activity at home.

Listening to Existence, 2003
Pastel on paper
Listen
Read
Teaching Artist Karla Man invites you to experience the artworks seen in this corner
of the Arnold Gallery through looking, learning, and making. Spend time looking in
the gallery, read about what you see, and do an art-making activity at home.
In these artworks by three generations of Native American women artists, we can witness
a rhythm and pattern of influences that are passed down through creative expression
and intertwined with Native American culture.
Lines and Lineage, A Generational Gift
Artist Margarete Bagshaw-Tindel (1964-2015) descended from the Kiowa Tewa [ta wa]
people in Santa Clara Pueblo, New Mexico. She was the daughter of artist Helen Hardin
(1943-1984) and Pat Terrazas and the granddaughter of artist Pablita Velarde (1918-2006)
and Herbert Hardin. Both Helen and Pablita were well-known artists as Margarete
grew up. Desiring to make her own way in the world, Margarete avoided becoming an
artist but eventually found her way in art in the tradition of her ancestors.
Margarete shares in her work a unique perspective on Native American iconography.
In the abstract drawing displayed here, she uses lines, vivid colors, patterns, textures
and geometric shapes to express her heritage and the world around her. Next to Margarete’s
drawing, we see works by her mother and grandmother, who use traditional symbols and
figures. Can you see hints of these traditional shapes and patterns within Margarete’s
drawing?
Continue reading to learn more.
At 26-years-old, after several attempts to find her own path, Margarete began drawing
and entering her works in blind art competitions. She wanted to remain anonymous,
so jurors judged her works on their own and did not connect Margarete to her famous
mother and grandmother. Her work gained popularity, and she gained confidence, eventually
becoming a well-known artist herself. She used Modernist visual language that
displays relationships to both Cubism and Abstract Expressionism.
This drawing, titled Listening to Existence, demonstrates Margarete’s ability to move
our eyes around the composition and keep us engaged in the artwork with color and
texture, overlapping lines that create new shapes, and play between movement and stillness.
Explore
At-Home Art Activity by Karla Man
Lines and Lineage, A Generational Gift
Scroll down to enjoy this at-home art activity designed by Teaching Artist Karla Man,
inspired by Margarete Bagshaw-Tindel’s drawing.
The activity includes a list of needed art supplies, an introduction, and a step-by-step
guide to make one drawing learning from Margarete’s techniques and one of your own
inspiration and vision.
Lines & Lineage: Pastels to Explore the Use of Line in Our Stories
Greetings from the Teaching Artist’s Corner!
I’m so glad you have joined me for an opportunity to dive deeper into our featured
artist’s history and work. Below are two, step-by-step activities to learn from the
artist’s techniques and to try an inspired drawing of your own.
In this activity, we will:
- Look at influences on the life and creativity of artist Margerete Bagshaw-Tindel.
- Learn about Margarete’s artwork entitled, Listening to Existence, on view at the Museum, focusing on the medium, how she created the composition, and her use of lines to create shapes and textures.
- Apply personal knowledge, life experiences, likes, and inspiration to a drawing of
your own using soft pastels.
Dive into Art History
If you’d like, here are some videos to learn more about Margarete Bagshaw-Tindel,
her mother, Helen Hardin, and her grandmother Pablita Velarde.
- Women's History Month-Meet Artist Margarete Bagshaw
- Margarete Bagshaw Painting Big!
- The Color Of Oil - Museum show
- Margarete Bagshaw - Museum Show - "Breaking The Rules"
- NMPBS ¡COLORES! Painter Helen Hardin
- New Mexico PBS Originals: Pueblo Paintings of Pablita Velarde
Supplies Needed
These art supplies can be found at Hobby Lobby, Michael’s, and Wal-Mart. When selecting
drawing paper, look preferably for paper made for pastels. It will have a ‘tooth’
or roughness for added texture.
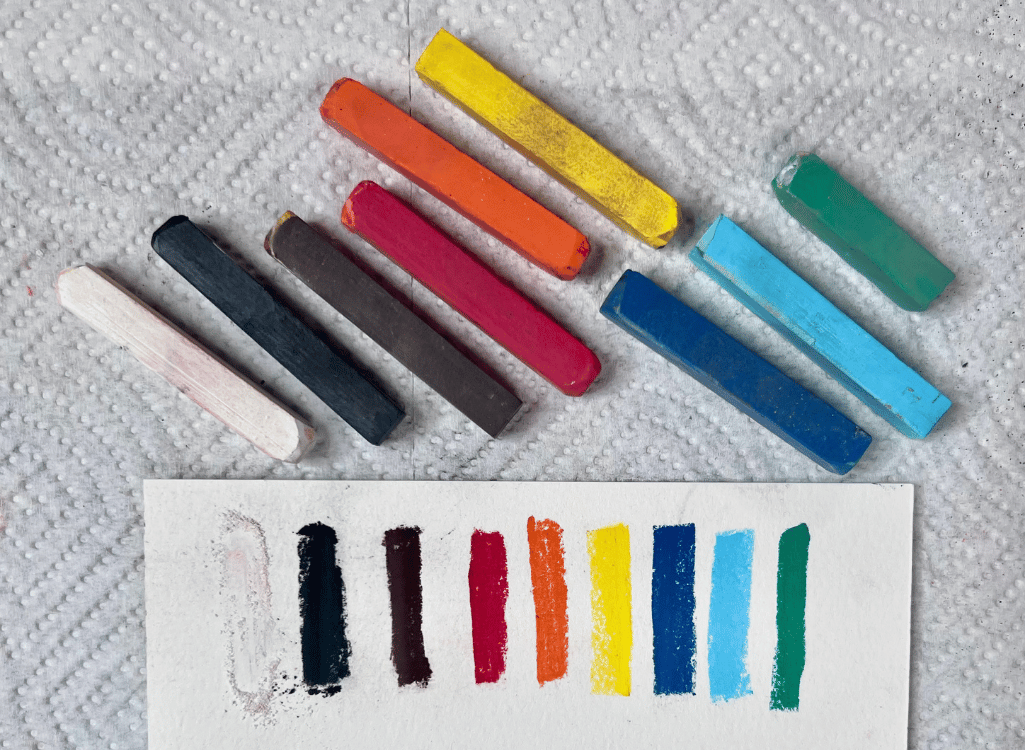
- Soft Pastels: Green, Red, Yellow, Orange, Blue, Black and White
- Drawing paper 9x12 inches
- Cotton Balls and/or Q-Tips
- Disposable table covering
- Baby wipes
Artist’s Tips & Tricks
- Soft pastels are messy, so be ready to have them all over your hands. I use my fingers to blend for added fun!
- Use baby wipes for quick hand cleaning between colors.
- Aprons come in handy to protect your clothing.
- You can purchase Spray Fixative for pastels and charcoal, which should be used outside for ventilation. This product will ‘fix’ the pastels after you finish your drawing and keep them from smudging.
Techniques
Here are two videos showing ways to use soft pastels.
Soft Pastel Techniques for Beginners
Artist's soft pastel demo in abstraction
Lesson 1: Learn From the Artist
Throughout history, artists learned their craft by apprenticeship with another artist
and by copying paintings by other artists. In the 1700s, artists would go to museums,
set up an easel in the gallery, and draw or paint a copy of something they saw there!
The Classical Greek philosopher, Aristotle, said 2300 years ago that we learn by imitation.
The Teaching Artist Program at the MaTT brings back this long tradition of learning
by imitating.
Try it!
Start with an overall layer of color. Then add Margarete’s basic structural lines.
Finally, mimic the types of textural lines and colors she uses to fill in the shapes
that are created.
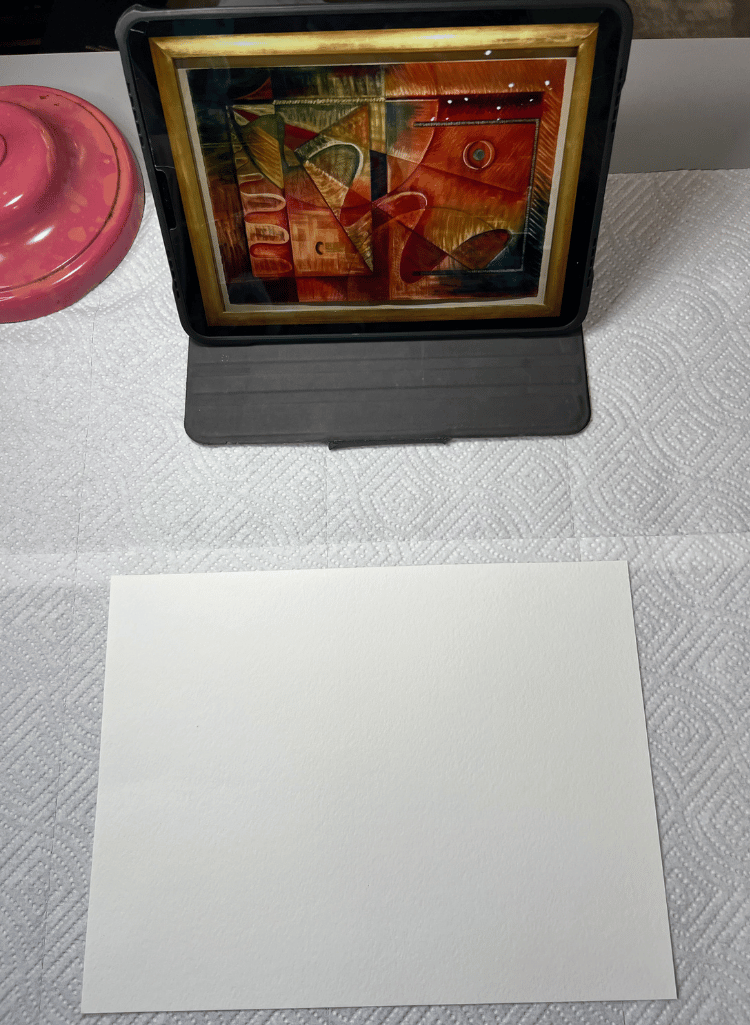
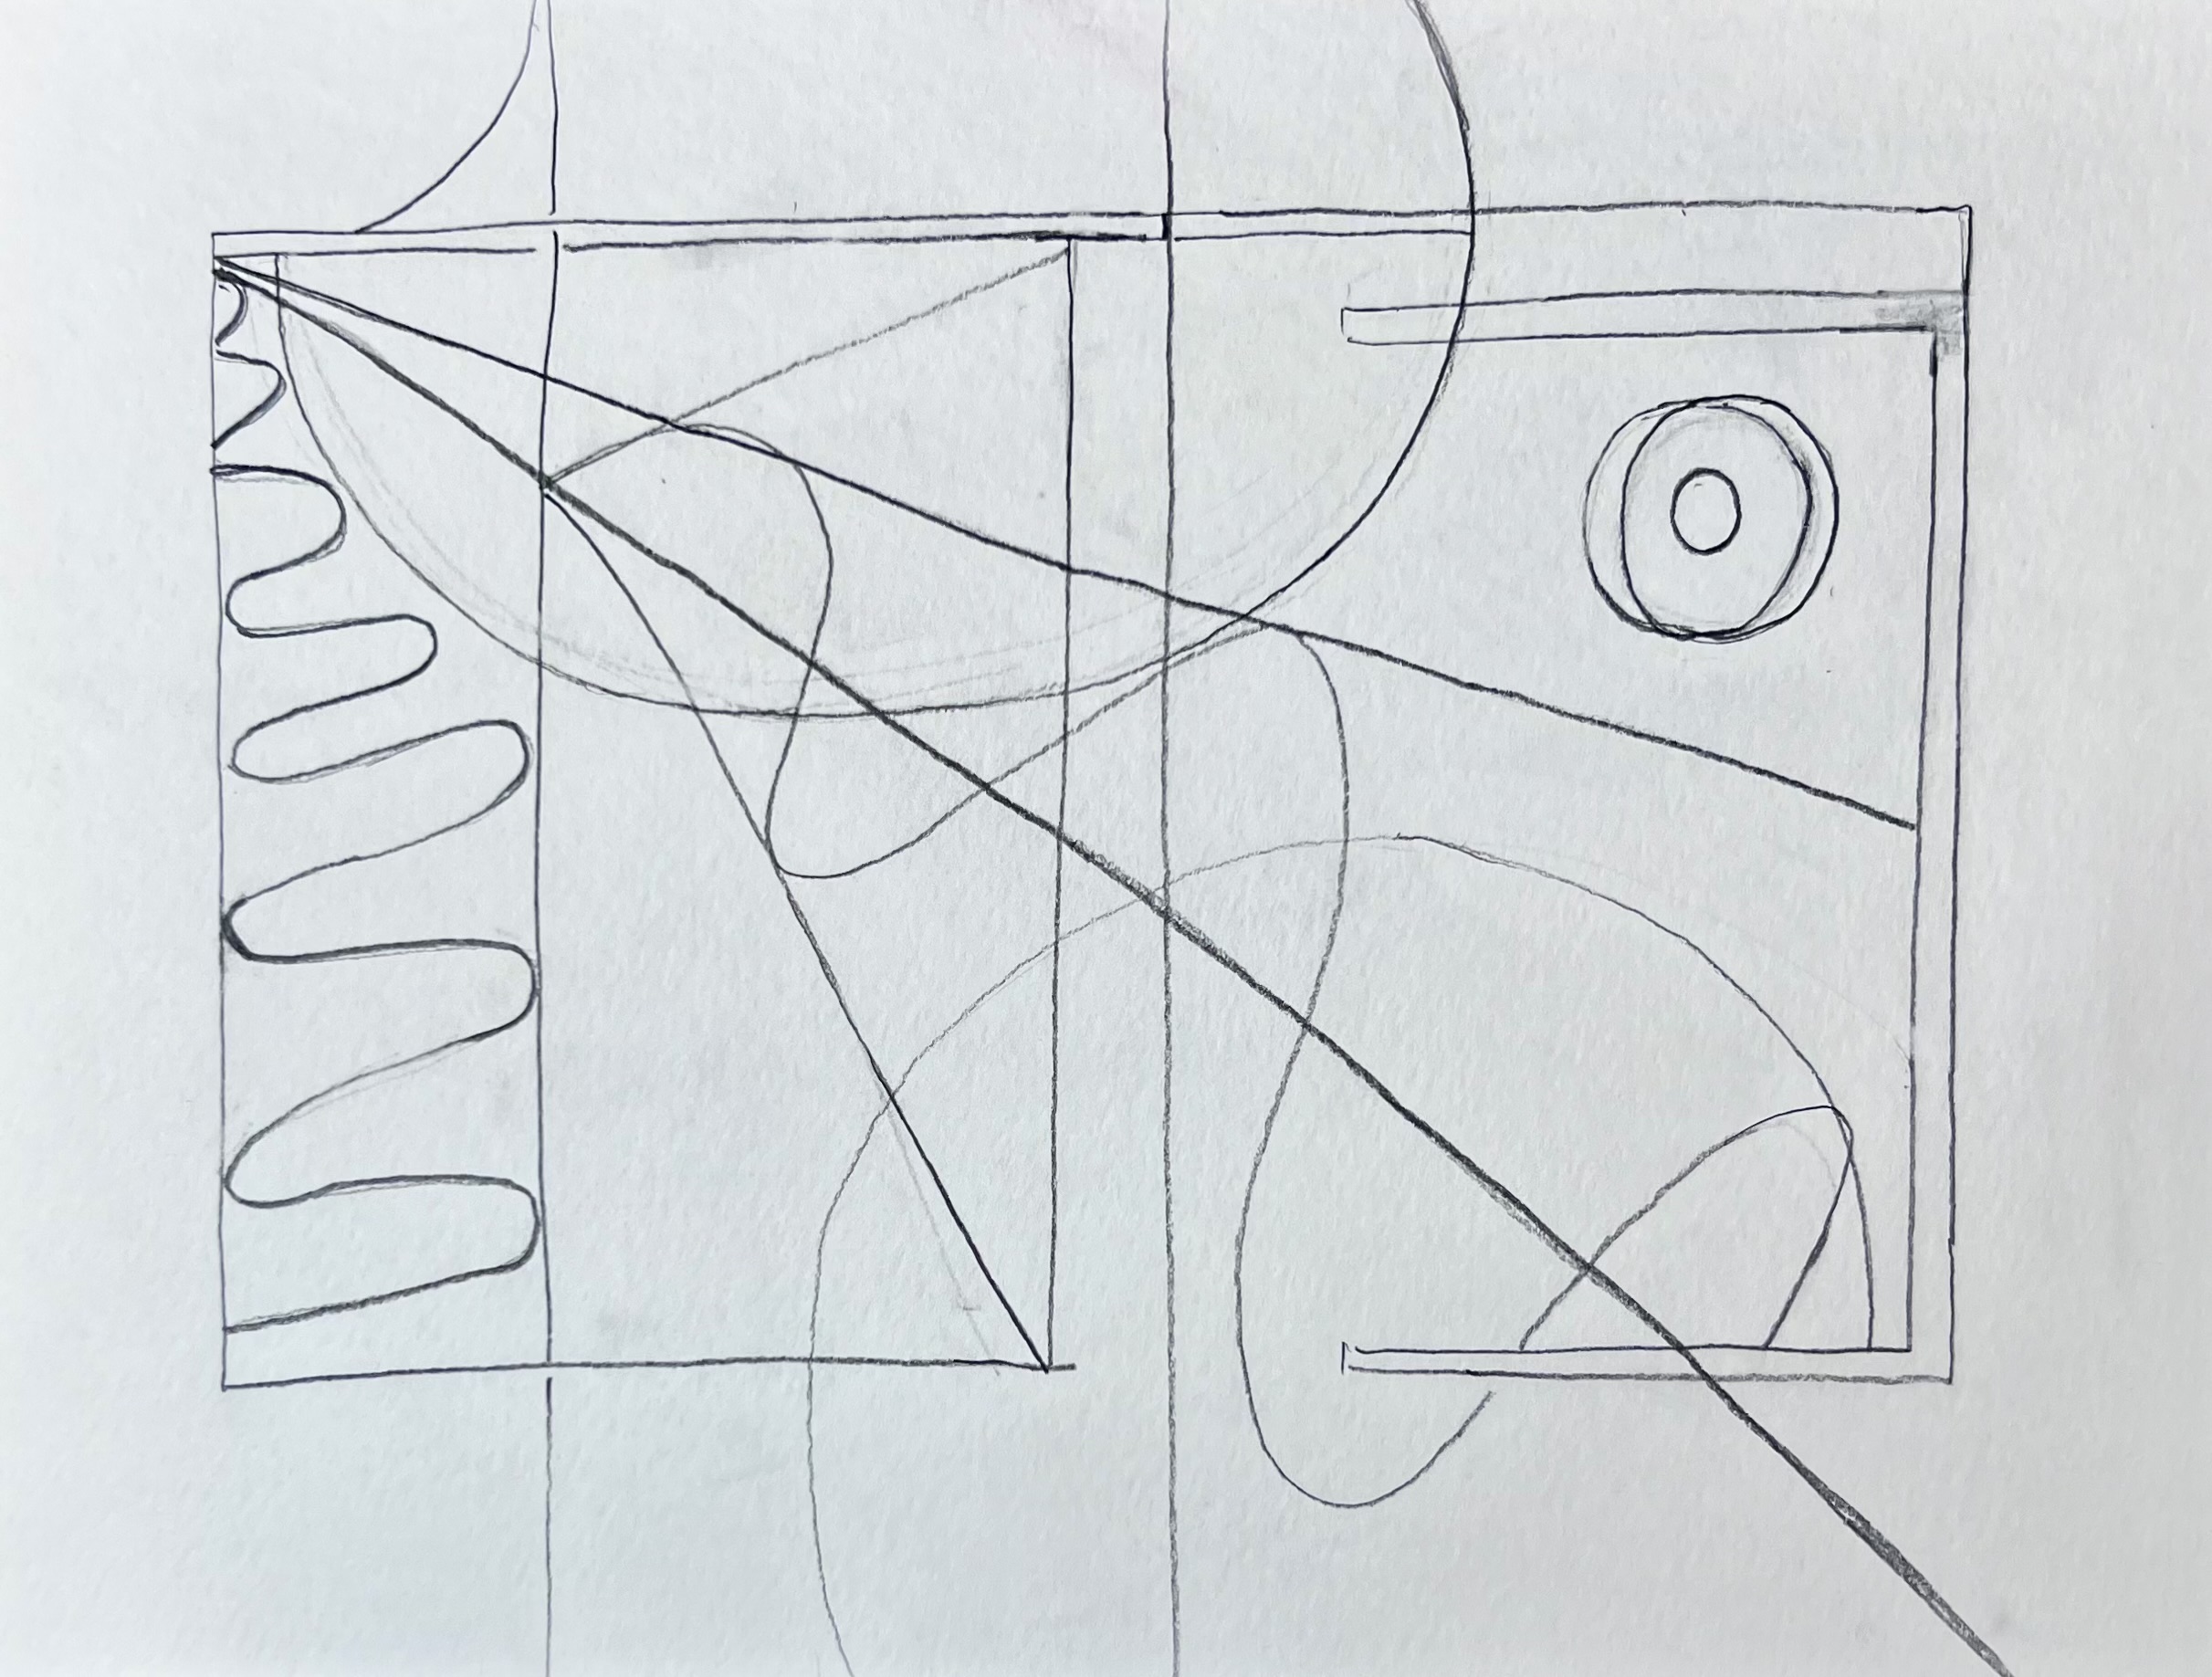
Step 1. Cover your table with paper towels. Have an image of Margarete’s drawing close by.
Choose your color palette. Begin with a blank sheet of drawing paper. Get your creativity
flowing by making a sketch with a pencil (it will be covered by the pastels, or you
can set it aside as a reference and start with a second sheet of drawing paper).
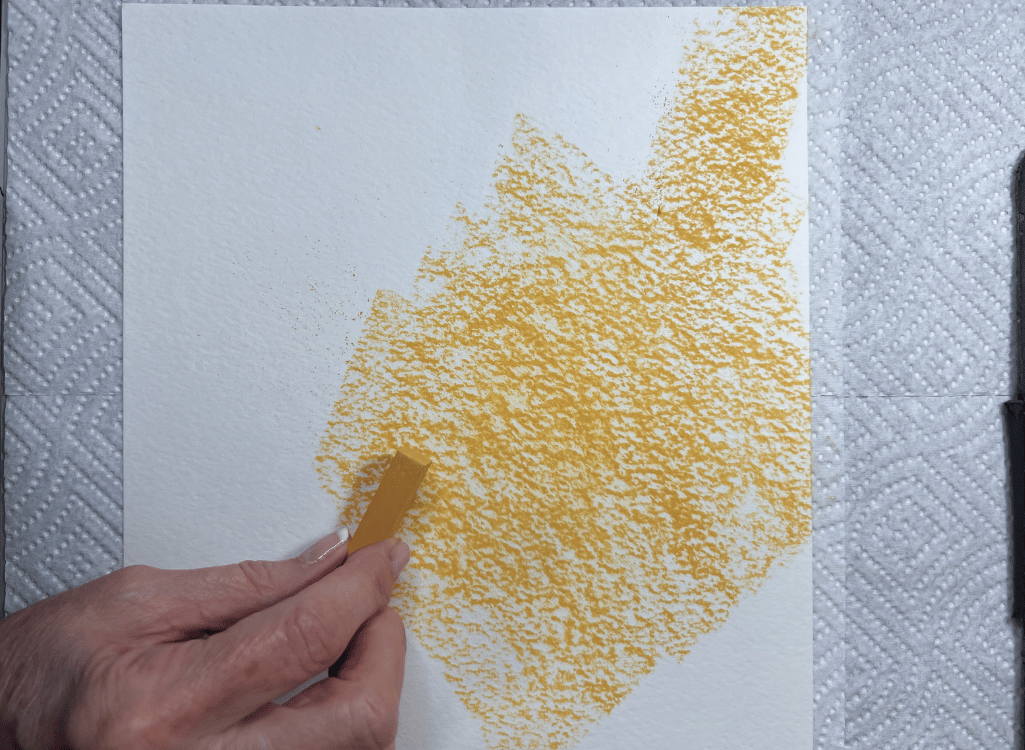
Step 2. Add a ground or base layer to your drawing. This color will show through the layers
of the finished drawing and bring everything together.
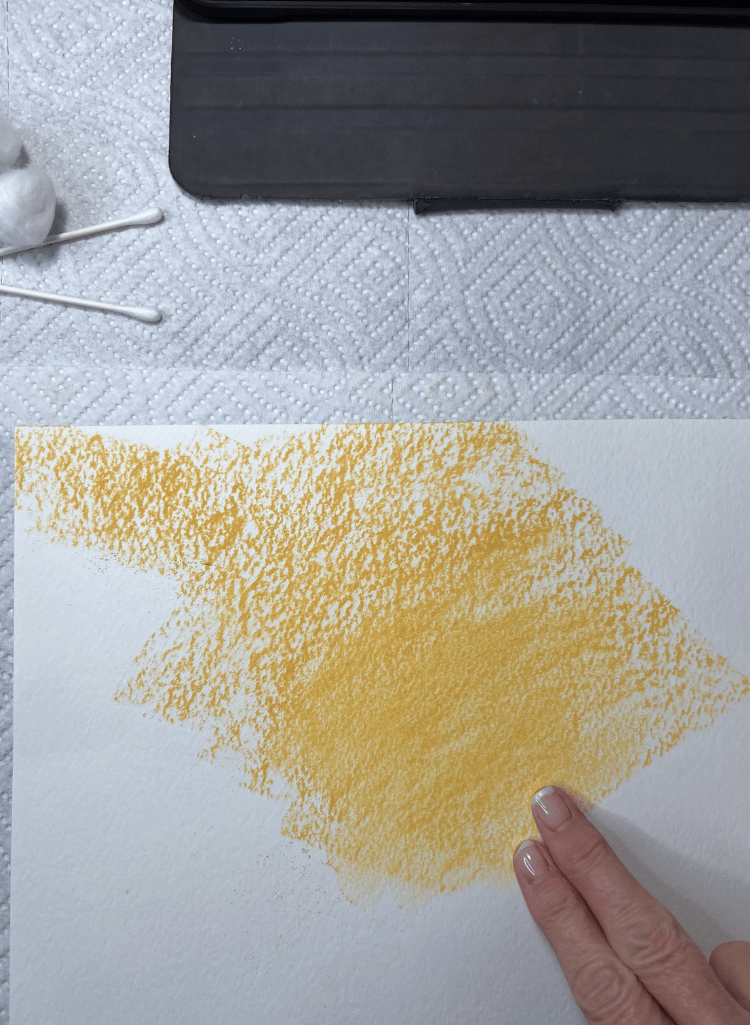

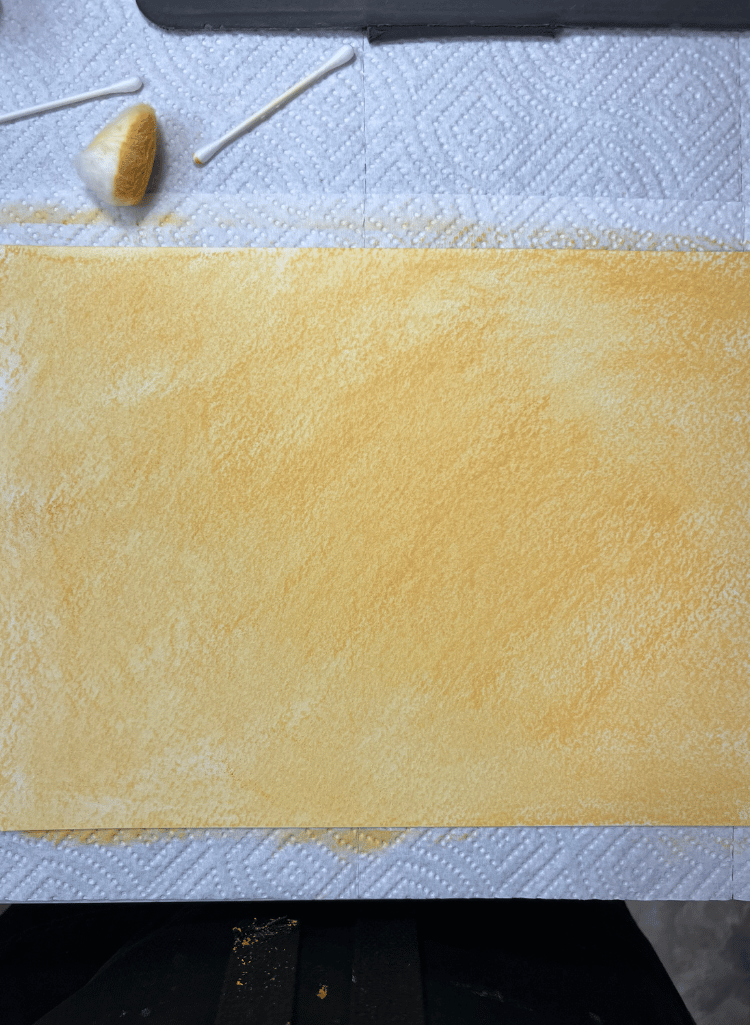
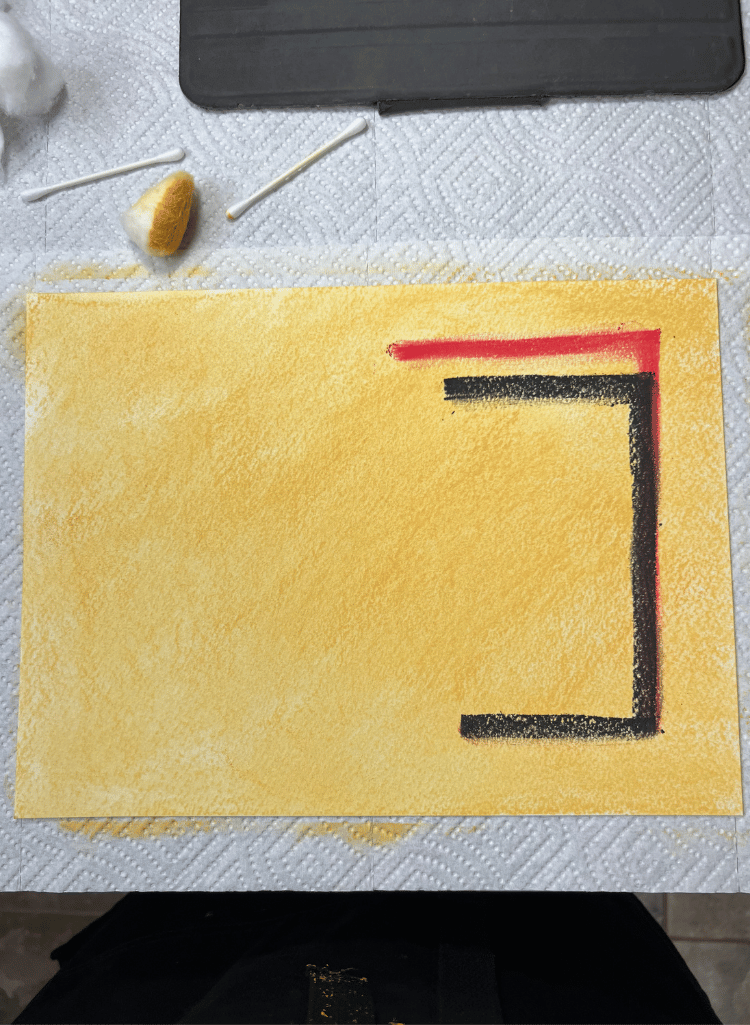
Step 3. Add the major structural lines and then begin adding color in the corners.

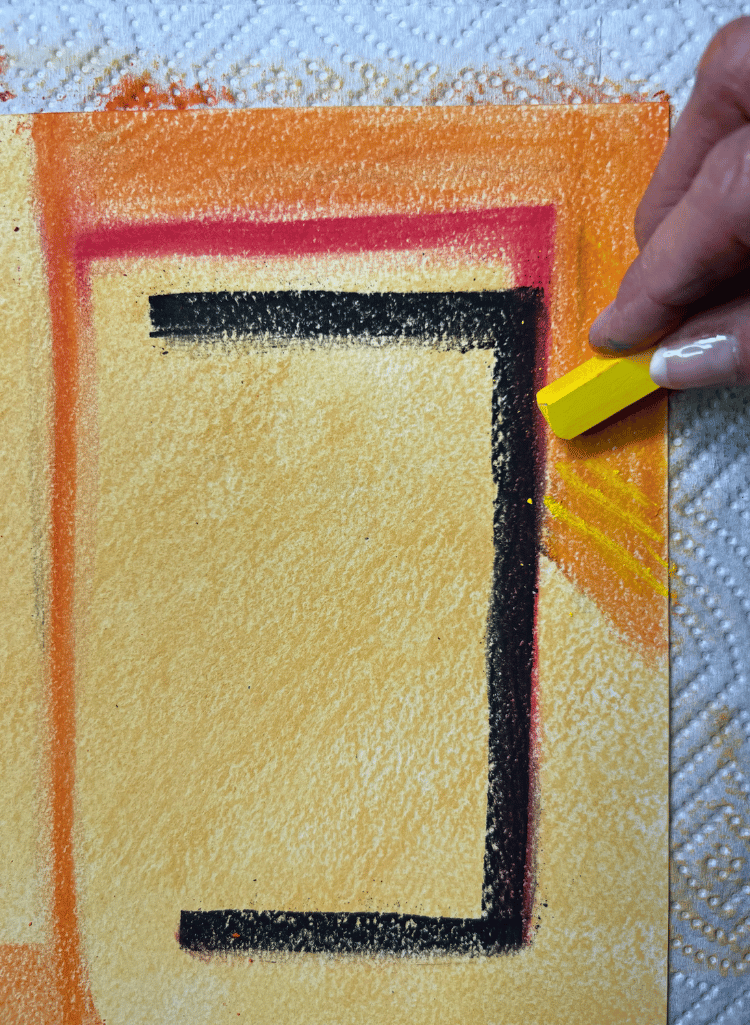
Step 4. Add orange to upper right corner. Next add yellow hatch marks on top. Explore different
types of marks for a) visual interest, b) movement, or c) depth.
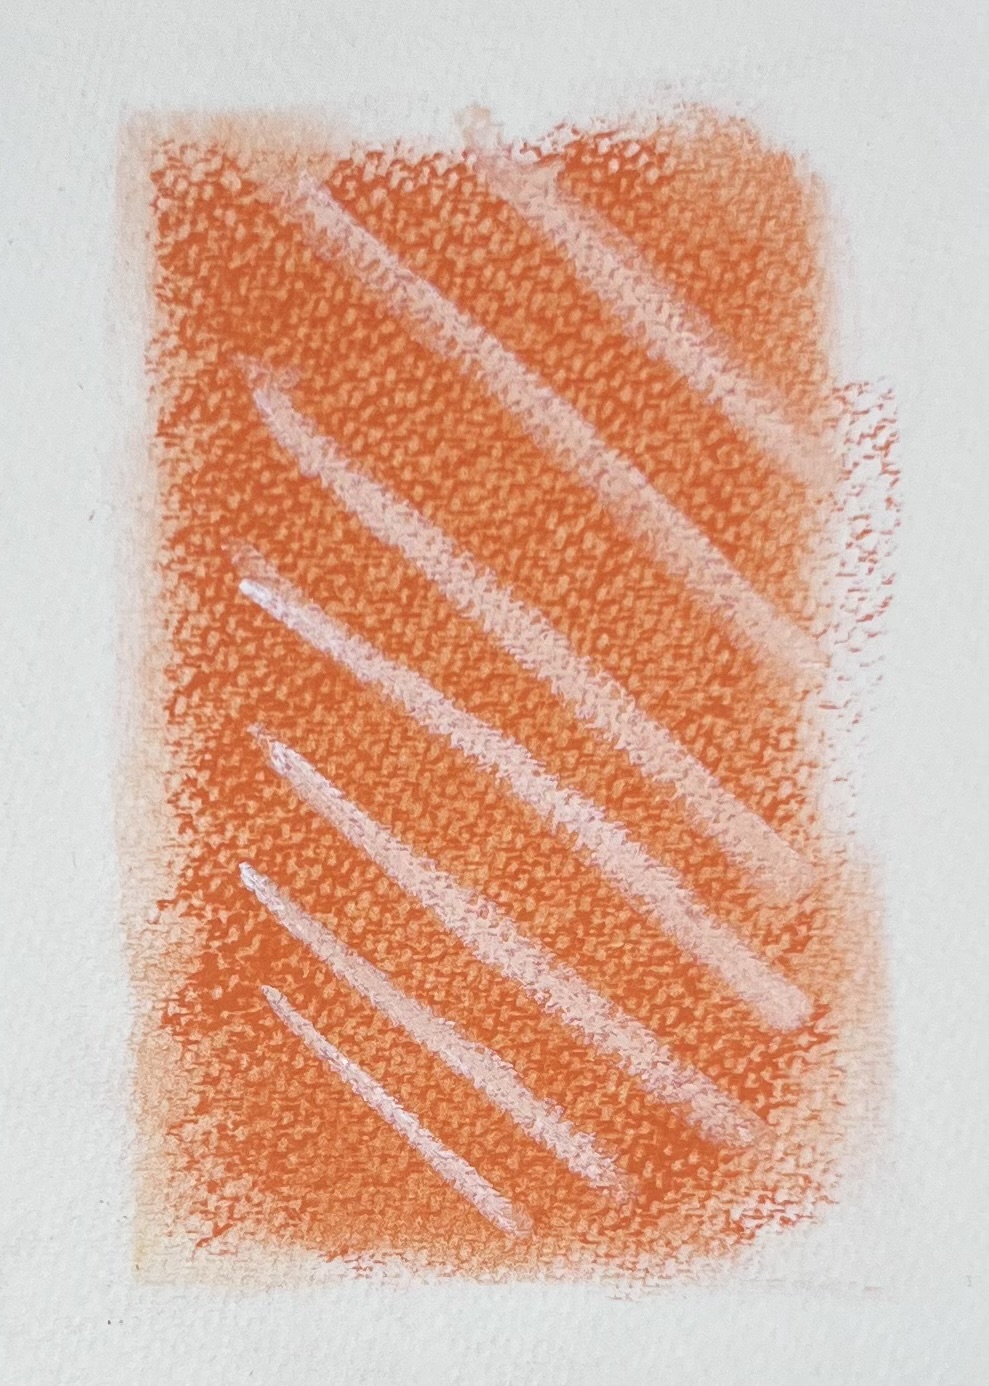
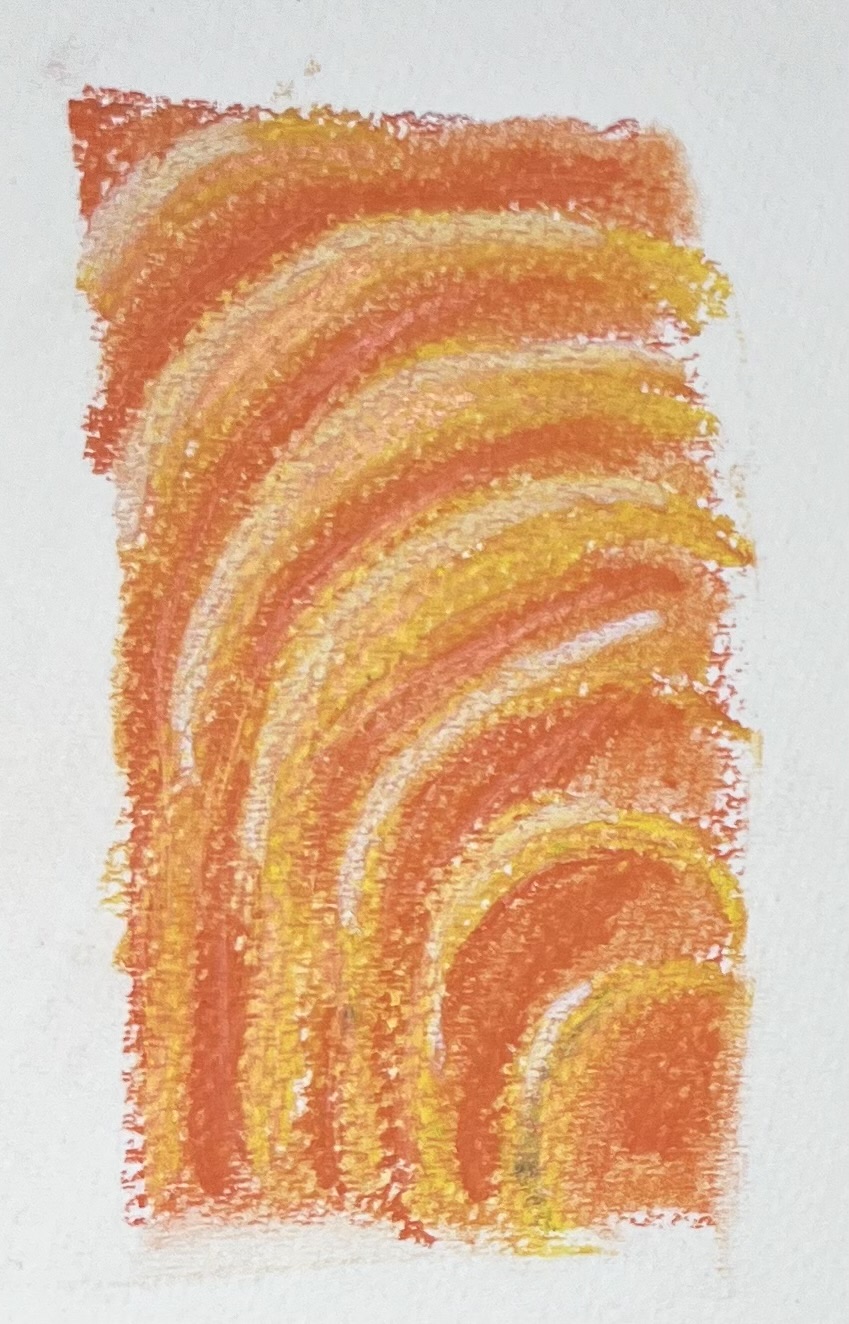
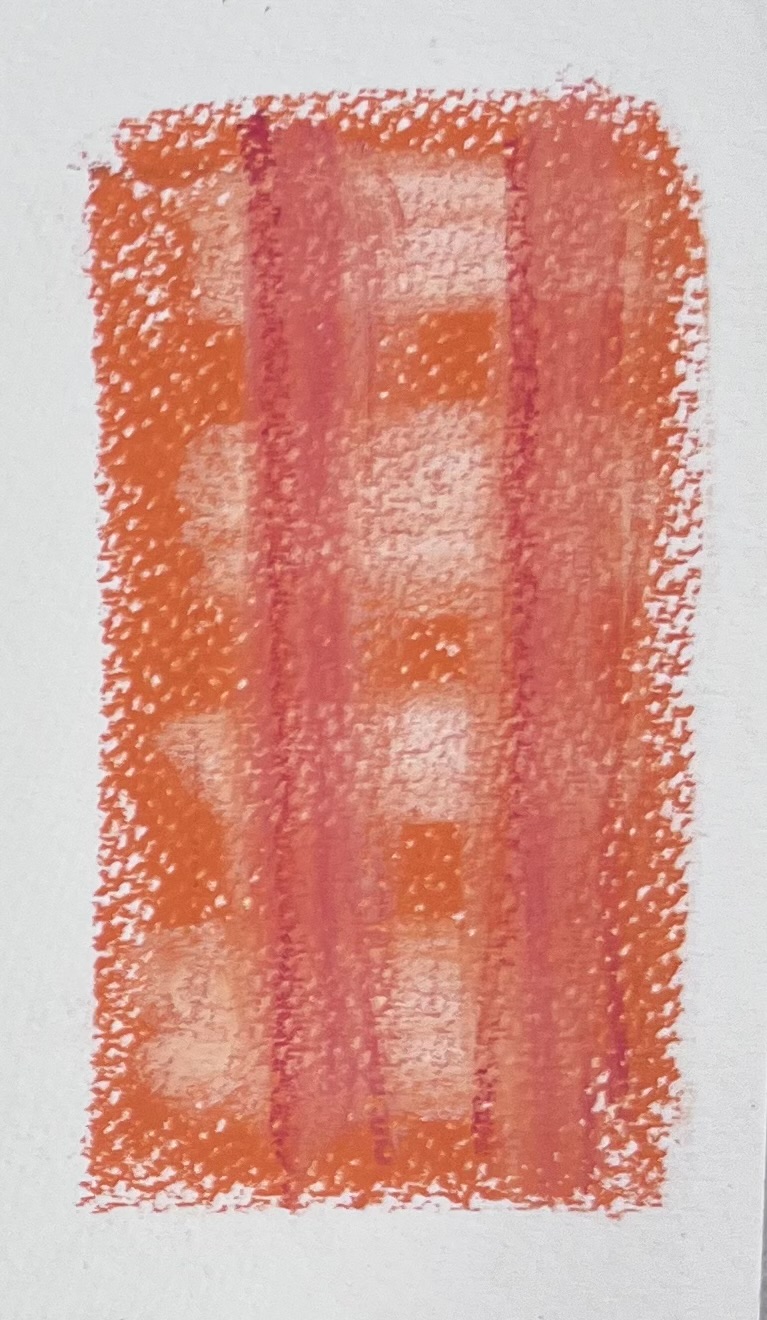
Step 5. Add orange, lower left; Add white hatch marks on top of the black line on the right
side and add a white circular line.
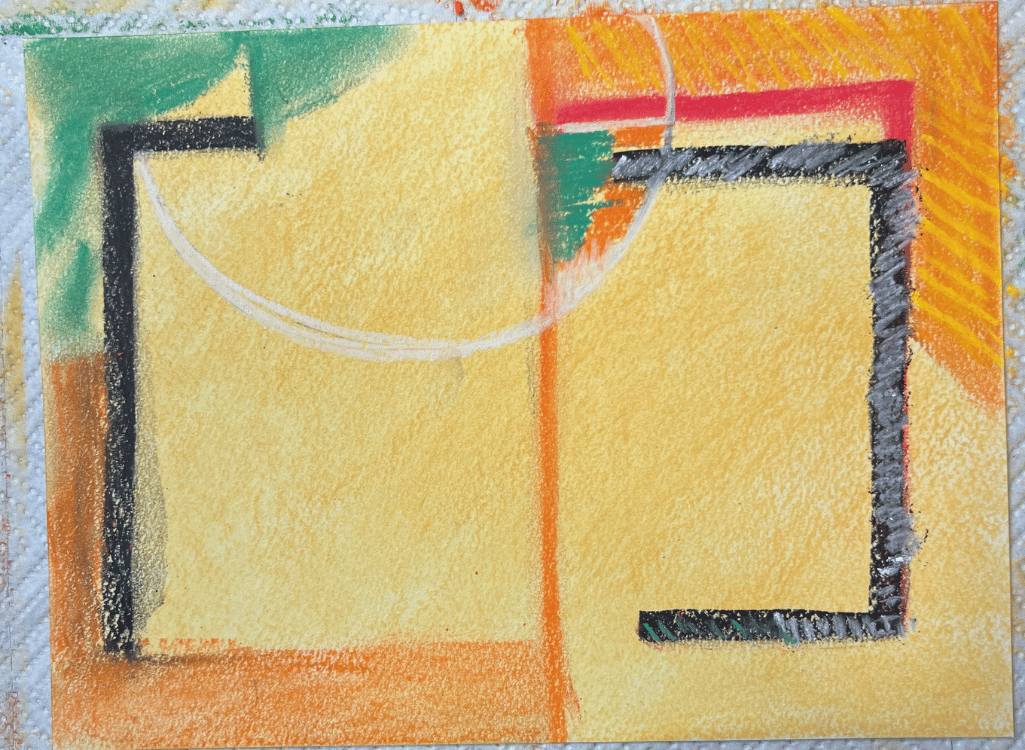
Step 6. Draw two red lines that connect to the two black lines. Draw a green squiggle line
on top of the red lines.
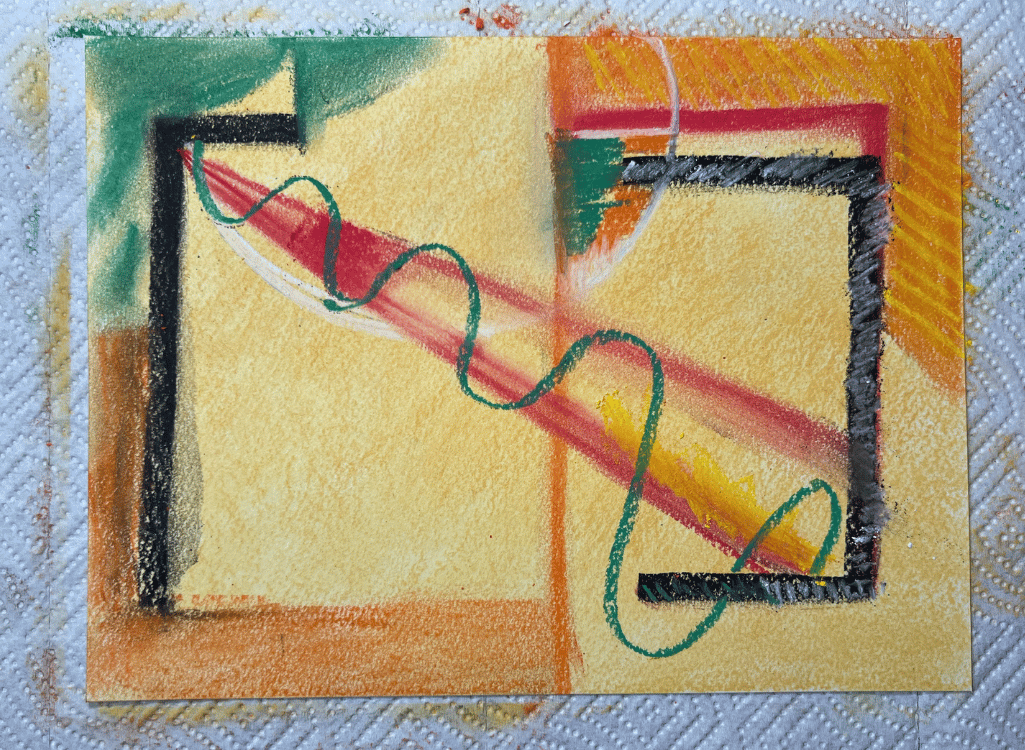
Step 7. Revisit Margarete’s image and add the colors and shapes you see.
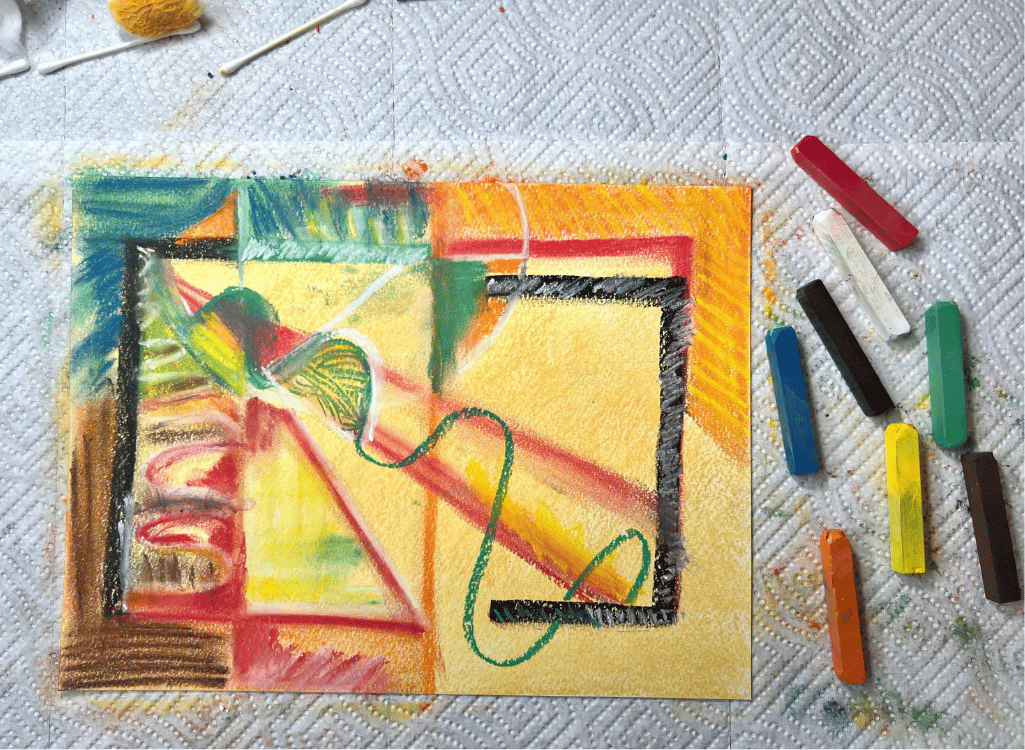
Step 8. Continue adding color and marks. Smudge color as needed.
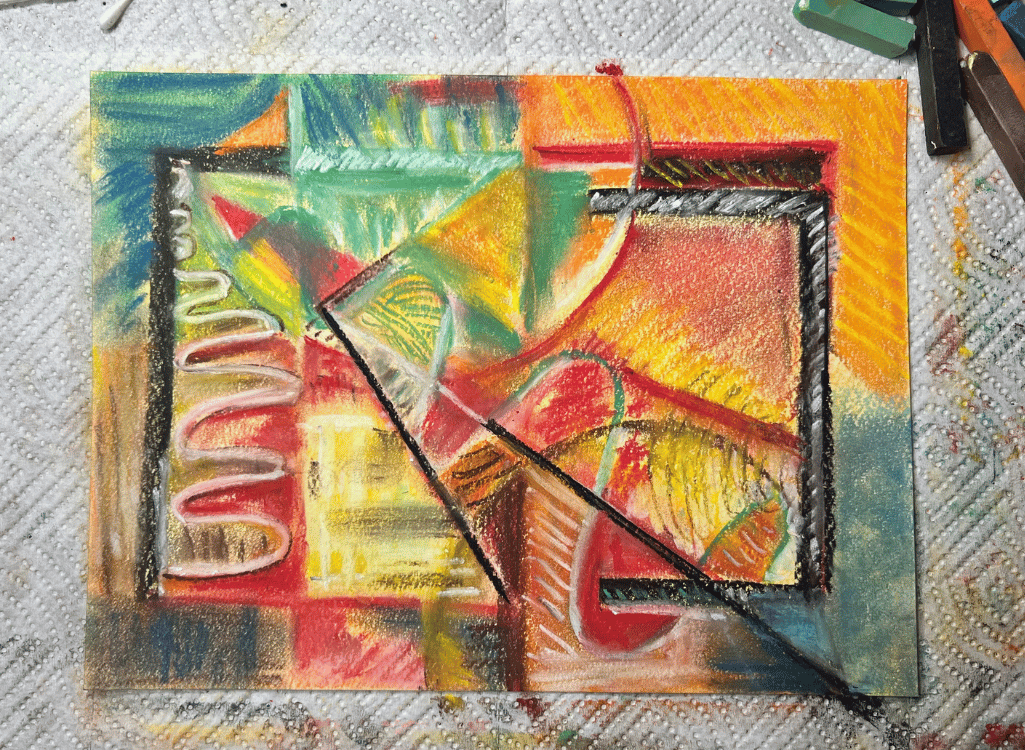
Step 9. Add the double circle lines with a dot in the upper right corner. Step back from
your drawing and look at Margarete’s. Where you see marks you want to add for more
pop or clarity, add those. Add bold lines that you want to stand out.
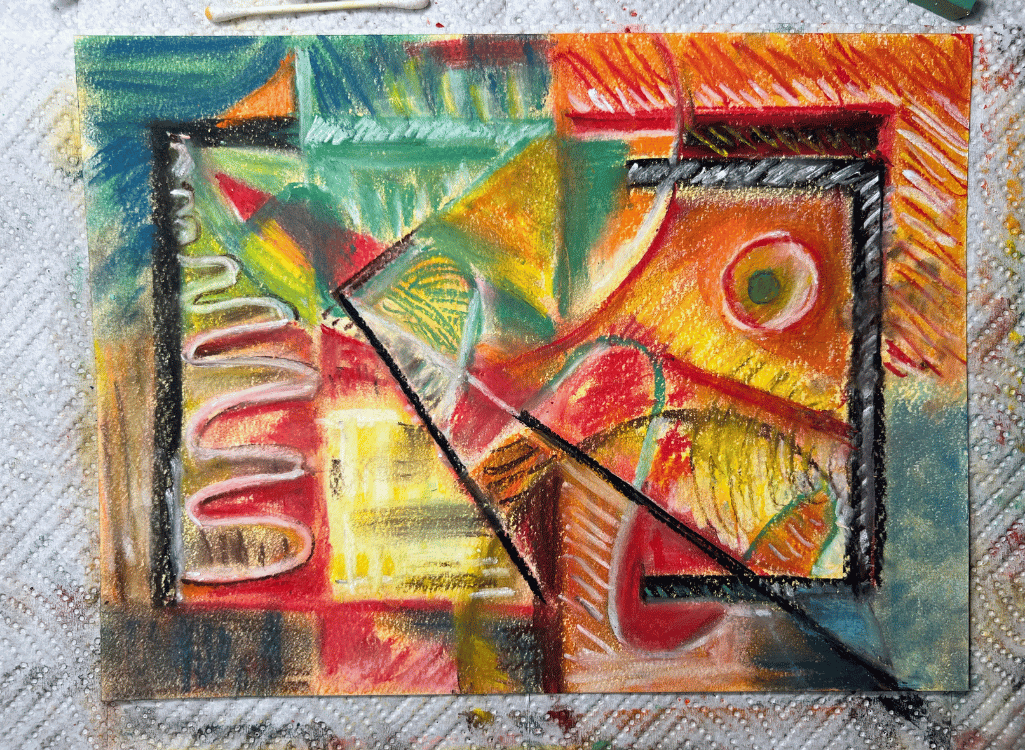
Lesson 2: Take It On Your Own
Now, using what stood out to you from copying Margarete’s structure, lines, textures,
and colors, make your own drawing.
Try it!
Margarete wanted to communicate the light and shadows of New Mexico, where she lived,
and what it feels like to “listen to existence.” She chose warm and cool colors to
represent the great contrast between bright sun and deep shadows. She chose wavy lines,
overlapping lines, and choppy lines that give us a sense of sound and both quiet and
energy. Circular lines and shapes suggest existence or eternity. These elements all
overlap and interplay. What parts of your life experience do you want to communicate?
What about this experience is important to you? What colors would express what you
feel? What kind of textures do you need to tell this story?
Ways to spark your ideas:
Start with Margarete’s structure, but move the lines around, change the colors, etc.
Focus on one or two elements you loved from Margarete’s drawing, and again, change
the lines around, use different colors, textures, etc.
Choose a different theme to explore using Margarete’s techniques and see where your
thoughts take your lines and colors.
Begin with a sketch...
You can also do a sketch or study by using a pencil, eraser, and blank sheet of paper.
This helps you get your ideas down before adding color and texture. Keep what you
like, erase what you don’t. You can play with the textures, lines, shadows, and details
on your sketch too.
Then go for it!
Step 1. Once you are satisfied with your sketch, pick a light-colored pastel and cover your
pastel paper with that color. Keep the texture where you want it and blend the pastel
where you want smoothness.
Step 2. Follow your sketch choosing colors to create the drawing you want.
Step 3. Remember, the pastels can be covered with a different color anytime.
Step 4. Get messy and use baby wipes between colors if using your fingers to blend.
Step 5. Find areas within your composition where you want to add detail for interest.
Step 6. Have fun!
Step 7. If you’d like, share your drawings with us at #MuseumArt!
Survey
Share your experience via this survey.
Back to Arnold Gallery
Museum at Texas Tech University
-
Address
3301 4th Street, Lubbock, TX 79415 -
Phone
806.742.2490 -
Email
museum.texastech@ttu.edu