
Lesson 2: Programming and Movement
Getting Started
After students have completed their robots, it is time to put them into action. Now is a good time to talk to your students about how robots work. Ask them abstract questions like, "Will a robot always do what we tell them to?" The answer to that question is yes, but many students will think no. No seems like the correct answer because robots will have unintended actions, like going left when the programmer wants it to go right. But the reality is that robots take every command a user gives it and follows it through exactly; the errors come from problems in the commands humans give to robots. This concept may be too abstract for younger children, but it really helps the older students understand how programming works.
Challenge!
Students who get done early or classes that have finished their robots, but do not have time to do the entire programming lesson, will find this challenge a good opportunity to learn how the robot moves before actually telling it to move with programming. Although, some of the math involved may be beyond younger students.
Give your students a tape measure or a printed-out paper ruler — one with centimeters and inches would be best. Draw a tic mark on one of the wheels with a piece of chalk, or place a piece of opaque tape on the wheel. Ask each team to find out how many full rotations of the wheel it would take for the robot to move 2 feet (or any arbitrary distance, like the distance of the surface of a table). Students who have already learned about circumference can usually figure out that the distance around the wheel is the same as the distance the robot moves. Students who have never learned about circumference will need some assistance coming to this conclusion.
This challenge is very useful because it teaches students how the robot will be moving when programming begins. The robot is told how far to go in either degrees or rotations, both referring to how far the wheel moves. If they can equate one rotation to an exact distance, they will understand the concept of programming in rotations easier.
Programming
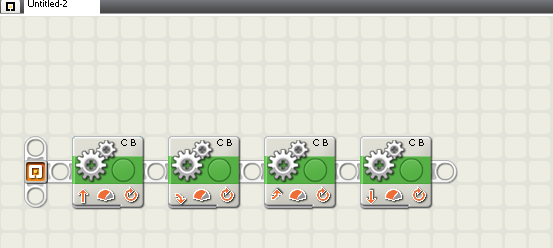
NXT programming is very easy to learn, but can be difficult to master. There are many things that can be done with the software, but for the sake of a simple lesson, it is best to start with just moving the robot. This is done with simple movement blocks, like the ones shown below.
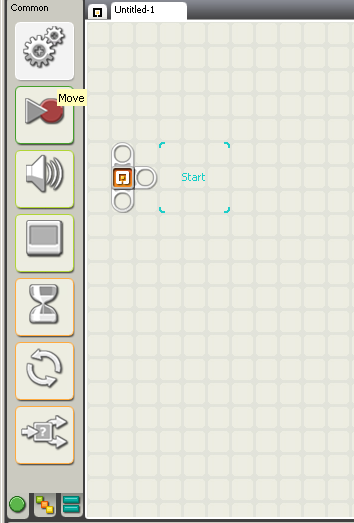
Movement blocks come from the left side menu. The top button is shown below.
When you click on a movement block, you will see a menu at the bottom of the screen similar to the one below. This menu lets you change the settings on each movement block. Port lets you chose which motor you are using. The convention is to have the two wheel-motors attached to Port B and Port C, leaving Port A for the robot's "Arm" motor. Direction is either Forward, Backward, or Brake. Steeling is simply choosing between left, right, or straight, and how sharp the turn is. For steeling, generally turning the slider all the way left or right will make a perfect turn-on-a-dime turn.
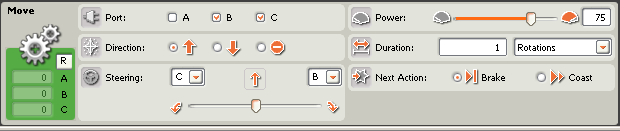
The power slider determines how much power is being put into the motor. For your wheel motors, 75 is the normal speed. However, the slider can be turned up to 100 for a faster movement, or down to 50 for a slower movement. Going lower than 50 usually makes the motors too weak to move the wheels. Action tells the robot to either brake and hold position after the movement is done, or to just let the motors go and coast.
Duration is the most important criterion for movement, and will require the most trial and error to determine. As said before, duration can be measured in rotations, but also can be measured in degrees or seconds. Starting with rotations is a good idea, especially if your students did the challenge at the beginning of the page. Even if your students know how long one rotation is, it is still a good idea to do a demonstration for the entire class of how far one rotation is, and also how far four or five rotations is.
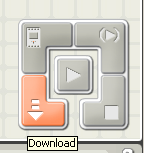
When your program is done, click on the download button shown below. If everything goes right, you should see a message saying "Download Complete" shortly afterward.
Instruction
The best way to teach programming is to halt all building and get the attention of the entire class. Having a projector helps students see your example program as you make it. The best way for students to learn is to follow along with your example program, and then try to program the robot to move some arbitrary track. Going over all the points mentioned above about moving is a good idea. However, don't get too detailed with your presentation because students will lose interest the longer they have LEGOs in front of them that they aren't using yet. Giving students around an hour to test out programming will help solidify what they have learned, and will ready them for the next task.
Teacher, It Doesn't Work!
Programming issues are very common, but usually easy to solve. A list of the most common programming mistakes and how to solve them can be found here.
Edward E. Whitacre Jr. College of Engineering
-
Address
100 Engineering Center Box 43103 Lubbock, Texas 79409-3103 -
Phone
806.742.3451 -
Email
webmaster.coe@ttu.edu