
Lesson 3: Lifting the Arm
Getting Started
As your students' skills using the NXT Software develops, they will be able to tackle more complex problems with it. Adding the third motor to the robot makes for a new set of challenges for students to try out.
Building
Students will want to keep following the instructions after the robot is built, but the attachments for the third motor in the instructions aren't very useful. Teachers need to encourage students to get creative and make their own attachment or arm for the robot, depending on what the robot needs to do. For the lesson below, a task from a previous GEAR competition will be completed. However, there are numerous tasks that could be done for this lesson.
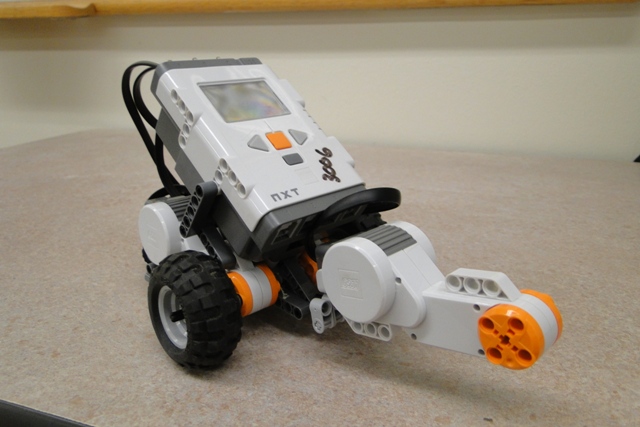
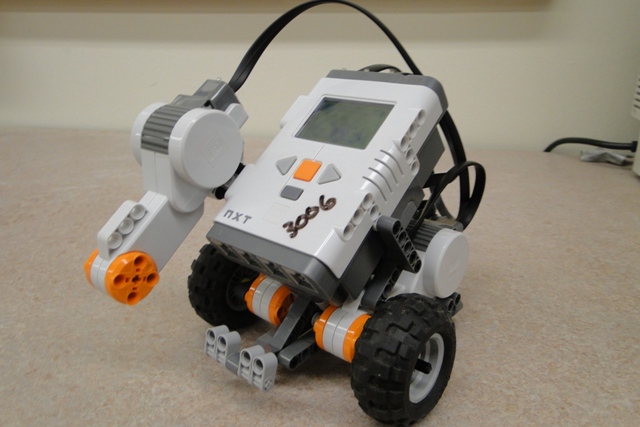
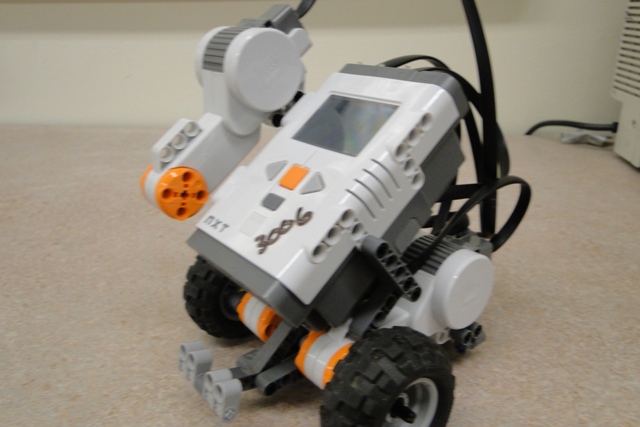
One of the challenges for students building their own arms is finding a place on the robot to attach it. Often students will attach their motor or arm using an axle, which will simply slide off if moved. If you notice this, be sure to suggest using a pin instead. Below are the three easiest places to attach the third motor. Letting students find their own unique places works as well.
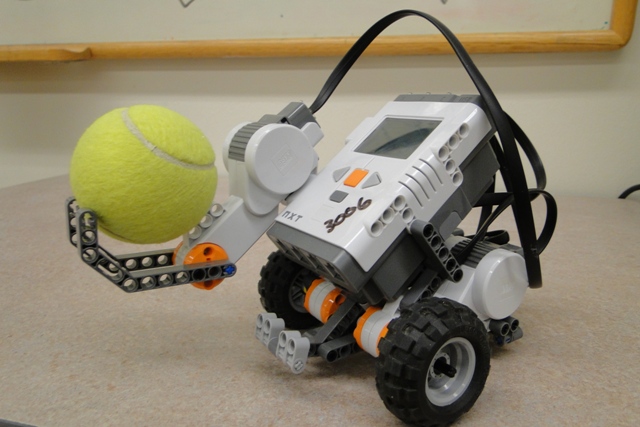
Students usually try one of two types of arms instinctively. Either they choose a very simple arm — which generally turns out to be more effective, depending on what the arm is supposed to do — or a very complex arm with many pieces. An example of a simple arm is shown below; the arm was built to carry a tennis ball and drop it off somewhere. While simplicity tends to work better, it is always best not to try and stifle a student's creativity for the sake of practicality. If a student builds an arm that is hard to use, he or she just has to meet the bigger challenge of getting it to work.
Programming
Programming the third motor is much the same as programming the robot to move. However, the third motor needs to be commanded with a separate movement block. Below are two movement blocks, one telling motors B and C to move the robot forward, and another telling motor A to move, lifting the arm.
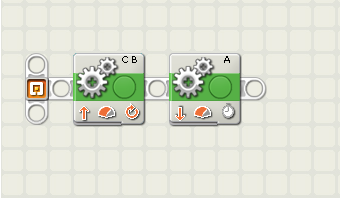
Clicking a movement block and opening the menu at the bottom of the page will allow you to switch the default motor B and C setting to motor A in the "Port" section. Both B and C will need to be unselected and A will need to be clicked. This tells the robot to only move the motor attached to port A. When the third motor is oriented like it is in the picture below, changing the direction to the down arrow will cause the arm to rise. This reversal can be confusing for younger students; usually it is enough to just remind them that if the arm goes the wrong direction, switching the arrow will fix it.
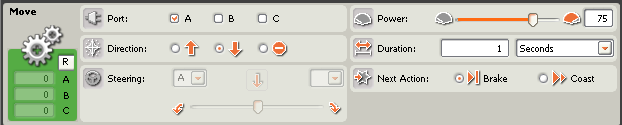
The most important aspect of programming an arm is also the most problematic. When one of the motors is programmed to move in rotations, the motor will only stop moving when exactly that many rotations have been made. This causes problems when the motor gets stuck or blocked because the motor will continue trying to move and will not go on to the next programming step until the program is aborted using the dark gray button on the NXT. As arms will most likely be blocked by something at some point, it is necessary to avoid programming the arm in rotations. To remedy this, the arm can be either programmed in degrees or seconds. Degrees can be helpful when you know exactly how far the arm needs to move, however it is more useful to use seconds, which continually moves the arm until a certain time limit as been reached. This means that if the arm gets blocked, it will stop trying to lift and move on to the next step.
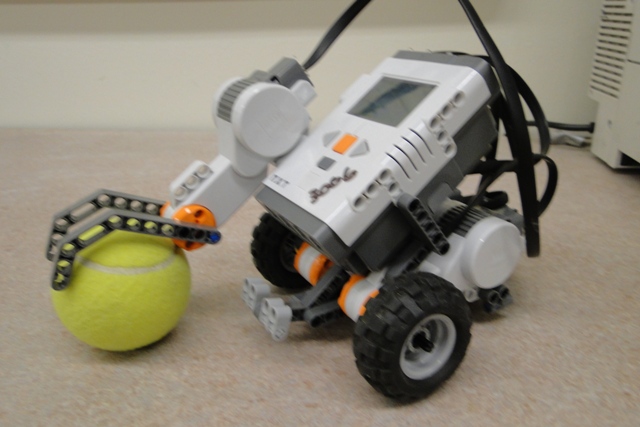
The arm above was designed to move up to a stationary tennis ball, grab it, and roll it back to the user. The arm is extremely simple and does not work perfectly. Encourage students to build something more clever to solve the particular problem you give them.
Instruction
Going over all the points made above is a good idea. Reminding students to plug their third motor into port A will help them remember to change the movement block for the arm. Explaining the reasoning for programming in seconds is also a good idea. Once you have gone over all the concepts about the third motor, it is time to let your students try it themselves. A good idea for younger students would be to attach the arm to another small attachment together as a class, and then program how to move it up and down as a group. This will give students some hands-on experience before diving in by themselves.
Challenge!
Giving students an hour or two to practice building and programming an arm is the best way for them to learn how to use it. As some students will build and effective arm faster than others, it is recommended to think of two different challenges for the robot to do. The first should have the arm lifting an object that can be grabbed easily by the robot. The second challenge should have the robot carrying an object to a designated area and dropping it in a container of some sort. These two challenges let the students experience a wide range of ways to build and program the arm. The results will be a wide variety of designs from the different groups.
Edward E. Whitacre Jr. College of Engineering
-
Address
100 Engineering Center Box 43103 Lubbock, Texas 79409-3103 -
Phone
806.742.3451 -
Email
webmaster.coe@ttu.edu