
Lesson 4: The Light Sensor
How It Works
The most amazing part of the LEGO NXT kit is that it comes with very sophisticated sensors that the NXT Brick can use to detect various things. Perhaps the most remarkable thing about the sensors is how easy they are to use. Given proper instruction and support, even the youngest of students can learn to use these complex devices. The light sensor sends out a bright red light, which is partially reflected by whatever the light shines on. That reflected light is measured by a light detector on the sensor that determines exactly what percentage of the light is returned. Since different colored materials will absorb and reflect different amounts of the light, the sensor can determine what color the object is that is being sensed. More practically, the sensor can determine when a new object is being sensed, such as a piece of dark tape on a light-colored table.
Building
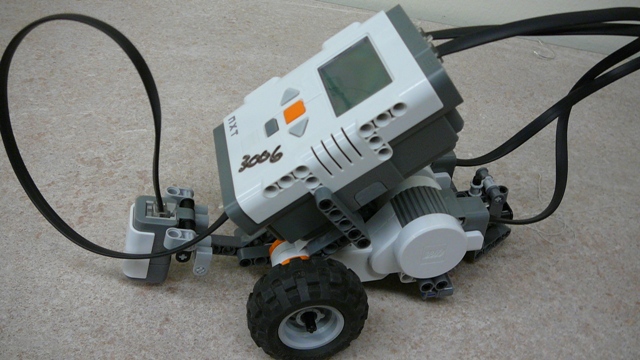
There are good instructions for attaching the light sensor in the 9797 Instructions. This are the fastest way to have your students attach the sensor. Be sure not to forget the cord from the sensor. It goes into one of the 1, 2, 3, or 4 ports at the bottom of the NXT.
Programming
The program shown below is the most basic program that can be made using the light sensor. What this program does is continually move forward until the light sensor reaches a certain value, then it stops. The first movement block tells the robot to go forward indefinitely. The infinity symbol on the block denotes this continual movement.
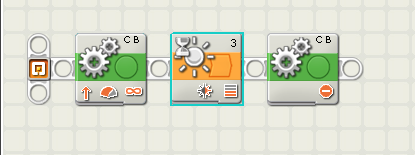
The orange "Wait" block tells the robot to stop as soon as a certain threshold value is reached. The threshold can be altered in the menu when clicking on the "Wait" block (shown below). In the wait block menu, you can choose which sensor to use, which port to use, and how the sensor should work. First, be sure to choose "Sensor" under the control section. You can also wait a certain amount of time before using this block, if desired. Under the sensor category, choose "Light Sensor". There are a number of other sensors you can use, including a different version of the light sensor called "Light Sensor*". Be sure not to select this sensor, as it does not work the same as the NXT light sensor we will be using. Also, make sure the sensor is plugged into the same port as the menu shows.
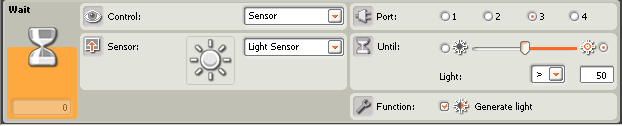
The most important part of the wait block menu is the "Until" section. This determines exactly how long the block will wait before moving on to the next block. For the light sensor, you choose a percentage of the light reflected back and a less than or greater than sign. What this does is if you enter a percentage greater than 50% (like what is shown in the menu above), the block will wait until the value from the light sensor is over 50, then move onto the next block — which in this case tells the robot to stop.
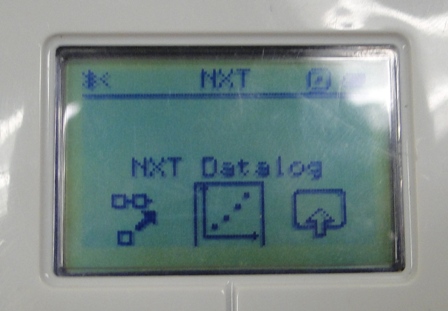
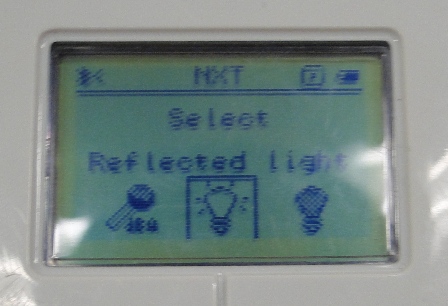
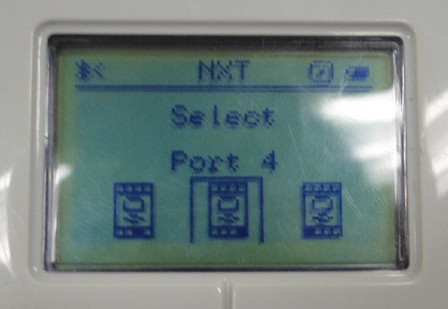
There is an easy way to test what reflected light percentage a certain surface will give. While the robot is plugged into your computer, the little number at the very bottom left corner of the wait block menu will show the current value the robot is receiving. In the menu above, the robot is not plugged in, leaving the number at 0. Another method that can be a good exercise in teaching students to use the sensor is using the data logging function on the NXT Brick. From the Min NXT menu, scroll to the side until you see NXT Datalog (or in some older versions the "View" option). Hit the orange button to select it. Scroll to the right until you see the picture of the lightbulb that says "Reflected Light". Select it and then choose which port your light sensor is plugged into. The result will be a constantly updating number representing exactly how much light is being reflected.
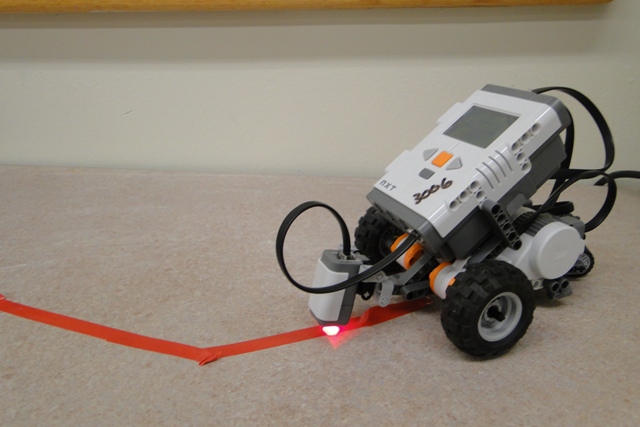
Shown above is a robot following a line of red tape. There is a section in the NXT Help tab on the right hand side of the NXT programming screen that you can use to look up certain common tasks for the robot. One of these tasks is following a line. The instructions for making the program are laid out. It isn't much of a learning opportunity, but it is a good way to come up with a demonstration for your students.
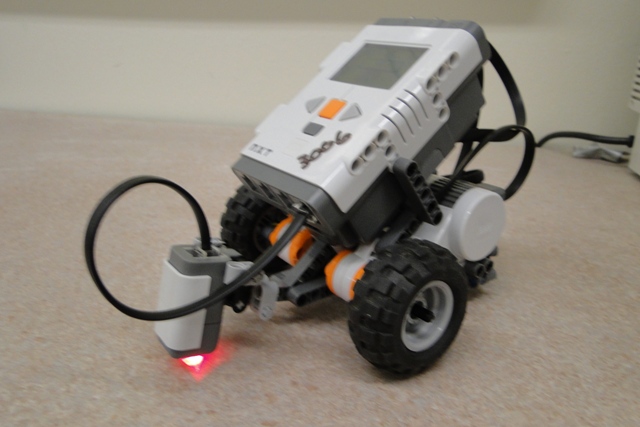
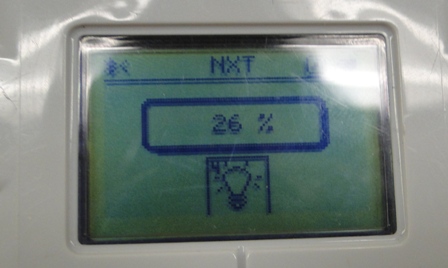
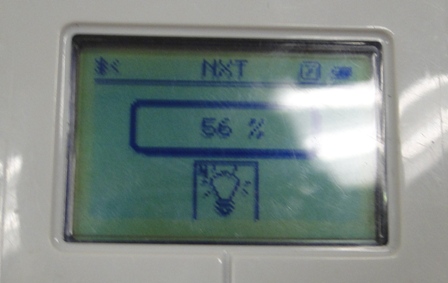
A light-colored table, like the one pictured above, will give a 60% or so reflection (shown on the picture below, right). A brighter white table can go up into the 70s. A piece of colored tape is usually in the 50s and 40s, and a piece of solid black tape is generally in the 20s and 30s (shown on the picture below, left). Using black tape on a white table makes your demonstration and your students' challenges easier.
Instruction
Give your students some time to either attach the light sensor their own way or with the instructions, making sure it is always facing the group. Once this is done, it is a good time to discuss how the sensor works. Older students may find a lot of meaning out of a quick optics lesson about how light is absorbed and reflected. Younger students might have this information fly over their heads, but can still benefit from a quicker explanation of the sensor. Once everyone's sensor is attached, it's time to let the students have some fun with the light sensor with the first Challenge.
Challenge #1
Letting the students try out the light sensor before using it for anything practical helps them understand exactly what the sensor does. Give your students a sheet of paper and lead them through activating the NXT Datalog on the brick, as explained above. Challenge them to find six or seven different colored objects in the room to use the light sensor on and record the results of each one. You may want to have a few bright and different colored objects of laid out for your students to use. After getting values for each of these colors, you can explain that dark colors have a much lower value because they absorb more light and that light colors reflect more light.

Challenge #2
Now that the students have used the light sensor, it's time to present them with a programming challenge. Go through an overview of how to use the wait block and show them an example program of how to make the robot stop after the wait block is done. Challenge your students to have their robot complete an obstacle course using dark tape on a light table. The robot should be able to stop and turn on each piece of tape and eventually get to the end of the course. This will take a good hour or so to get most of the groups programming with the light sensor effectively. The good thing about this challenge is if one team gets ahead of the others, you can just make the course more challenging for them and let them problem solve the rest of it themselves.
Edward E. Whitacre Jr. College of Engineering
-
Address
100 Engineering Center Box 43103 Lubbock, Texas 79409-3103 -
Phone
806.742.3451 -
Email
webmaster.coe@ttu.edu