
December 2019 Story- Where does my waste go?
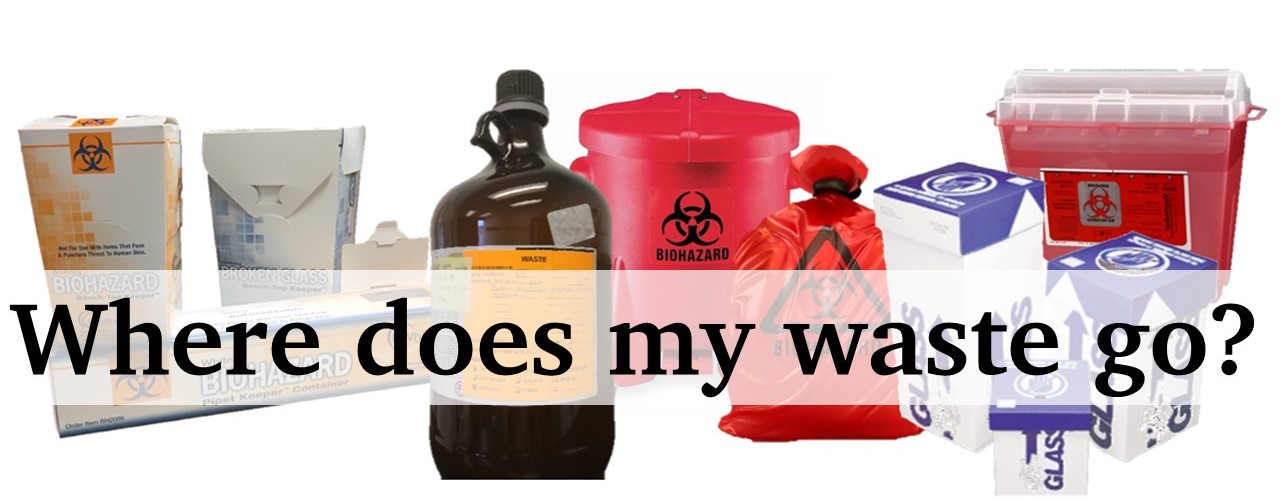
Proper segregation of laboratory waste protects not only you, your lab mates and custodial and maintenance staff but the Lubbock and surrounding area and community as well. Understanding how and why to properly dispose of waste makes your work areas safer.
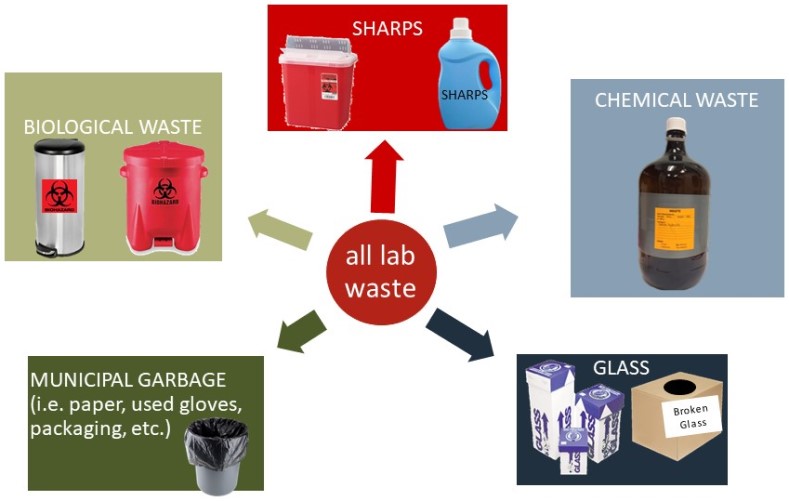
Why Segregate?
Waste streams are segregated in work areas, including lab areas and occupational shops, to protect personnel and the environment. Treatment and/or disposal methods vary with waste type. Not all lab waste can be tossed into one container with you crossing your fingers that nothing bad happens.
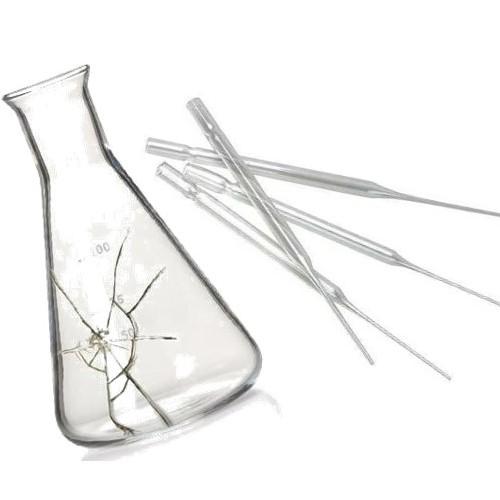
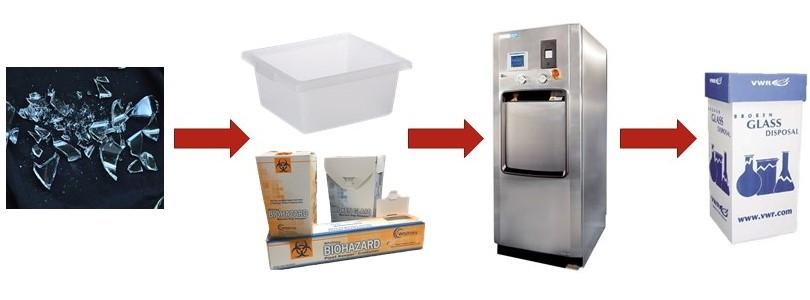
Glass Waste
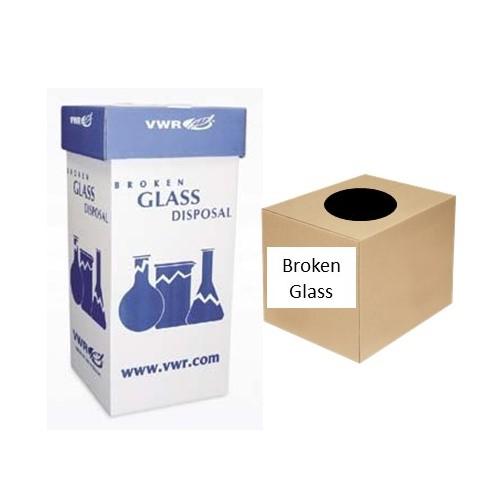
Glass waste, whether it is broken or intact, must be cleaned before disposal into an appropriate glass waste container. Glass waste containers are typically the labeled broken glass boxes available from laboratory vendors but a sturdy, labeled cardboard box with a plastic liner and sealable lid is also appropriate.
Do not dispose of anything except glass in a glass waste container. Do not overfill containers. You must be able to pop up the center cardboard to seal the box tightly. When boxes are full, they are sealed, taped closed and disposed of in a municipal dumpster by work area personnel.

Tips
- Broken glass must be handled with care. Do not handle broken glass directly with your hands; always use tools like a broom and dustpan or forceps to handle broken glass.
- Chemically-contaminated broken glass may be safer to dispose of solid chemical waste rather than attempting to clean broken glass pieces.
- Biologically-contaminated broken glass can be placed in an autoclave tub or other autoclavable container (e.g., keeper boxes), autoclaved and then disposed of in a glass waste box.
- Remove stuck on residues with an appropriate solvent (e.g., acetone, ethanol, water, etc.). Collect the solvent as chemical waste, drain, let dry and dispose of glass in a glass waste box.
- Soak intact glassware in a bleach solution for biological disinfection, drain, let dry and dispose of in a glass waste box.
- Empty glass chemical containers can be discarded in the municipal trash without the lid. Only P-listed chemical containers need to be collected by EHS as waste.
Glass Waste Resources
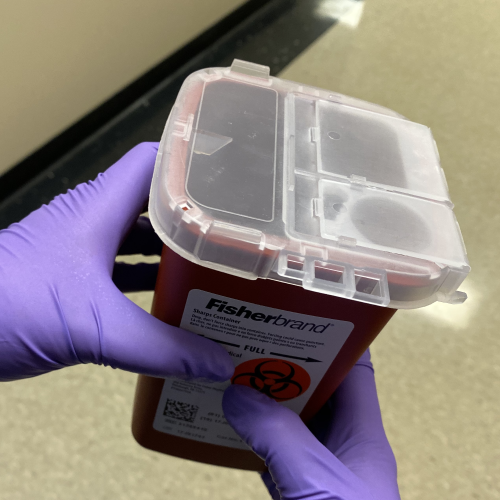
Sharps Waste
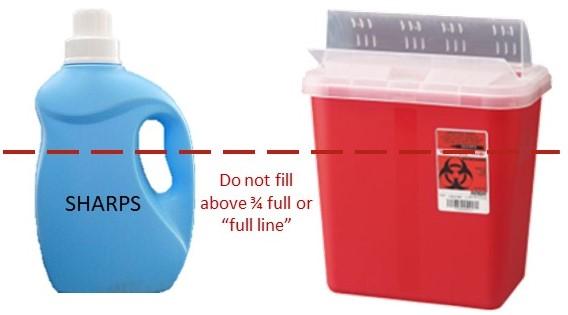
Sharps are any metal object / device used to puncture or cut. Examples include any type of injection device and whatever is attached to it, razors, X-Acto knives, pointed scissors, scalpels, etc. Sharps must be disposed of in an appropriate sharps' container. Chemical and BSL1 work areas may use and leak-proof, puncture-resistant plastic container (e.g., a rinsed laundry detergent container) labeled as "Sharps".
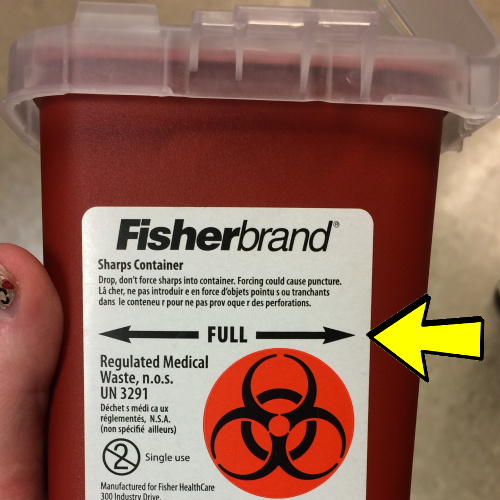
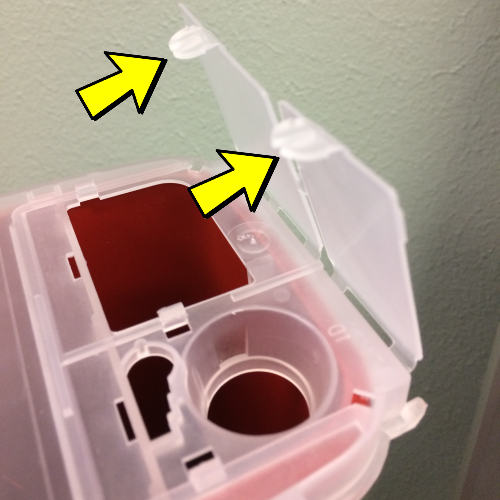
Dispose of sharps immediately after use. Locate sharps containers in the immediate work area to prevent traveling across the work area for disposal. Do not overfill containers. Most marked containers have a "Full" line. Submit a Biological Waste Request for EHS pick up. Containers must be completely secured prior to pick up.
Tips
- Never recap a needle to prevent accidental sticks.
- Use disposable sharps to avoid cleaning sharps or replacing blades.
- Needle caps and blunted needles are not sharps waste and can be thrown in the regular trash can to save space in your sharps' container.
- Pipet tips used for chemical transfers are not biological waste nor sharps waste; they can be collected and thrown in the regular trash.
Sharps Waste Resources
Biological Waste Pick Up Request
Chemical Waste
Chemical waste must be disposed of through EHS but work area personnel have many responsibilities to manage waste safely to prevent accidents.
Every work area is required to complete a Waste Determination for each work area procedure that produces a waste, meaning a single lab can have several Waste Determinations.
A Waste Determination identifies the components and hazard characteristics (i.e., corrosive, toxic, flammable or reactive) of a given waste stream and determines the appropriate number of containers to use for waste collection. EHS has created a standardized form and instruction page to help personnel with the Determination process.
Satellite Accumulation Areas, or SAAs, is any area at or near any point of generation where hazardous waste initially accumulates and that is under the control of the operator of the process generating the waste. Certain guidelines for SAAs must be followed.
- No more than 40 gallons of hazardous waste and/or one quart of
 acutely hazardous (e.g., sodium azide) may be accumulated at any one time (CHP A19.4.4).
 - Locate your SAA near the point of waste generation.
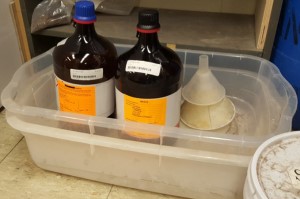
- If your SAA is located on the floor, place your containers in secondary containment to collect spills. The only exception to this is large drums.
- SAA rules are overseen by the Environmental Protection Agency and the Texas Commission on Environmental Quality. These agencies do inspect work areas on campus at least annually and have cited violations to the regulations.
- If repurposing a manufacturer chemical container for waste
 collection, triple-rinse the container with an appropriate solvent collecting each
rinse as waste prior to repurposing and completely cover the original label with duct tape, paper or spray.
collection, triple-rinse the container with an appropriate solvent collecting each
rinse as waste prior to repurposing and completely cover the original label with duct tape, paper or spray.
- Remove the yellow EHS barcode and affix it to a Barcode Return Form to keep your inventory current.
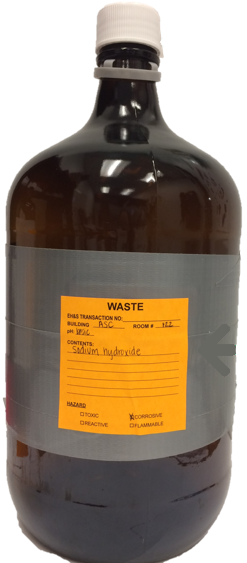
- Affix an orange Waste label upon first addition of waste to the container. Write the full name of every chemical added to the container; abbreviations are not acceptable. For example, write "sodium hydroxide", not NaOH.
- Waste containers must be kept in good condition (i.e., not leaking) and free of spills.
- If you notice a leaking container, immediately transfer to contents to a viable, non-leaking container.
- Containers must be compatible with the contents.
- Do not use metal containers to collect corrosive wastes. This is very dangerous.
- Do not use food or drink containers to collect waste.
- Use venting caps for wastes prone to gas production. Caps are available for FREE from EHS or the Chemistry Department Stockroom.
- Do not fill containers past 3/4 full or use for longer than 90 days.
- Do not put chemicals into biological waste receptacles.
- Pipet tips used for chemical transfers are not biological waste nor sharps waste; they can be collected and thrown in the regular trash.
- Certain chemical waste types cannot be mixed to ensure safety to work area and EHS
personnel. Do not mix the following waste types:
- Acid and base wastes;
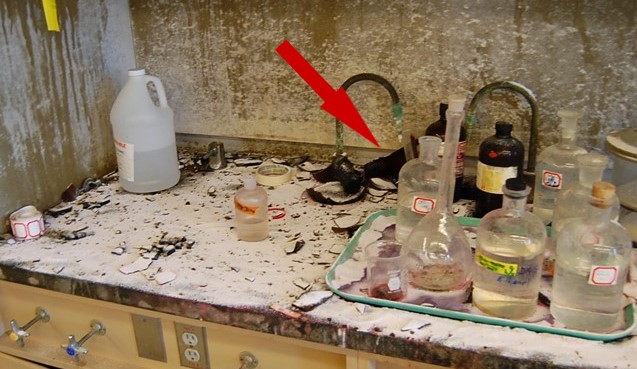
- Inorganic and organic (especially nitric acid with any organic material - nitric acid
is an oxidizing acid and reacts with organic materials to produce gas).
- Several incidents at Texas Tech involved the mixing of nitric acid with organic solvents resulting in student injuries.
- Halogenated and non-halogenated wastes.
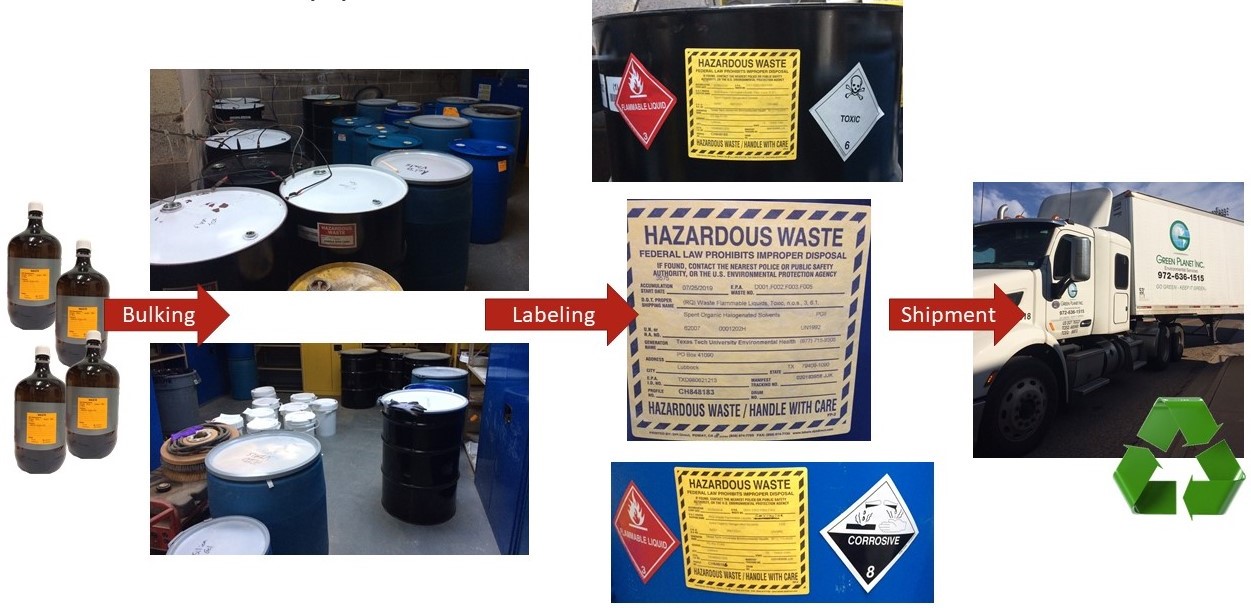
What Happens After EHS Takes My Waste?
Following the above guidelines not only protects the work area personnel but EHS personnel and the university's waste contractor as well. All containers collected on campus are bulked with like wastes for proper placarding and shipment. This is why it is so important that wastes are labeled properly and incompatibilities are not mixed. There are incidents of containers compromising during transport to the EHS Container Storage Area and to the third-party waste processing sites due to incompatible wastes being mixed.
If you do ever catch a mistake that was made in waste accumulation, contact EHS immediately to remedy the situation.
Chemical Waste Resources
Waste Determination Instructions
Chemical Waste Poster - 11" x 17"
Chemical Waste Pick Up Request
Biological Waste
Biological waste treatment and disposal depends on the state of the materials (liquids or solids). First, what is classified as biological waste? Biological waste includes:
- animal waste (carcasses, body parts/fluids and bedding of animals intentionally exposed to potential pathogens)
- animal cell cultures
- human and non-human primate blood/body parts/cultures
- microbiological waste (cultures, stocks, specimens, transfer devices, etc.)
- pathological waste
- sharps as these terms are defined in 25 TAC §1.132
- any enriched sample/specimen
- samples/specimens that are reasonably considered containing, have been purposefully exposed to, or tested positive for a pathogen
No matter what materials are being treated, each treatment must be logged, and the records maintained for three years. Treatment logs with all required information are listed in the Biological Waste Resources' section at the end of this article.
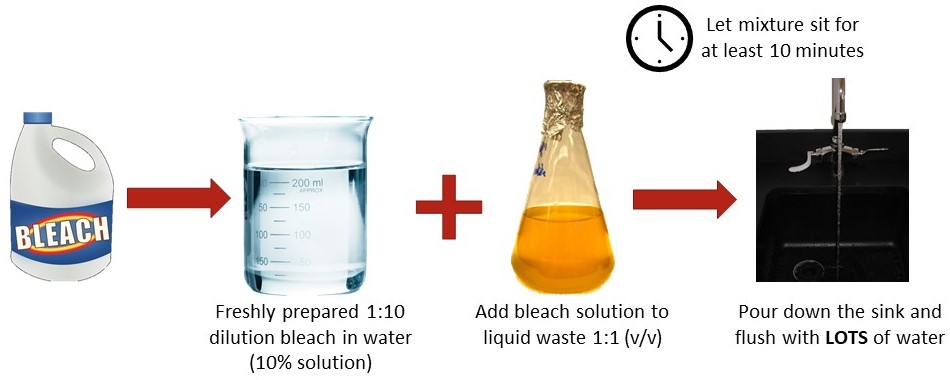
Treating Liquids
Liquid biological waste includes cell cultures, contaminated medias or supernatants from spinning down cell cultures. Follow this process to treat liquid biowaste.
- Prepare a fresh 10% percent bleach solution. Note that Clorox bleach is the only EPA approved bleach.
- Add the bleach solution in equal volume to your liquid biowaste. For example, if you have one liter (1L) of culture, add one liter (1L) of 10% bleach.
- Allow the mixture to sit for at least 10 minutes to allow adequate disinfection.
- Pour the waste-bleach mixture down the sink and flush with copious amount of water.
- Log the treatment on your Treatment Log.
Autoclaving Solids
Waste Containers
- Waste is to be collected in leak-proof containers. Bags with the
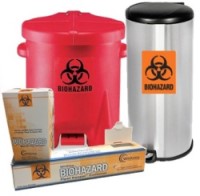 universal biohazard symbol must be used to collect solid waste. If you steam-sterilize
your waste, make sure your bags are autoclavable.
universal biohazard symbol must be used to collect solid waste. If you steam-sterilize
your waste, make sure your bags are autoclavable. - Other than benchtop collection, biohazard bags must be contained in a solid, leak-proof container with a lid capable of decontamination. The container must be marked with the biohazard symbol.
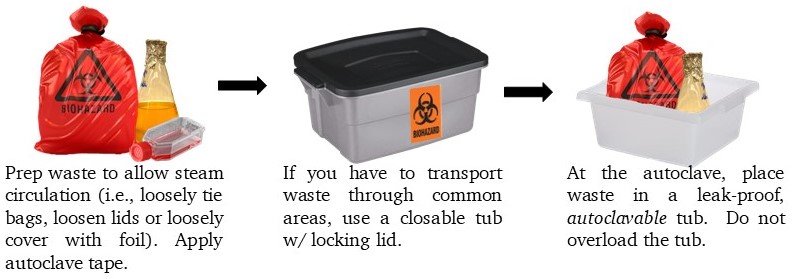
Preparing for the Autoclave
- Prepare waste to allow steam circulation (i.e., loosely tie bags, loosen lids or loosely cover with foil). Apply autoclave tape.
- If you have to transport waste through common areas, use a closable tub w/ locking lid; take the autoclave tub(s) with you.
- At the autoclave, place waste in a leak-proof, autoclavable tub. Do not overload the tub.
Autoclaving and Final Disposal
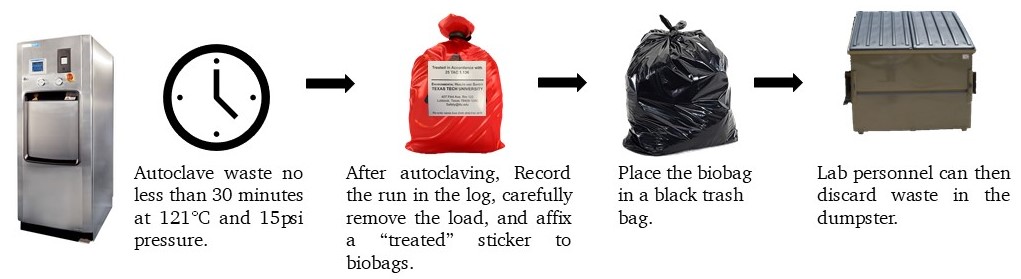
- Autoclave waste no less than 30 minutes at 121 °C and 15psi pressure.
- After autoclaving, Record the run in the log, carefully remove the load, and affix a "treated" sticker to Bio-Bags.
- Place the Bio-Bag in a black trash bag.
- Lab personnel can then discard waste in the dumpster.
- Log the treatment on your Treatment Log.
Chemically Disinfecting Solids
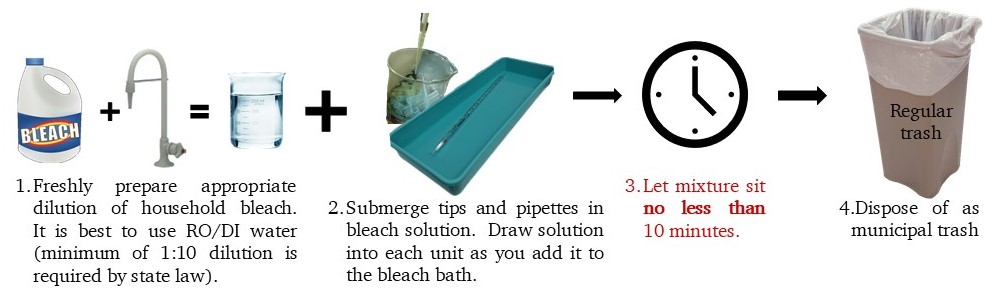
Some solid biowaste can be chemically disinfected using a 10% bleach (or other appropriate disinfectant) upon creation of the waste. An example of this is contaminated serological pipets generated inside a Biosafety Cabinet during research. Follow the steps below.
- Prepare a fresh 10% percent bleach solution. Note that Clorox bleach is the only EPA approved bleach.
- Submerge tips and pipettes in the bleach solution. Draw the solution into each unit as you add it to the bleach bath to ensure contact with all surfaces.
- Let the mixture sit for at least minutes.
- Drain the disinfectant from each unit and dispose of the regular trash.
- Log the treatment on your Treatment Log.
EHS Bio-Barrels
Some work areas use Bio-Barrel provided by EHS to collect solid biological waste. Bio-Barrels are only provided to work areas who do not have access to a functioning autoclave for solid waste treatment. Certain rules must be followed when using Bio-Barrels.
- Do not place liquids in Bio-Barrels. Liquid biowaste should be treated by work area personnel.
- Do not overfill the barrels. Only fill up to 3/4 full or exceed 50 pounds per barrel.
- Do not place loose materials in the barrel. Biowaste should be accumulated in smaller Bio-Bags, tied off and then collected in the Bio-Barrel. See the image below for an example.
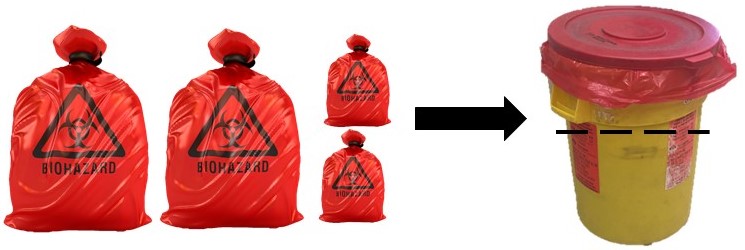
- Bio-Barrel liners must be secured tied by work area personnel and the lid snapped securely in place prior to EHS pick up. EHS will not collect improperly prepared barrels.
Biological Waste Resources
Chemical Disinfection of Biological Waste
Chemical Disinfection Log - Liquids
Chemical Disinfection Log - Solids
Chemically Disinfecting Biowaste Poster - 11" x 17"
Autoclaving Biological Waste SOP
Autoclaving Biowaste Poster - 11" x 17"
EHS Bio-Barrel Preparation Poster - 11" x 17"
Conclusions
Waste accumulation can be one of the most hazardous operations on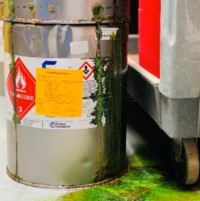 campus, but with mindful management, effective and clear communication between coworkers
(including between waste generators inside the work area and between generators and
EHS personnel), and adherence to the guidelines set forth by EHS, it can be handled
efficiently and safely for all.
campus, but with mindful management, effective and clear communication between coworkers
(including between waste generators inside the work area and between generators and
EHS personnel), and adherence to the guidelines set forth by EHS, it can be handled
efficiently and safely for all.
What About "Mixed Waste"?
If your research work generate "mixed waste", which is any combination of chemical, biological or radioactive material waste, contact EHS prior to waste generation to identify proper handling.
Submit any questions regarding waste management to ehs.lab.safety@ttu.edu.
Environmental Health & Safety
-
Address
Texas Tech University, 407 Flint Ave, Lubbock, TX 79409 (Mail Stop 1090) -
Phone
806.742.3876 -
Email
safety@ttu.edu